Pages

Wednesday, July 18, 2018

Vintage Travel


The new challenge starts today at Frilly and Funkie and it is called Planes, Trains and Automobiles.  The lovely Kathy is our hostess and she describes it this way:

Summer is a great time to travel. For this challenge, create a vintage or shabby chic travel themed project. Think folded maps, cruise ships, road signs, compasses, passports, trains, planes or automobiles. As long as your project features a travel theme, you're headed in the right direction.

I have been admiring the tall and skinny cards that my team mate Jenny has been making lately and thought I would give one a try. She makes them look so easy but I took a while to come up with a design that I liked and that was flat enough to mail without having to rob a bank to pay for the postage.

I started with some cream card stock (Staples) for the blank and then added a panel of rusty red card stock (Bazzill), which was distressed and inked on the edges with Vintage Photo Distress Ink (Tim Holtz).  Pretty well everything on the card was distressed and inked in the same manner.


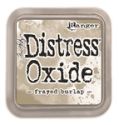
Next I took another piece of cream card stock and inked it all over with Aged Mahogany, Frayed Burlap and Vintage Photo Distress Oxide (Tim Holtz).  This time I spread them on using a very wet paint brush adding a colour at a time in random areas and then drying with a heat tool (Tim Holtz) before I added the next colour.


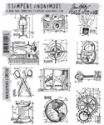
Once the panel was dry I added some stamping using Vintage Photo Distress Ink (Tim Holtz) and one of the Travel Mini Blueprint Stamps (Tim Holtz).


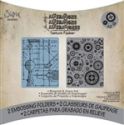
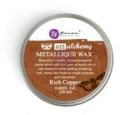
A panel of rust card stock (Recollections) came next.  It was embossed using a Gears embossing folder (Tim Holtz) and then the highlights were rubbed with Rich Copper Metallique Wax (Prima).

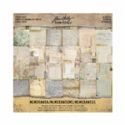
I cut a chevron from Memoranda paper (Tim Holtz) and added that next followed by a half circle of some map paper from the same paper pad.

Some venise lace was dyed with Vintage Photo Distress Ink and added to a smaller chevron cut from the Memoranda paper before the chevron was added to the card.

I used Versamark Embossing Ink and a pocket watch stamp (IndigoBlu) to stamp onto some acetate and then it was embossed with Copper Embossing Powder (Ranger).  I fussy cut the watch and added it next.

The lovely lady is from the Paper Dolls (Tim Holtz) and has been inked with Vintage Photo DI as were the clip art suitcase and the Small Talk Sticker (Tim Holtz).  A bit of Black Soot DI was added to the suitcase straps using a water brush (Tim Holtz)


Finally I altered an arrow (Tim Holtz) by coating it with a blend of Terra Cotta and Copper Mixative Alcohol Ink (Tim Holtz).

These products for my vintage card came from The Funkie Junkie Boutique:

Saturday, July 14, 2018

Saturday Showcase at Frilly and Funkie

It is my turn to present the Saturday Showcase at Frilly and Funkie today and here is a peek at what I made using Tim Holtz Memoranda paper. 


To get all the details on this project, just pop on over to Frilly and Funkie.

Thursday, July 5, 2018

Ombre Canvas


It is time for the next monthly challenge at Stamps and Stencils.  Ruth is the hostess for this one and is calling it Ombre!  She describes it this way:

Ombre has been in fashion for a while now and not just in art. It's a french word meaning 'a colour that is shaded or graduated in tone'...so for this challenge we want to see projects incorporating one colour (or more if feeling adventurous!) that graduates from it's lightest pastel tint to its darkest shade...with a little stamping or stenciling of course!

I was preparing to go on a little vacation to visit a crafty friend in Virginia so I created something very simple before I left. Check out how I made this very purple canvas. I hope you can see the different tones of the paint I used. Oh and by the way, the spots that look like I missed are really a touch of silver that I added to try to define the embellishments - not sure it really worked the way I intended it though.

  • Coat a deep edge 6" x 6" canvas with White Gesso (Liquitex).


  • Add stenciling with Molding Paste (Golden) through a geometric stencil (Teresa Collins).


  • Adhere some lace (Fancy Gap) across the stencil.


  • Die cut some flourishes (Spellbinders) from card stock (Recollections) and add.
  • Die cut leaves (Tim Holtz) from card stock (Recollections) and add.
  • Add a variety of paper flowers (Wild Orchid Crafts, Dollar Store and Excelsior Warehouse)
  • Add pearls to centres without stamens.
  • Working on an angle from the centre out sponge on Wild Orchid Acrylic Paint (DecoArt) starting with it full strength and adding White Acrylic Paint (Ceramcoat) to future batches to make it lighter and lighter.
  • Add some Treasure Pewter Wax Paste (Connoisseur Studio) as highlights.

I hope you will join us and create an ombre project with stamping and/or stenciling. The challenge is open until 20:00 pm UK time on August 1st.

Wednesday, July 4, 2018

Butterflies and Sunflower


It is time for the new challenge at Frilly and Funkie.  This time I am the hostess and I am calling it "B" Happy.  Here is how I describe the challenge:

Create a shabby chic or vintage project that makes you happy and features birds, bees and/or butterflies. You must use at least one of these things with wings and it must have a place of prominence on your creation but if you wish to use two or more, please feel free to do that.

If I have to choose between bugs and butterflies, the butterflies are going to win every time although I am not really afraid of bugs - they just aren't as pretty to look at.

I made a shabby card with a little mixed media on it for my offering and here is how I did it:


  • Cover a piece of card stock with Botanical Collage Paper to create a background panel (Tim Holtz).
  • Dry brush thin coat of White Gesso (Prima) over the panel.
  • Use White Embossing Paste (Ranger) through Flourishes Stencil (Tim Holtz) to add texture to the panel.
  • Randomly ink panel with Tea Rose and Orange Blossom Archival Ink (Wendy Vecchi).
  • Distress edges of panel and rub edges with Rose Gold Wax Paste (Prima).
  • Die cut a Crochet Doily (Prima) and rub edges with Rose Gold Wax Paste.
  • Cut a tag from St. Tropez paper (Prima), distress edges and ink with Vintage Photo Distress Ink (Tim Holtz).
  • Add Burlap string to top of tag.
  • Die cut petals from crinoline using Pinwheel Posies die (Tammy Tutterow).
  • Dye petals using Wild Honey Distress Ink (Tim Holtz).
  • Layer petals and add a carved coconut shell button (upside down) to the centre.
  • Die cut leaves from Garden Green die (Tim Holtz), shape and then ink with Peeled Paint Distress Ink (Tim Holtz).
  • Punch small butterflies, coat with Rose Gold Wax Paste and add brown pearls (Kaisercraft) for body.
  • Coat large butterfly (cut by my husband on his laser machine) with Clear Crackle Paste (Prima).
  • Cover with Rose Gold Wax Paste and add brown pearls for body.
To assemble:
  • Add background panel to card blank (Bazzill card stock) and adhere crochet doily on top with a strip of venise lace.
  • Adhere tag using foam dimensionals and then add the leaves and sunflower.
  • Add the butterflies and some copper sequins.
The following products used to make this card came from The Funkie Junkie Boutique - check them and other great buys out by clicking on the thumbnails.