Pages
▼
Wednesday, January 30, 2019
Winter Blues
It is time for a new challenge at Frilly and Funkie. Kathy is our hostess this time and she is calling it Winter Blues. Here is what she has to say about it:
January is the longest winter month and lots of us get the "winter blues". Let's take the winter blues in a positive direction and create a mostly monochromatic vintage or shabby chic project done up in shades of blue. You may use a bit of white, beige or grey for contrast, but I would like the blues to be front and center in this project.
I have been known to overthink my creations but this one came to mind very quickly and for a change looks the same in real life as it did in my head. I made this card just 5" square and here is how to put it together:
1. Cut and distress a piece of blue patterned paper 4 3/4" square, distress the edges and adhere to the card blank. Note: I used some paper leftover from the Precious Memories pad (Graphic 45) but any blue paper that suits your fancy will do - there are lots of options available in the paper section at The Funkie Junkie Boutique.
2. Use Soft Matte Gel Medium (Finnabair for Prima Marketing) and glue a piece of Botanical Collage Paper (Tim Holtz) to a piece of white card stock 4 1/2" square.
3. Dry brush White Gesso (Dina Wakley) over the collage paper.
4. Use Crackled Texture Paste (Wendy Vecchi) and the Crossed stencil (Tim Holtz) to add random areas of texture around the outside of the collage paper panel.
5. Once the panel is dry, distress the edges and adhere to the card on top of the patterned paper.
6. Using the Shabby Posies die (Tammy Tutterow), cut a variety of petals (I cut 3 of the largest and 3 of the next size down) from crinoline. Note: The Tattered Florals die (Tim Holtz) would be a nice alternative.
7. Dye the petals with Tumbled Glass Distress Oxide (Tim Holtz) and allow to dry in an egg carton so the petals have some shape before layering to form a flower.
8. Use the Tumbled Glass DO to dye some seam binding and once it is dry create a loopy bow.
9. Use Glossy Accents (Ranger) to glue a number of large white seed beads to an old button and then spray with Tumbled Glass Distress Spray Stain (Tim Holtz) before adding to the centre of the flower.
10. Use a mixture of Snow Cap Mixative, Aqua and Sail Boat Blue Alcohol Ink to alter a bronze filigree medallion. Note: I cut the medallion in half and kept the other half for a future project.
11. Pat any remaining ink onto a piece of Gloss paper (Ranger) and die cut a flourish from it.
12. Use a scrap of turquoise card stock to die cut the branch from the Skeleton Leaves die (Tim Holtz) and then cut the leaves off the branch.
13. Use white card stock and die cut a small branch of leaves from the Garden Green die set (Tim Holtz), shape the leaves and ink the edges with some Tumbled Glass Distress Ink (Tim Holtz).
14. Cut a small piece of venise lace and ink the edges with Tumbled Glass DI.
15. Layer all the embellishments tucking everything in various spots under the large flower.
16. Ink the edges of a little sentiment from the Small Talk sticker collection (Tim Holtz) with Tumbled Glass DI and add it to finish off the card.
With winter in full force in the northern hemisphere, I bet you have the winter blues too so why not banish them by going into your craft space and creating a project for this challenge. The challenge is open until 11:55 pm EST on February 12th and you have a chance to win a gift certificate to go shopping at The Funkie Junkie Boutique or you could be one of our top picks with the overall top pick receiving an invitation to join us at a future date as a Guest Designer.
The following products used to create this card came from The Funkie Junkie Boutique:
Tim Holtz Idea-ology Collage Paper Botanical
Dina Wakley Media Mediums - White Gesso MDM41689
Studio 490 Wendy Vecchi Texture Paste - Crackled WVPASTECRA
Stampers Anonymous Tim Holtz Layering Stencils - Crossed
Sizzix Alterations Tim Holtz Tattered Florals Bigz Die- 656640
Sizzix Thinlits Die Set 5pk - Skeleton Leaves by Tim Holtz 66309
Sizzix Thinlits Die Set 9PK - Garden Greens by Tim Holtz 661206
Cotton Crinoline
Ranger Tim Holtz Distress Ink Pad - Tumbled Glass TIM27188
Tim Holtz Ranger Distress Stain Spray - Tumbled Glass TSS42570
Ranger Tim Holtz Distress Oxide Pad - Tumbled Glass
4 Piece Antiqued Bronze Filigree Pieces - Set of 4
Ranger Adirondack Alcohol Ink - Snow Cap Mixative AL31611
Ranger Adirondack Alcohol Ink - Sail Boat Blue TAB25535
Ranger Tim Holtz Alcohol Ink - Aqua
Ranger Inkssentials Gloss Paper 8.5 X 11 PAP12887
Prima Art Basics - Soft Matte Gel (8.5 fl. oz.) Transparent
Ranger Inkssentials Glossy Accents GAC17042
Tim Holtz Idea-ology Small Talk Stickers TH93193
Ranger Inkssentials Alcohol Ink Applicator With 10 Blending Felts TIM20745
Ranger Inkssentials Mini Ink Blending Tool - With 4 Blending Foams IBT40965
Scor-Pal Scor-Tape 1/8" x 27 Yards
Scor-Pal Scor-Tape 1/4" x 27 Yards
Scor-Pal Scor-Tape 3/8" x 27 Yards
Tim Holtz Tonic Studios Paper Distresser 370E
Tim Holtz 5 Inch/ 12.3CM Titanium Snip 816E
Wednesday, January 16, 2019
Key to My Heart
It is the beginning of a new challenge at Frilly and Funkie. Our hostess for this one is Maggi and she calls it Vintage Valentines. Here is how she describes the challenge:
It's sweetheart time and what could be more fun than creating Valentine's for our loved ones? For this challenge I want to see vintage valentines in vintage colors like pinks, blues, purples. No bright red please. Show me your vintage side with vintage colors and images. If you need some inspiration, click here to link to a great vintage color palette.
I have created a romantic card with lots of flowers and some gorgeous papers. It was simple to put together so there are no process photos this time but I will walk you through it. At the end I will provide links to the supplies I used from The Funkie Junkie Boutique or suggested alternatives in cases where I am using older supplies.
1. Distress the edges of two pieces of Love Story patterned paper (Prima), one that is 1/4" smaller than the card blank and another that is 1/4" smaller than the first piece and adhere them to the blank.
2. Add a strip of venise lace across the patterned paper.
3. Cut the sentiment ephemera from the paper pad and distress it and a romantic image before adding to the card. I found the image online but have had it in my files for so long that I can't remember the source.
4. Hand cut a heart from heavy card stock and run it through an embossing folder.
5. Coat the heart with Versamark, sprinkle with Rose Gold Embossing Powder (Emerald Creek) and heat to melt the powder. Repeat the process one more time.
6. Use your fingers to rub some Rose Gold Metallique Wax (Finnabair for Prima) on the raised areas and then glue the heart to the card.
7. Use the Skeleton Leaves die (Tim Holtz) to cut the leaf branch from white card stock and then cut the leaves from the stem so you have individual leaves.
8. Add the leaves and a variety of paper flowers to create a bouquet on the card.
9. Make a loopy bow from pink ribbon (May Arts), add a little bow of white twine and a key charm to it and adhere it to the card.
10. Punch a butterfly from pink card stock and add some tiny adhesive pearls (Kaisercraft) to the body before adding to the card.
I think this very romantic and very shabby card is so pretty but I need to make something a little less frilly for my husband so I better get at it because Valentine's Day will be here before you know it. This challenge is the perfect opportunity for you to get your Valentine's cards done so I hope you will create and share the creations with us.
The challenge is open until 11:55 pm EST on Tuesday, January 29th and you have the chance to be the random winner of a gift certificate to The Funkie Junkie Boutique or to be Guest Designer at a future date.
Following are links to supplies used or suggested that can be obtained from The Funkie Junkie Boutique:
Prima Marketing 8x8 Paper Pad - Love Story
Prima Art Alchemy by Finnabair - Metallique Wax- Rose Gold
Emerald Creek Alure Powders - Rose Gold
Sizzix Thinlits Die Set 5pk - Skeleton Leaves by Tim Holtz 663094
Set of 10 Metal Keys for Scrapbooking and Mixed Media
KAISERCRAFT Pearls - Self Adhesive - Pearl
VersaMark Watermark Ink Stamp Pad
Scor-Pal Scor-Tape 1/4" x 27 Yards
Scor-Pal Scor-Tape 1/8" x 27 Yards
Scor-Pal Scor-Tape 3/8" x 27 Yards
Tim Holtz Tonic Studios Paper Distresser 370E
Tim Holtz 5 Inch/ 12.3cm Titanium Snip 816E
Venise Lace Trim - 2 inches - I have this lace too and grabbed one that isn't in stock anymore but this one would be so pretty - now I wish I had used it instead.
Ivory/White Jute Twine - I was out of this great jute twine when I made the card.
May Arts 5/8 Inch Crochet Ribbon - Light Pink - I used a plain ribbon but since it is no longer in stock, I am linking to the lovely crochet ribbon but since it is a bit wider, you might want to just make a couple loops.
Prima Marketing Moon Child Flowers - Crescent Moon and/or
Prima Marketing Moon Child Flowers - Absolute Aurora and/or
Prima Marketing Moon Child Flowers - First Eclipse - These Moon Child flowers would be a nice alternative to the flowers I used from my stash.
Wednesday, January 2, 2019
Watercolour with Distress Ink
Welcome to 2019 and the first challenge of the year at Frilly and Funkie. I am the hostess for this one and am calling it Inspired By. Here is how I describe it:
I don't have access to quality craft classes locally so I spend time online to learn new things. For this challenge I want you to create a vintage or shabby chic project inspired by or using a technique or tutorial that you have found online. You must provide a link to the site that is inspiring your creation and please do not make a direct copy of anything you found.
I usually colour images with pencil crayons but wanted to do something different this time. I have been watching a number of technique tutorials and decided to try water colouring on the stamp with distress inks. I used a YouTube tutorial that I found HERE as my inspiration and this is my first attempt so be gentle.
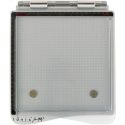
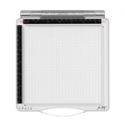
1. Put the stamp of your choice on a stamp platform along with a piece of water colour card stock and leave both in place during the initial colouring. I have the platform that Linda used to sell but will link to the Tim Holtz platform she is carrying now. I also used a Wendy Vecchi flower stamp that I had and will link others that are in the shop and should work for this technique.
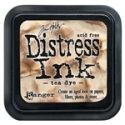
2. Use a variety of Distress ink pads (Wild Honey, Tea Dye, Worn Lipstick, Shabby Shutters, Peeled Paint) to colour the stamp starting with the stem and leaves of the flower, stamp and then clean the stamp before you move on to the next colour. The mini stamp pads would be easier to use but I don't have them so I used some make-up sponges to add the colour. In the above photo I accidentally got some of the flower colour on the top of the leaf so I tried a second time but didn't take a photo.
3. Once you are happy with the colour on the card stock, remove the card stock from the stamp platform and finish water colouring.
4. Use a water brush to move some of the colour on your stamped image.
5. Pat more colour onto an acrylic block and use the water brush to enhance some of the colour or to add shading or highlights.
To assemble the card:
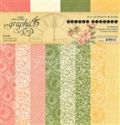
1. Cut different panels of patterned paper from Graphic 45's Garden Goddess and Gilded Lily paper pads. I love that I can use different collections and find the same colours - great to mix and match and avoid wasting the little off cuts/scraps.
2. Distress the edges of each panel and ink with Vintage Photo Distress Ink.
3. Add a strip of venise lace to the edge of one panel.
4. Punch one edge of the smallest panel or cut with decorative scissors.
5. Layer all the panels and the stamped image panel.
6. Dye some seam binding with Peeled Paint DI and form into a loopy bow.
7. Make some paper beads with scraps of the Graphic 45 paper, coat with Vintage Collage Medium and when dry fashion into stick pins with pearls. I followed a tutorial that I found HERE to make the paper beads and need more practice with this too.
8. Make a sentiment on the computer, punch or cut it into a tiny tag, add a brad and adhere to the bow.
9. Punch a tiny butterfly out of a scrap of copper card stock and add to the image panel.


