Pages

Saturday, December 14, 2019

Saturday Showcase at The Funkie Junkie Boutique Blog


Today we have a new Saturday Showcase at The Funkie Junkie Boutique Blog.  This time all the designers are sharing the post and we have all made tags so you are going to be treated to a lot of fabulous inspiration all at once.

For my offering I created this snowflake tag featuring a couple of the Tim Holtz snowflake dies and here is how I went about it:
  • Glue music paper to both sides of a #8 Etcetera tag (Tim Holtz) and then coat the paper with some watered-down White Gesso (Dina Wakley)
  • Dip a wad of paper toweling into some Texture Paste (Ranger), pounce a bit off and then pounce over the gesso to create subtle texture
  • Use a ratty old paint brush to paint both sides with some watered-down Lapis and Mineral Acrylic Paint (Dina Wakley) and then ink over random areas with Chipped Sapphire Distress Oxide (Tim Holtz)
  • Use Silver Embossing Paste (Wendy Vecchi) through a Falling Stars Layering Stencil (Tim Holtz) to add more texture
  • Die cut a large snowflake from the Flurry #3 die (Tim Holtz) and six smaller snowflakes from the Paper Snowflakes, Mini die set (Tim Holtz)
  • Coat the five smallest snowflakes with clear glitter
  • Dye some seam binding with Chipped Sapphire Distress Ink (Tim Holtz) and add with silver thread and grey wool to the top of the tag
  • Adhere all the snowflakes to the tag along with a button for the layered one and then finish with a computer generated sentiment and a Christmas paper doll (Tim Holtz)
Supplies:

Tim Holtz Etcetera - #8 Tag Thickboards THETC-005
Dina Wakley Media Mediums - White Gesso MDM41689
Dina Wakley Media Acrylic Paints
Ranger Tim Holtz Distress Oxide Pad - Chipped Sapphire
Ranger Tim Holtz Distress Ink Pad - Chipped Sapphire TIM27119
Stampers Anonymous Tim Holtz Layering Stencil - Falling Stars THS115
Studio 490 Wendy Vecchi Embossing Paste - Silver WVPASTESIL
Ranger Texture Paste Opaque Matte INK44444
Tim Holtz Sizzix Thinlits Die Sets - Flurry #3 (appears to be sold out now but you can substitute any other large snowflake die)
Sizzix Thinlits Die Set 14PK - Paper Snowflakes, Mini by Tim Holtz
Tim Holtz Idea-ology 8 x 8 Metallic Jewels Kraft Stock
Tim Holtz Idea-ology Paper Dolls, Christmas TH94001

This Saturday Showcase is the final project for 2019 for The Funkie Junkie Boutique but I will be back on January 8th with a new project for the first challenge of the year.

I would like to wish all of you a very Merry Christmas and a Happy New Year.  Have a lovely time over the holidays and stay safe.

Wednesday, December 4, 2019

Joy to the World


It is time for the last challenge of 2019 at The Funkie Junkie Boutique Blog.  Maggi is our hostess for this one and she has given it the title of It's the Holidays and describes it like this:

This is such a busy time of the year that it's hard to find anytime to pursue our paper passion! With that in mind, I designed a challenge that will hopefully give you some needed crafting time, while making something useful for the holiday season that is upon us! For this challenge, create a vintage or shabby chic card, tag, gift box, bag, anything holiday related, that you can use over the holidays.

I have the Graphic 45 paper pad called Joy to the World so I thought I would use it to make a card with a pocket inside to hold a gift card.  This is a little bit shabby so it won't be one that goes in the mail - that might require robbing a bank to pay for the postage.  I think my Daughter will be the recipient since she has numerous gift cards on her wish list for Christmas.  My Granddaughter has her beaten by a mile but this wouldn't be her taste even with the gift inside  I guess when you turn 13 and become a teenager, you don't trust Grandma to pick anything out for you, even with instructions, so that explains all the gift cards. 😃😃😃

This card was simply put together as follows:

  • Cut a panel of patterned paper for the background, ink the edges with Vintage Photo Distress Ink and add to a card blank
  • Cut chevrons from two more patterned paper, ink the edges, mount on kraft card stock chevrons and adhere to background
  • Cut angel element from patterned paper, ink the edges, mount on kraft card stock and add to card
  • Add sentiment sticker element from collection
  • Cut flower petals from cream, salmon and kraft card stock using the Shabby Posies die
  • Ink petal edges, layer to create flowers and glue copper seed beads to centres with Glossy Accents
  • Use Skeleton Leaves die to cut leaves from Rose Gold Metallic Kraft Stock
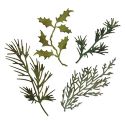
  • Use Holiday Greens die to cut greenery from green card stock and ink the edges
  • Add leaves, greenery and flowers to front of card
  • Cut another angel element from the patterned paper, add gussets to create a pocket and adhere to the inside of the card for a gift card holder

We would love to have you join us for this challenge.  It is a perfect opportunity for you to show off some of the cards and other festive things you are making for the holiday season.  The challenge runs through 11:55 pm EST on Tuesday, December 17th.  One randomly chosen winner will receive a gift certificate to go shopping at The Funkie Junkie Boutique and the Design Team will choose their top 4 picks with the overall winner receiving an opportunity to Guest Design with us at a future date.

Supplies List:

Graphic 45 Joy to the World 12x12 (sold out)
Staples Cream Card Stock
Martha Stewart Wild Salmon Card Stock
Spellbinders Shabby Posies Die by Tammy Tutterow (no longer available)
Copper Seed Beads
Sizzix Alternations Tim Holtz Thinlits Dies - Holiday Greens 658759
Ranger Tim Holtz Distress Ink Pad - Vintage Photo TIM19527
Sizzix Thinlits Die Set 5pk - Skeleton Leaves by Tim Holtz 663094
Tim Holtz Idea-ology 8 x 8 Metallic 2 Kraft Stock - Rose Gold & Copper TH93780
Ranger Inkssentials Mini Ink Blending Tool - With 4 Blending Foams IBT40965
Scor-Pal Scor Tapes
Ranger Inkssentials Glossy Accents GAC17042

Wednesday, November 20, 2019

Lots of Leaves


The new challenge begins today at The Funkie Junkie Boutique Blog.  Jenny, our hostess for this one calls it Lovely Leaves and here is what she has to say about it:

At this time of year leaves take over from flowers as the stars of Nature's display - the deciduous ones take on beautiful Autumnal hues before falling to the ground, whilst the evergreen ones keep our gardens from looking bare as we wait for new flowers to appear in the Spring. For this challenge make sure to add leaves (or even Pine Needles if you like) to your vintage or shabby chic projects.

As I mentioned in an earlier post, the colourful leaves here are long gone and what is left was buried under 10" of snow last week.  I decided though that leaves are a perfect image to use on note cards that can be used for all sorts of occasions so I made a little box and 4 cards to fit inside.  I think this will be a great gift for someone.

I started by making the cards so I had an idea what size the box needed to be.  I made 4 cards that are 4 1/4" x 5 1/2" from kraft card stock and each one is different.


The first one was simply made by cutting three leaves from the Tattered Leaves die (Tim Holtz) using papers found in the St. Nicholas and Voyage Beneath the Sea paper pads (Graphic 45).  The edges of the leaves were inked with Vintage Photo Distress Ink (Tim Holtz).

To finish the card I inked the edges of a strip of paper from the Amber Moon paper (Prima) and added it to the front of the card blank and then topped it with the leaves and a loopy twine bow.


For this card I used the Fall Foliage die (Tim Holtz) to cut a bunch of small leaves from gel printed papers in my stash and adhered them to the card blank on top of an oval cut from the Old Lace paper (Stamperia).  The oval and all the leaves were inked with Vintage Photo DI.


I started with the background for this card by dragging a piece of card stock through puddles of Frayed Burlap, Gathered Twigs and Walnut Stain Distress Ink as well as Frayed Burlap Distress Oxide (Tim Holtz).


To make the leaves I coated a piece of waxed paper with some watered down PVA glue and when it was dry I coloured it with a variety of alcohol inks - Sunshine Yellow, Cranberry, Sunset Orange, Poppyfield, Ginger and Willow (Tim Holtz).  Next I crumpled it up a bit, cut leaves from the Tattered Leaves die (Tim Holtz) and added them to the background panel.


The last card has more layers but again was simple to make.


I cut a square of Copper Metallic Kraft Stock (Tim Holtz), embossed it with a flourish embossing folder, rounded the corners and then proceeded to cover the metallic look with a mixture of Mushroom, Espresso, Rust and Snow Cap Mixative Alcohol Inks (Tim Holtz).


I used the Tattered Leaves die to cut the leaf from a scrap of mat board and then inked it with a blend of Wild Honey, Peeled Paint and Aged Mahogany DI (Tim Holtz).

To finish the card I layered a strip of paper from the Voyage Beneath the Sea pad, a strip of burlap and another strip of paper from the St. Nicholas pad.  I rounded the corners of another piece of paper from Voyage Beneath the Sea, added my embossed panel and finally added the leaf.


Before I made the box I stacked the cards to determine how much space I needed inside the box to accommodate the cards.  The box opens with the flap that you see with the leaves and the cards fit inside from the top.

The front, bottom and back of the box are one piece 5 3/4" wide and 10" long - scored on the long side at 4 1/2" and 5 1/2".

The flap, top and a small piece to attach at the back are another piece 5 3/4" wide and 4" long - scored on the short side at 2 1/2" and 3 1/2".  The remaining 1/2" strip was attached at the back on the outside before the patterned paper was added.  I cut the outer edges of this strip on a slight angle, which makes it almost invisible when it is covered.

The sides are two separate pieces 2" wide and 4 3/4" long - scored on the short side at 1/2" and 1 1/2" and score on the long side at 1/2".  This leaves a 1/2" piece on each side and one on the bottom to attach the side panels to the inside of the box.

A magnetic closure was added inside the flap to close it to the front.  After the magnetic closure was added all the outside pieces as well as the inside of the flap were covered with paper from the Amber Moon pad that were inked with Vintage Photo DI.

To decorate the flap I used the fall foliage die to cut a bunch of tiny leaves and inked them with a mixture of Peeled Paint, Wild Honey, Aged Mahogany and Vintage Photo DI.  I also added a teeny butterfly punched from some Copper Metallic Kraft Stock.

Now I have a sweet little box with a selection of note cards - all with lovely leaves.

I hope you will join us for this challenge, which runs through 11:55 pm EST on Tuesday, December 3rd.  One randomly chosen entrant will receive a gift certificate to shop at The Funkie Junkie Boutique and the Design Team will select their top picks with the overall winner receiving the opportunity to be a Guest Designer at a future date.

Supplies list with links to The Funkie Junkie Boutique:

Tim Holtz Distress Inks
Tim Holtz Distress Oxides
Ranger Adirondack Alcohol Inks
Stamperia - Old Lace 12x12 Paper Pack SBBL32
Tim Holtz Idea-ology 8 x 8 Metallic 2 Kraft Stock - Rose Gold & Copper TH93780
Sizzix Thinlits Die Set 14PK - Fall Foliage by Tim Holtz 660955
White Jute Mesh (Burlap)
Scor-Pal Scor Tapes
Sizzix Big-Z Die - Tattered Leaves by Tim Holtz
Graphic 45 Voyage Beneath the Sea Paper
Graphic 45 St. Nicholas Paper
Prima Autumn Moon Paper Pad
Spellbinders Petite Ovals Large Die
X-Cut Corner Rounder Punch
Basic Grey Magnetic Closures
Cuttlebug Victoria Embossing Folder
Recollections Kraft Card Stock

Saturday, November 16, 2019

Saturday Showcase at The Funkie Junkie Boutique Blog

Today I am presenting the Saturday Showcase at The Funkie Junkie Boutique Blog and I have used the new Tim Holtz Yuletide Gatherings stamp set to make a couple of cards and a tag.


Here is a peek at one of the cards but if you pop over to the blog you can see the other two projects and the details on how all three came together.

Wednesday, November 6, 2019

Leaf Collage


It is time for the next challenge at The Funkie Junkie Boutique Blog.  Ginny, our hostess for this one calls it 'Fabulous Fall' and describes it like this:

It's the wonderful season where the leaves are changing and the air is crisp and our thoughts turn to pumpkin spice everything. For this challenge create a Fall inspired project.

I don't want to be a downer but by this time of year at my house all the gorgeous fall colours are over and we are left with mostly bare branches and whatever colour we have is dull yellow and carpets the ground - my poor husband is struggling to get all the leaves bagged up and out of here because they won't compost fast enough to avoid a soggy mess.  The air is certainly crisp, which is way better than hot and humid but sadly we have more rainy days than sunny ones.  As the temperatures continue dropping that rain is going to turn into the dreaded snow.  The stores are already packed with Christmas decorations and that wonderful aroma of pumpkin spice is being replaced by cinnamon pine cones - a lovely aroma too but makes me want to scream NOOOOOOOO since it is too soon.

So given the current state of affairs in my neck of the woods, I have decided to make a leaf collage in more neutral tones.

I began by adding some rough texture to a stretched canvas with Texture Paste (Ranger) and a palette knife.  Then I covered everything with some White Gesso (Dina Wakley) and once that was dry followed it with some watered down Sand Acrylic Paint (Dina Wakley).


Next I prepared the various elements that I wanted to layer on the canvas.  Some Copper Metallic Kraftstock (Tim Holtz) was die cut with the Garden Green (Tim Holtz) die and another piece was embossed with a Honeycomb Embossing Folder (Tim Holtz).


A piece of corrugated cardboard was painted with some Ancient Acrylic Paint (Dina Wakley and a couple pieces of paper from the Old Lace pad (Stamperia) were torn and the edges inked with Vintage Photo Distress Ink (Tim Holtz).


Some tea bag paper was dyed with Vintage Photo, Gathered Twigs and Walnut Stain DI (Tim Holtz).


For the focal point I used Jet Black Archival Ink to stamp a leaf from the Leaf Prints set (Tim Holtz) on a piece of torn old book paper, inked the edges with Vintage Phot DI and then coated it with three layers of Vintage Beeswax Baked Texture (Seth Apter).

To complete the collage layers a bit of copper wire was threaded through a black button from my stash.  I added some crochet ribbons, a piece of the faux leather I made for the last challenge and a Big Chat sticker (Tim Holtz) that was inked with Vintage Photo DI.

I hope you will join us for the challenge.  One random winner will receive a gift certificate to shop at The Funkie Junkie Boutique and the Design Team will choose their top picks with the overall pick receiving an opportunity to join us as a Guest Designer at a future date.

Supplies list with links to The Funkie Junkie Boutique:

Leaf Prints Stamp Set (Tim Holtz)
Ranger Texture Paste Opaque Matte INK44444
Dina Wakley Media Mediums - White Gesso MDM41689
White Corrugated Cardboard - 15 Sheets
Stamperia - Old Lace 12x12 Paper Pack SBBL32
Ranger Archival Ink Pad - Jet Black AIP31468
VersaMark Watermark Ink Stamp Pad
Ranger Tim Holtz Distress Ink Pad - Vintage Photo TIM19527
Ranger Tim Holtz Distress Ink Pad - Walnut Stain TIM19534
Ranger Tim Holtz Distress Ink Pad - Gathered Twigs TIM32823
Seth Apter Baked Texture - Vintage Beeswax 17g
May Arts 5/8 Inch Crochet Ribbon - Black
May Arts Ivory Mesh Ribbon - 1.5"
Tim Holtz Idea-ology 8 x 8 Metallic 2 Kraft Stock - Rose Gold & Copper TH93780
Sizzix Thinlits Die Set 9PK - Garden Greens by Tim Holtz 661206
Tim Holtz Idea-ology Big Chat Stickers TH93192
Dina Wakley Media Acrylic Paint - Ancient, 1oz Bottle
Dina Wakley Heavy Body Acrylic Paint - Sand - 1oz Bottle
Ranger Inkssentials Mini Ink Blending Tool - With 4 Blending Foams IBT40965
Scor-Pal Scor-Tape 1/4" x 27 Yards
Bubble and Honeycomb Set Texture Fade (Tim Holtz)
Old Book Page
Black Button
Copper Wire
Tea Bag Paper

Wednesday, October 23, 2019

Leather Notebook - But Is It Real?


Today is the start of a new challenge at The Funkie Junkie Boutique Blog and I am the hostess this time.  I am calling this challenge "It Looks Real" and here is how I describe it:

There are so many ways to make something look real when it isn't. For this challenge, make a vintage or shabby chic project with one or more faux elements. Those elements could be faux rust, leather, stitching - to name a few. Make sure you tell us what the faux element is and how you made it because it will look real.

I decided to make a tiny notebook with a faux leather cover. I was actually inspired by a TV commercial that features a folded butterfly.


I have made faux leather a few times in different ways but this has to be the easiest way yet.  When you get an order from The Funkie Junkie Boutique you find some of the products wrapped in brown paper.  I always threw it out until Jenny Marples told me she saves it and uses it in her projects.  I realized what a mistake I had been making so I started to save it as well.

To make my faux leather I inked a piece of the brown paper  completely with Vintage Photo Distress Ink (Tim Holtz).  Then I crumpled the paper into a tight ball and then spread it out again.  I did this a few times to give it lots of wrinkles.  Next I rubbed the Coffee Archival Ink pad (Ranger) over the top to hit the highlights.

Because I wadded the paper up so many times, it softened quite a bit so I stiffened it up by coating it with Mod Podge.  Voila, faux leather.


The base of the book is just heavy card stock cut  9" x 5 1/2" and scored on the long side at 4 1/4" and 4 3/4".  The outside of the book was covered in the faux leather and then I added a piece of brown card stock cut a bit smaller to the inside.

I made two holes side by side at the top and bottom of the spine and strung the book with round elastic.  I didn't like the stark white elastic against the brown so I inked it with some Vintage Photo DI.  Next I made two signatures from tea and coffee dyed copy paper that I had in my stash and added those to the inside of the book.


I realized that I need a closure so I cut a piece of card stock 1" x 5", covered it with some of my faux leather and bent it around the notebook using a magnet snap (Basic Grey) to keep it shut.  Tip: If you want to stretch your magnet stash, use a purchased magnet on one side and a steel washer on the other side but you need thinner paper over it because it may not be strong enough under card stock.


The next step was to decorate the front cover around the area where the magnet sits.  To do that I made all sorts of leaves and branches with the Fall Foliage and Skeleton Leaves dies (Tim Holtz) using paper from the Abandoned and Metallics Kraft Stock pads (Tim Holtz).  The die cuts from the Fall Foliage die set were inked on the edges with Vintage Photo DI.

To decorate the closure I folded paper from the Abandoned pad to make a butterfly and then added an Idea-ology pen nib (Tim Holtz) that I altered with some Ginger and Gold Mixative Alcohol Inks (Tim Holtz).  Tip:  To glue the two sections together bend the bottom section so the sides almost touch in the middle, apply the glue in a narrow strip and use a paper clip to hold the two sections together while the glue dries.  I used a bit too much glue and didn't bend the bottom enough so I didn't get as much gap between the top and bottom sections of the butterfly as I wanted - lesson learned.

There you have it, a simple but handy little notebook.  This one would be great for a fellow but if you use different inks and more feminine embellishments you will be able to create something lovely for a female.

The challenge is open through Tuesday, November 5th at 11:55 pm EST and you have a chance at being chosen as a top pick.  The overall top pick will have an opportunity to be a Guest Designer at a future date.  One randomly selected winner will receive a gift certificate to shop at The Funkie Junkie Boutique and with all the wonderful new products coming in and the great prices and customer service Linda offers, you won't want to miss this chance.

Supplies list with links to The Funkie Junkie Boutique:

Tim Holtz Idea-ology Mini Paper Stash, Abandoned TH93962
Tim Holtz Idea-ology 8 x 8 Metallic Kraft Stock
Ranger Tim Holtz Distress Ink Pad - Vintage Photo TIM19527
Ranger Archival Ink Pad - Coffee AIP31451
Sizzix Thinlits Die Set 14PK - Fall Foliage by Tim Holtz 660955
Sizzix Thinlits Die Set 5pk - Skeleton Leaves by Tim Holtz 663094
Magnetic Snaps, Large MET522
Tim Holtz Idea-ology Pen Nibs
Ranger Adirondack Alcohol Ink - Ginger TIM22046
Ranger Adirondack Alcohol Ink - Gold Mixative TIM22053
Ranger Tim Holtz Alcohol Blending Solution
Ranger Inkssentials Alcohol Ink Applicator With 10 Blending Felts TIM20745
Scor-Pal Scor-Tape 1/8" x 27 Yards
Scor-Pal Scor-Tape 1/4" x 27 Yards
Scor-Pal Scor-Tape 1/2" x 27 Yards

Wednesday, October 9, 2019

Halloween Pop-up Shop


It is time for the new challenge at The Funkie Junkie Boutique Blog called 'It's Halloween' and Sara Emily, our hostess this time, describes it this way:

I love Halloween! With Halloween just a few weeks away, I challenge you to create a vintage or shabby chic project with a Halloween theme. Your project can be as silly or creepy as you like, but just have fun!

Halloween isn't a celebration that I get carried away with anymore because we now live in a neighbourhood with few children and my Grandchildren live out in the country so they don't even come by for treats. As a matter of fact, my Granddaughter who just turned 13 has decided she won't go trick or treating this year but wants to have a party with friends and watch a scary movie.  As a result, I was at a loss with this challenge until I was going to toss an empty cracker box in the garbage and a light went on in my head.  I could envision it becoming a pop-up shop and set about to make just that.

Leaving about an inch at the top, I cut one side of the box open to make the doors and then I covered the box inside and out with Black Gesso (Dina Wakley).  After that was dry I decided to add some texture by covering the outside and both sides of the doors with crumpled up black tissue paper (Dollarama).


I rough cut a piece of corrugated cardboard and coated it with Black Gesso to make the backing for the store sign.  The sign itself is just a piece of card stock with a computer generated name that has been cut out with a pair of deckle scissors (Fiskars) and then inked with Twisted Citron and Dusty Concord Distress Ink (Tim Holtz)

Next I inked over the tissue with some Twisted Citron and Dusty Concord DI but it didn't show up as well as I wanted to I went over it with some watered-down Lime and Blackberry Acrylic Paint (Dina Wakley).   After that I used my finger to rub some Starry Night and Lime Green Stickles (Ranger) to the doors and the sign backing.


The back of the inside was covered with a piece of patterned paper from the Abandoned paper pad (Tim Holtz) and then I added shelves, which are just pieces of wood covered with Black Gesso.

Some little pieces of wood were covered with scraps of faux leather paper (leftover from a previous project) to create little books.  The bottles were inked with Purple Twilight and Yellow Sunshine Alcohol Ink (Tim Holtz).  One was filled with water and the other with a bunch of googly eyes (Dollarama).   Computer generated labels were added to the bottles and the spines of the books.  The final shelf was filled with little skulls.


Some little pumpkins were aged with some Sand Acrylic Paint (Dina Wakley) and had bits of wood branches added for stems.


The tombstones are also pieces of wood cut and engraved by my husband on the laser cutter.  I coated them with Black Gesso and then sponged on some Elephant Acrylic Paint (Dina Wakley).  I made the witches brooms from wooden skewers and unraveled jute twine coated with watered down Mod Podge but wished I had had some of the Idea-ology brooms so I will link those for you.


The tent sign was also created on the computer and mounted on some card stock inked with Twisted Citron and Dusty Concord DI.  An Idea-ology Bitty Bat (Tim Holtz) was added along with another one on the store sign.  Some cheesecloth was dyed with Hickory Smoke DI and added along with some plastic spiders to the top of the Bootique and


The black cats were also cut on the laser cutter from heavy black card stock.  I coated some acetate with Sunshine Yellow and Sunset Orange Alcohol Ink and added bits behind their eyes.  Some Witch paper dolls (Tim Holtz) came to shop.

Tip:  Use florist gum, which comes in a roll attached to a paper tape, to make things stand up.  It can be removed to change positions or when you want to take everything apart.

If you are a fan of Halloween, this may not be the scariest project but I think the result is quite fun and since pop-up shops are all the rage right now, I am definitely fitting right in with this creation.

The challenge runs through 11:55 pm EST on October 22nd so you are just in time to make something for Halloween and share it with us.  We will choose our top picks with the overall winner receiving an invitation to be a Guest Designer at a future date and one randomly chosen winner will receive a gift certificate to go shopping at The Funkie Junkie Boutique.

Supplies list with links to The Funkie Junkie Boutique:

Tim Holtz Idea-ology 2018 Paper Dolls, Ancestors (Discontinued)
Dina Wakley Media Mediums - Black Gesso - 4 oz. Jar MDM41719
Dina Wakley Heavy Body Acrylic Paint - Sand - 1oz Bottle
Dina Wakley Media Acrylic Paint - Elephant, 1oz Bottle
Dina Wakley Media Acrylic Paint - Lime, 1oz Bottle
Dina Wakley Media Acrylic Paint - Blackberry, 1oz Bottle
Tim Holtz Idea-ology Mini Paper Stash, Abandoned TH93962
Tim Holtz Idea-ology Bity Bats TH93981
Tim Holtz Idea-ology Pumpkin Pieces TH93970
Tim Holtz Idea-ology Skull Fragments TH93968
Tim Holtz Idea-ology Broomsticks TH93965
Ranger Tim Holtz Distress Ink Pad - Twisted Citron TIM43294
Ranger Tim Holtz Distress Ink Pad - Dusty Concord TIM21445
Ranger Tim Holtz Distress Ink Pad - Hickory Smoke TIM43232
Ranger Tim Holtz Alcohol Ink - Purple Twilight
Ranger Adirondack Alcohol Ink - Sunshine Yellow
Ranger Adirondack Alcohol Ink - Sunset Orange
Scor-Pal Scor-Tape 1/8" x 27 Yards
Ranger Inkssentials Alcohol Ink Applicator With 10 Blending Felts TIM20745
Ranger Inkssentials Mini Ink Blending Tool - With 4 Blending Foams IBT40965
Ranger Starry Night Stickles
Ranger Lime Green Stickles
Corked Vials (Dollarama)
Cheesecloth
Plastic Spiders (Dollarama)

Saturday, September 28, 2019

Saturday Showcase at The Funkie Junkie Boutique Blog


I am presenting the Saturday Showcase this week at The Funkie Junkie Boutique Blog.  I have made a bright art journal page using Dina Wakley Acrylic Paints.

Pop on over to the blog to see how it came together.

Wednesday, September 25, 2019

Just Add Treats


It is time for the next challenge at The Funkie Junkie Boutique Blog.  Maggi is our hostess and is calling this one Treats, Not Tricks! Here is what she has to say about it:

Choose a theme and make something that will hold a treat for someone. It could be a Halloween treat bag, a Vaentine's candy box, a birthday card for a special person that holds a treat (could be a gift card "treat" or a bite of chocolate), anything that can hold a treat. So, for this challenge, choose a theme and make a vintage or shabby chic treat project to treat your someone special!

I got a head start on Christmas and created a couple little treat boxes and an altered gift bag using Graphic 45 papers.


For the altered bag, I used the Joy to the World collection and started with a layer of patterned paper  that was distressed and inked with Frayed Burlap Distress Ink (Tim Holtz).  Frayed Burlap was used for all the inking in these projects.

A strip of venise lace that was inked was added to the bottom and then a strip of patterned paper was punched with a border punch (Martha Stewart) and added on top.

Next came another panel of patterned paper followed by a panel of cream card stock that was embossed with a Starry Night embossing folder (Sizzix) and then an image panel cut from the paper collection.

I cut some Greenery using the Holiday Greens die (Tim Holtyz) and added poinsettias on top (Prima).  A big gold organza bow was topped with a little burlap bow and snowflake charm was added next along with a sentiment from the collection.


The little treat boxes were created from patterns I found online and turned into tree ornaments.


The red one has paper from the Joy to the World collection and a variety of ephemera from the St. Nicholas paper pad.  I cut greenery from the Holiday Greens die and also made a little poinsettia to which I added adhesive pearls (Kaisercraft) for the centre.

Some ivory satin ribbon (Fabricland) was used to make the hanger and then a red burlap bow and a little bells charm were added.

The other box is from a free pattern (Lori Whitlock) and is covered in paper from the Christmas Magic pad along with a fussy cut angel and circle sentiment from the Joy to the World collection.  Little poinsettias were made from red card stock and some patterned paper.

Ivory satin ribbon and a bow with a pearl centre were added to create a closure and the hanger.

Supplies list (links to The Funkie Junkie Boutique):

Antiqued Bronze Snowflake Charms - Set of 5
Graphic 45 - Joy To The World 12x12 Collection Pack 4501909
Graphic 45 - Christmas Magic - 8x8" Pad
Graphic 45 - St. Nicholas 8x8" Pad
Antiqued Bronze Snowflake Charms - Set of 5
Antiqued Bronze Bell Bowknot Charms - Set of 5
Prima Marketing Christmas In The Country Flowers - Kris Kringle 642495
Gold Organza Ribbon
Cream Satin Ribbon (Fabricland)
Starry Nights Embossing Folder (Sizzix)
Lace Border Punch (Martha Stewart)
Cream Card Stock (Staples)
Green Card Stock (Michaels)
Kraft Gift Bag (Michaels)