It is time for the new challenge at The Funkie Junkie Boutique Blog and Sara Emily, our hostess for the challenge, is calling it 'Let's Do It Again'. Here is what she has to say about it:
Have you ever made something that you wish you could do over? Perhaps it was a technique you tried and didn't get the results you were hoping for. Maybe you didn't have just the right product you wanted to make your project just perfect. Or maybe a friend asked you to make something like it for them. Now's your chance for a do-over. Choose one of your own posted vintage or shabby chic projects and do it over with a bit of a twist. Be sure to link back to the post of the project you are making over and tell us why you wanted to do it a second time and what's different about it this time. We like to see your entry be in the vintage or shabby chic style we prefer.
I am constantly wishing I had done a project differently so when I started to think about which project I would do over, I was overwhelmed. In the end I decided I would remake this small zig zag mini album I made for a Saturday Showcase some time ago and then I got completely carried away.
This time the plan was to make a larger album with fabric covers and use one paper collection from Stamperia for the inside. I had intended to make it so that photo mats for 4" x 6" photos would fit but I miscalculated my measurements for the zig zag base by 1/4" on both the long and short side and of course I didn't discover that until it was put together with all the pockets, etc. and I made the first photo mat. All was not lost though because I found out that Walmart will print 3" x 4" photos so I made mats for that size as well as some smaller sizes they print, such as 2" x 3" and 1.3" x 2".
Here are the measurements and instructions for the base album that I should have made to accommodate 4" x 6" prints and then I will walk you through the album - be prepared for a long post.
Pages:
- Cut 7 pieces 4 1/2" x 7" out of heavy card stock
- Score the 7 pieces on the long side at 3/8" and 1/2" (This will give you a little 1/8" gusset to accommodate thickness created with pockets, inserts and embellishments)
- Fold all the score lines and go over them with a bone folder (I found it easiest to fold the 1/2" line first and then the 3/8" line next)\
- Cut both ends of the 3/8" strip on a slight angle on each of the 7 pieces (optional)
- Cut 1 piece 4 1/2" x 6 1/2" out of heavy card stock
- Join each of the pieces together by adhering the inside of the 3/8" strip to the plain edge of another piece making sure you are creating a zig zag as you go along. You will end with the 8th piece that has no scored lines. NOTE: the outside pieces on each end will not be decorated as they are the pieces that will be glued to the cover insides
- Ink the zig zag along the edges and in the gussets on both sides (I used Frayed Burlap Distress Ink for all inking)
Covers:
- Cut 2 pieces of chipboard or mat board 5" x 7"
- Cut 2 pieces of quilt batting 5" x 7"
- Glue the quilt batting to each cover
- Cut 2 pieces of fabric 7" x 9"
- Centre the batting side of the cover on the wrong side of the fabric and glue the excess fabric to the cover making sure to pull tight so the finished cover will be smooth and make sure to tuck the corners so they will be neat
- Set the covers aside until the inside is done
- Cut 2 strips of ribbon long enough to make bows that will accommodate the thickness of the finished inside (optional if you think your album will stay closed on its own - it turns out mine would have so I could have left the ribbon out)
- Glue one strip of ribbon across the inside of each cover
- Cut 2 pieces of card stock 4 3/4" x 6 3/4" and ink the edges
- Glue a piece to the inside of each cover over the ribbon
To finish the album glue the unfinished cards stock pages to each cover inside. You will end up with 8 pages on the front and 6 pages on the back.
Starting with the floral cover and flipping to the left . . . .
Left side - pocket decorated with piece die cut from Rose Gold Metallic Kraft Stock and inked with a blend of Mushroom and Copper Mixative Alcohol Ink - includes folded photo mat
Right Side - pocket decorated with little postage stamps that have been stamped with a tiny bee using Watering Can Archival Ink - includes 2 tri-fold photo mats
Left side - pocket decorated with a belly band with text from the paper collection - includes tabbed photo mat and small photo mat/journaling card
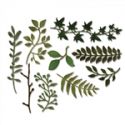
Right Side - two corner pockets decorated with punched flowers and leaves die cut from Rose Gold Metallic Kraft Stock and the Garden Greens die - includes two tags
Left Side - pocket decorated with border punched strip - includes folded photo mat
Right Side - tuck spot made from die cut postage stamp shape cut in half and decorated with a smaller version - includes journaling card and tag
Left Side - pocket decorated with a tuck spot with rounded corners and a die cut flourish heat embossed with Patina Oxide Baked Texture - includes tabbed photo mat and small photo mat/journaling card
Right Side - vertical band decorated with part of a circle element cut from the paper collection - includes 2 journaling cards
Back cover - not decorated so the album will lie flat on a table
Left Side - corner pocket with overlay embossed with French Script Texture Fade and filigree metal corner altered with mixture of Mushroom and Clover Alcohol Ink - includes large photo mat
Right Side - pocket decorated with punched border strip - includes folded photo mat
Left Side - two pockets decorated with punched flowers - includes tiny photo mats/journaling cards
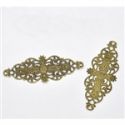
Right Side - pocket decorated with filigree metal heat embossed with Patina Oxide Baked Texture - includes folded photo mat
Left Side - postage stamp tuck spot - includes journaling card and tag
Right Side - band decorated with piece die cut from Turquoise Metallic Kraft Stock and inked with mixture of Mushroom and Copper Mixative Alcohol Inks - includes 2 journaling cards
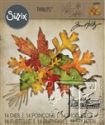
The front again - decorated with lace, layered flowers, die cut leaves cut from the Fall Foliage die set and Rose Gold Metallic Kraft Stock inked with a mixture of Mushroom and Copper Mixative Alcohol inks, a dragonfly die cut using the Geo Insects die set and heat embossed with Aegean Sea Baked Velvet (from the Mediterranean set) and finally some text from the paper collection
I had intended to take a picture of the album spread open all the way but because it is 51 1/2" long, I could not get it all in the camera view and if I could have it probably would have been so tiny you would have needed a magnifying glass to see it.
If you managed to stay with me, I hope you will join in on the challenge and share your remake. One randomly chosen winner will receive a gift certificate to shop at The Funkie Junkie Boutique and the Design Team will their top picks with the overall winner receiving a chance to be a Guest Designer at a future date.
Supplies list with links to The Funkie Junkie Boutique:
Flower Punch - EK Success
Small Circle Punch - EK Success
Venetian Motifs Die Set - Spellbinders
Postage Stamps Die Set - Spellbinders
French Script Texture Fade - Tim Holtz
Flower Petals - Recollections
Tiny Roses - Wild Orchid Crafts
3/8" Cream Satin Ribbon - Kate's Paperie
1/4" Cream Satin Ribbon - Fabricland
Fabric and Batting - Fabricland
Border Punches - Martha Stewart
Tim Holtz Idea-ology 8 x 8 Metallic 2 Kraft Stock - Rose Gold & Copper TH93780
Tim Holtz Idea-ology 8 x 8 Metallic Jewels Kraft Stock
Seth Apter Baked Velvet - Mediterranean Kit
Sizzix Chapter 2 Tim Holtz Thinlits Geo Insects 664180









Oh, my, Cec! You have really outdone yourself with this magnificent album! I love the design and the colors are gorgeous. I wish I could hold this and flip through all the pages and pull out all the tags, journal card, photo mats and folders. The Stamperia papers you've chosen are stunning and look even better used to create this album. I'm so glad you did this one again; I really like the variation in shape and the creative ways you've made to add photos and stories. This is a treasure! Hugs!
ReplyDeleteCec this is stunning!!!!! That fabric based cover is sumptuous and the way you've grouped the lace, flowers and dragonfly together works perfectly. And all those pockets, tuck spots and flaps are such a treat to see! they show off those gorgeous papers to such good advantage. LOVE it all!!!
ReplyDeleteGorgeous mini album! The many pages with all the lovely ways to store memories is wonderful! Lovely soft textures and design!
ReplyDeleteThis is so lovely, Cec! You really added so many wonderful interactive features to the inside! The cover is just gorgeous! I haven't made a zig zag album in years....might have to pull that idea out of the archives and give it a go!
ReplyDelete