Saturday, September 28, 2019

Saturday Showcase at The Funkie Junkie Boutique Blog


I am presenting the Saturday Showcase this week at The Funkie Junkie Boutique Blog.  I have made a bright art journal page using Dina Wakley Acrylic Paints.

Pop on over to the blog to see how it came together.

Wednesday, September 25, 2019

Just Add Treats


It is time for the next challenge at The Funkie Junkie Boutique Blog.  Maggi is our hostess and is calling this one Treats, Not Tricks! Here is what she has to say about it:

Choose a theme and make something that will hold a treat for someone. It could be a Halloween treat bag, a Vaentine's candy box, a birthday card for a special person that holds a treat (could be a gift card "treat" or a bite of chocolate), anything that can hold a treat. So, for this challenge, choose a theme and make a vintage or shabby chic treat project to treat your someone special!

I got a head start on Christmas and created a couple little treat boxes and an altered gift bag using Graphic 45 papers.


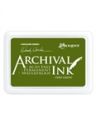
For the altered bag, I used the Joy to the World collection and started with a layer of patterned paper  that was distressed and inked with Frayed Burlap Distress Ink (Tim Holtz).  Frayed Burlap was used for all the inking in these projects.

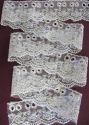
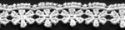
A strip of venise lace that was inked was added to the bottom and then a strip of patterned paper was punched with a border punch (Martha Stewart) and added on top.

Next came another panel of patterned paper followed by a panel of cream card stock that was embossed with a Starry Night embossing folder (Sizzix) and then an image panel cut from the paper collection.

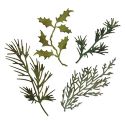
I cut some Greenery using the Holiday Greens die (Tim Holtyz) and added poinsettias on top (Prima).  A big gold organza bow was topped with a little burlap bow and snowflake charm was added next along with a sentiment from the collection.


The little treat boxes were created from patterns I found online and turned into tree ornaments.


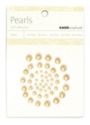
The red one has paper from the Joy to the World collection and a variety of ephemera from the St. Nicholas paper pad.  I cut greenery from the Holiday Greens die and also made a little poinsettia to which I added adhesive pearls (Kaisercraft) for the centre.

Some ivory satin ribbon (Fabricland) was used to make the hanger and then a red burlap bow and a little bells charm were added.

The other box is from a free pattern (Lori Whitlock) and is covered in paper from the Christmas Magic pad along with a fussy cut angel and circle sentiment from the Joy to the World collection.  Little poinsettias were made from red card stock and some patterned paper.

Ivory satin ribbon and a bow with a pearl centre were added to create a closure and the hanger.

Supplies list (links to The Funkie Junkie Boutique):

Antiqued Bronze Snowflake Charms - Set of 5
Graphic 45 - Joy To The World 12x12 Collection Pack 4501909
Graphic 45 - Christmas Magic - 8x8" Pad
Graphic 45 - St. Nicholas 8x8" Pad
Antiqued Bronze Snowflake Charms - Set of 5
Antiqued Bronze Bell Bowknot Charms - Set of 5
Prima Marketing Christmas In The Country Flowers - Kris Kringle 642495
Gold Organza Ribbon
Cream Satin Ribbon (Fabricland)
Starry Nights Embossing Folder (Sizzix)
Lace Border Punch (Martha Stewart)
Cream Card Stock (Staples)
Green Card Stock (Michaels)
Kraft Gift Bag (Michaels)

Wednesday, September 11, 2019

Big Tag Notebook Holder


It is time for the new challenge at The Funkie Junkie Boutique Blog and Ginny is our hostess for this one.  She calls it Terrific Tags and here is how she describes it:

Add it to a gift, label a homemade tasty treat, or display it with your favorite home decor, tags are not only fun to create they also have a million uses. For this challenge create a tag that's big or small, mixed media or layered, or added to a project as a fabulous focal point. I can't wait to see your creations!

I decided to turn one of the small Etcetera tags (Tim Holtz) into a notebook holder.


I started by gluing old book pages to both sides of the tag and I gave it a coat of White Gesso (Dina Wakley). Then I inked it randomly with Forest Moss, Crushed Olive, Gathered Twigs and Cracked Pistachio Distress Oxide along with Worn Lipstick and Broken China Distress Inks.  When I finished I decided it was too bright so I brushed on some watered down White Gesso to knock the colour back a bit.  Now I was happy and if you look at the tag in real life you can still see a bit of the text from the book page showing through - barely but it is there.


To add some interest I added some stenciling with a Flourish stencil (Tim Holtz) and Crackled Texture Paste (Wendy Vecchi).  Then I added a 1/4" pocket created from card stock that has an accordion gusset on either side to allow for easy removal of the notebook.  To decorate the pocket, I distressed a piece of paper from the Bloom paper pad (Graphic 45).  I topped that with a piece of card stock punched with a border punch (Martha Stewart) and inked with Picked Raspberry DI (Tim Holtz).  Next came a punched border of patterned paper and then a strip of venise lace.  The last embellishments were some paper flowers (Wild Orchid Crafts), Skeleton Leaves from a die (Tim Holtz) and some Open Leaf branches (Heartfelt Creations) that were stamped, fussy cut and inked with Forest Moss DI (Tim Holtz).


I made a little notebook to fit in the pocket by cutting a piece of card stock  5" x 8 1/4", scoring it on the long side at 4", 4 1/8" and 4 1/4" and then folding the score lines.  Tiny holes were punched 1/2" from the top and bottom and round elastic was threaded through it and tied on the inside.  I created a signature out of copy paper and sewed it with some white twine before inserting it through the elastic to create the inside of the notebook.  It wanted to pop open so I made a belly band with a strip from the patterned paper.


Once I knew how high the book would sit, it was time to decorate the tag.  I made a flower from the patterned paper and a Pinwheel Posies die (Tammy Tutterow) and added stamens to the centre that were dyed with some Picked Raspberry Reinker mixed in water.  I also dyed a paper flower from the dollar store and hung it upside down to dry.  Note:  I should have removed the dark green layer because it dripped onto the bottom of the coloured flower and stained the very outer edge.  I am going to pretend that is a vintage, aged look - my story and I am sticking to it. 

Some ephemera and postage stamps from the paper pad were added along with a Mulberry flower (Wild Orchid Crafts), some Open Leaf branches and Skeleton leaves.  A fussy cut butterfly stamped with Fern Green Archival Ink (Wendy Vecchi) from my leftovers stash was also added.  To top off the tag, I dyed some seam binding and then tied it around a pencil from the dollar store.

Supplies List with links to The Funkie Junkie Boutique:

Graphic 45 - Bloom - 8x8" Paper Pad
Paper Flowers (Wild Orchid Crafts and Dollarama)
Open Leaf Stamp (Heartfelt Creations)
Border Punch (Martha Stewart)
Cream & White Card Stock (Staples)
Butterfly Stamp (Hero Arts)
Stamens
Pencil (Dollarama)