Showing posts with label 12 Tags of Christmas. Show all posts

Sunday, December 17, 2017

12 Tags of Christmas - #12


Here is my project for the final week of 12 Tags of Christmas sponsored by The Funkie Junkie Boutique.


Linda created this fun tag full of vintage bits and pieces so I decided to make a card with a real vintage vibe.

My card is very, very simple though because I discovered that each of the very shabby cards I made earlier in this challenge cost me $1.80 each to mail.  This card is the first card for Christmas 2018 and I am determined to make all of them for next year so they can be sent with regular postage.

I started with some rusty red card stock (Recollections) for the blank and then added a panel of patterned paper that looks like vintage newspaper ads (Farm House Paper Company) that I immediately covered with more patterned paper (Graphic 45).

Next came a strip of burlap.  I added a snowflake cut from the Paper Snowflakes die (Tim Holtz) and then topped that with a Found Relatives - Occasions card (Tim Holtz)  I added some Christmas ephemera (Tim Holtz) and a Metallic Holiday Talk sticker (Tim Holtz).  Finally I added a loopy burlap string bow.

I definitely had fun participating in Linda's challenge for the first time and I will do it again if she has it but look for more simplicity and not so much dimension from me - unless I win a lottery, of course.

12 Tags of Christmas - #11


I am back with my project for week 11 of the 12 Tags of Christmas sponsored by The Funkie Junkie Boutique.


Here is Linda's tag and this time I took my inspiration from the mitten and made a gift card holder that is masquerading as a tree ornament.


I found a template online, printed it on card stock and then cut it out.  I used this as my pattern, laid it on the back side of my patterned paper (Graphic 45) and traced around it before I fussy cut it.  I repeated this making sure to flip the pattern before I traced it.


Next I turned one half of the mitten to the back side and marked where the gift card was going to sit.  This time I decided to let it peek above the top since the gift card came in a nice green wrapper but you can hide it below the top by just marking where you want it to stop lower inside the mitten.


I added double sided tape (Scor Tape) to a small strip of fun foam (Michaels) and added it to bottom of the outline I made.

Next I glued both halves of the mitten together using a fine bead of glue (Art Glitter Designer Dried Clear Adhesive) around the edge but leaving about 1/2" open on each side at the top (you can see where I erased the lines to remind me).  Once the glue was dry, I trimmed away any bits that did not match up perfectly.

To finish the mitten I added cuffs cut from quilt batting and a length of burlap string for a hanger on one side.  I decorated the opposite side with a label from the paper pad (Graphic 45), some greenery cut with a punch (Martha Stewart), paper roses (Wild Orchid Crafts), sparkly berries (Michaels) and a loopy bow from burlap string.

Sunday, December 10, 2017

12 Tags of Christmas - #10


Here is my offering for week 10 of the 12 Tags of Christmas sponsored by The Funkie Junkie Boutique.


Here is Linda's tag but I am making cards this year and this time I chose the wreath as my inspiration.  Following are the steps to create this card:


1.  Ink the top half of piece of white card stock with any combination of blue inks.  I used Salty Ocean, Faded Jeans and Broken China Distress Oxide (Tim Holtz) and then followed up with Weathered Wood and Hickory Smoke Distress Ink (Tim Holtz) and set aside.  The Hickory Smoke was a decision when I started to put the card together so it is not in the photo.


2.  Paint a piece of card stock with Coffee Bean Acrylic Paint (Folk Art) or any other dark brown paint making sure to cover it.  When dry paint with White Acrylic Paint (DecoArt) but don't completely cover the brown.  Make sure your brush strokes are all done vertically on the card stock.
3.  When the paint is dry turn the card paint side down on a scoring tool (I used Martha Stewart Scoreboard) and score every half inch.


4.  Turn the paint side back to the top and run ink pads vertically down the card stock holding the pad at an angle.  I used Walnut Stain Distress Ink (Tim Holtz), Coff Archival Ink (Ranger) and Watering Can Archival Ink (Wendy Vecchi).
5.  Cut a semi circle on the top of the faux wood panel.


6.  Cut greenery from the Holiday Greens die (Tim Holtz) using a variety of the dies and different colours of green card stock.  Snip the greens apart and glue into a ring to create a wreath.
7.  Add clusters of adhesive pearls (The Paper Source) and a loopy bow of red satin ribbon (Fabricland).

To assemble the card:

1.  Glue the sky panel to the card blank.
2.  Add the wooden gate on top of the sky panel lining the bottom with the bottom of the sky panel.
3.  Adhere the wreath to the gate.
4.  Add a wavy piece of white card to the bottom of the gate.
5.  Punch a number of tiny snowflakes (Martha Stewart) and add them to the sky and on top of the wavy card stock to make a pile of snow.
6.  Add some Stardust Stickles to the centre of each snowflake.
7.  Add white dots in the sky  with a white pen (Signo Uniball)

There we go, another one completed so time to work on week #11.

Tuesday, November 28, 2017

12 Tags of Christmas - #9


Today I am sharing my card for week 9 of the 12 Tags of Christmas sponsored by The Funkie Junkie Boutique.


Here is Linda's tag and as you can see I was inspired by quite a few elements - the dark blue, trees, splatters, a deer and the "greenery".


I started by cutting a scalloped hole with a die called Petite Scalloped Circles Small (Spellbinders) in a piece of card stock (Recollections). and then splattered it with some watered down white acrylic paint (DecoArt).


Using the pine tree from a set called Lovely As A Tree (Stampin' Up) and Versamark (Tsukineko) I stamped three trees on a piece of white card stock.  One tree was embossed with Cornflower Blue Embossing Powder (Wendy Vecchi) and two were embossed with Watering Can Embossing Powder (Wendy Vecchi).  This panel was mounted behind the circle cut out.


Using Cornflower Blue Archival Ink (Wendy Vecchi) and the Christmas stencil (Tim Holtz), I added Merry Christmas to a strip of white card stock.


My husband cut the deer for me on his laser cutter and I patted it with Versamark and then embossed it twice with Sterling Silver Embossing Powder (Stamp-N Stuff).  In this photo the embossing powder looks blue but trust me it is actually a steely grey in the container - hmmmm.


I took some metal foil tape (Home Depot) and used a tiny poinsettia die (Marianne Creatables) to cut three each of two sizes of petals.  I added some Silver Mixative Alcohol Ink (Tim Holtz) and some Brushed Pewter Distress Spray Stain (Tim Holtz).  The petals were layered and some tiny white seed beads were added to the centres before they were mounted on top of the "greenery", which was a gift from a fellow crafter.

Sunday, November 26, 2017

12 Tags of Christmas - #8


Today I am sharing my offering for week 8 of the 12 Tags of Christmas sponsored by The Funkie Junkie Boutique.


Here is Linda's tag and as in the past I have created a card.  I went along with her non-traditional colour palette but I must admit I am a fan of the more traditional colours.


I started by creating the paper for the background using Tumbled Glass, Faded Jeans and Broken China Distress Ink (Tim Holtz).  I patted the pad on a piece of plastic packaging, gave it a light spritz with water and then pounced it on my card stock.  This is a neat trick that the lovely and talented Tracy Evans shared when she was on Hochanda recently.


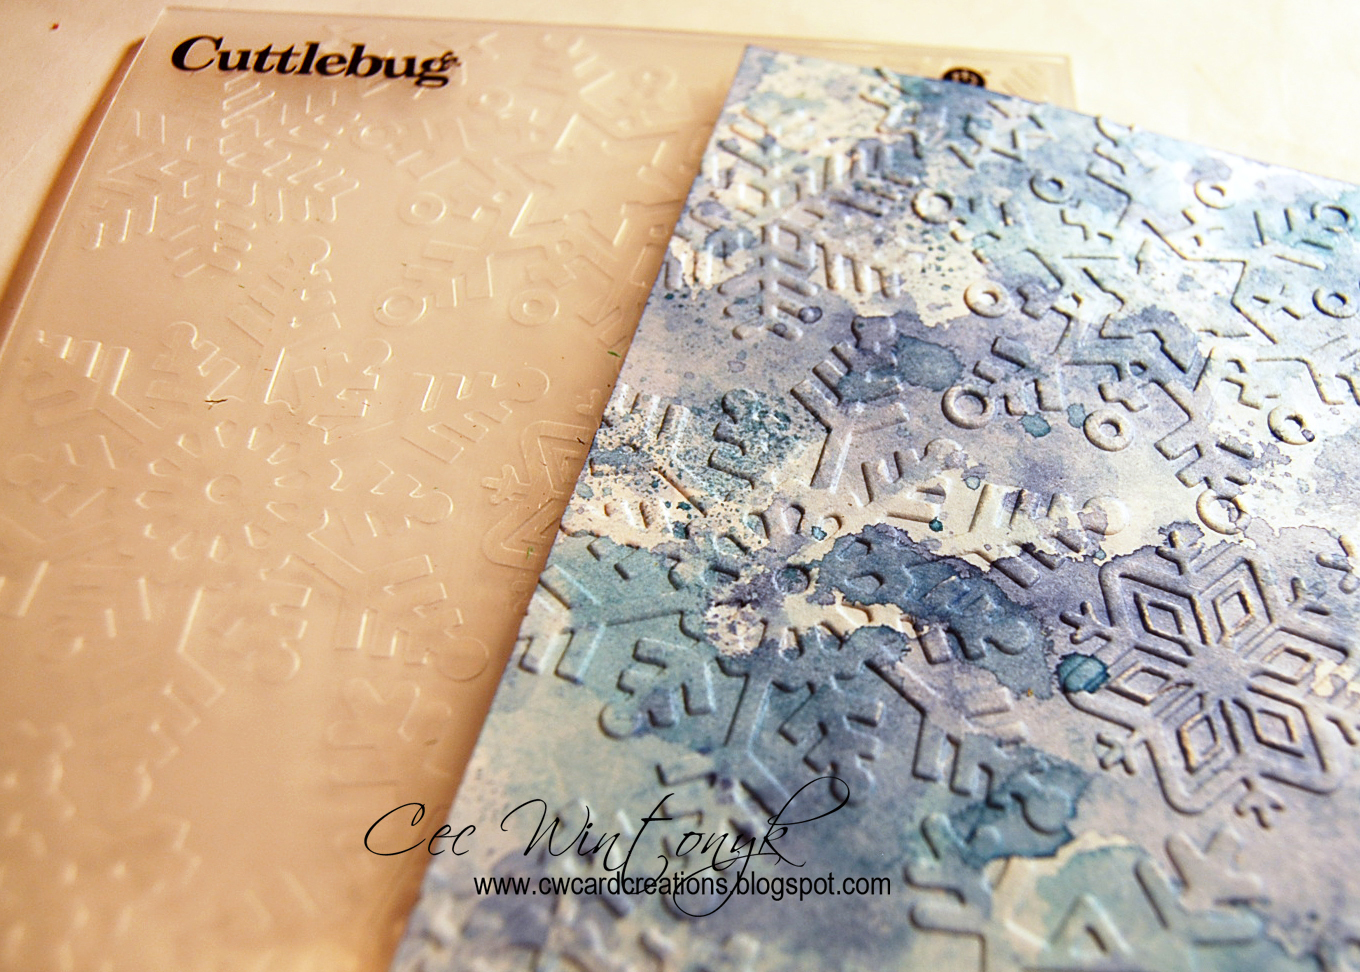
Once the card stock was dry, I embossed it with a Snowflake embossing folder (Cuttlebug).


The raised areas were rubbed with some Treasure Pewter Wax Paste (Connoisseur Studio) and the edges were distressed.


Using the same technique and Spun Sugar, Worn Lipstick, Festive Berries and Picked Raspberry Distress Ink (Tim Holtz) I created some pink paper for the snowflake.


I die cut three sizes of an identical snowflake from the Paper Snowflakes and Paper Snowflakes Mini die sets (Tim Holtz).


Using an embossing pen and some Rose Gold Embossing Powder (Emerald Creek), I added a few highlights to the snowflakes and then layered the snowflakes twisting each one a little so they weren't directly on top of one another.  I used a scrap of silver card stock (Recollections) to punch a small snowflake (Martha Stewart) and added it to the centre.

I created the sentiment on the computer and cut it into a chevron.  To give it some depth, I used my scoring tool (Martha Stewart) to score vertical lines from the back and then highlighted the raised areas lightly with some Worn Lipstick DI (Tim Holtz) before I distressed the edges.

To assemble the card, I started with white card stock (Staples) for the blank and added a panel of dark blue card stock (Recollections) followed by the embossed blue panel.  The sentiment chevron was added next.  I cut some holly leaves from silver card stock using a die called Holiday Greens (Tim Holtz) and mounted that on top of the chevron followed by the snowflake.  Finally I added a few teeny silver snowflakes cut with punches (Martha Stewart and Marvy Uchida).

Thursday, November 16, 2017

12 Tags of Christmas - #7


I am back again with my project for the challenge sponsored by The Funkie Junkie Boutique, 12 Tags of Christmas - Week 7.


Once again Linda has created some gorgeous inspiration for us to follow and once again I have made a card.  This time I took my inspiration from the plaid.

I started with some red card stock (Bazzill) for the blank and then added a panel of plaid paper from a pad called Good Ol' Sport (Graphic 45) that I found at Tuesday Morning in the US on a visit a year ago.  When I bought it, I never envisioned using it to create something for Christmas - bonus!


I found the lovely vintage online at christmasgifts.com and printed it, inked the edges with Fired Brick Distress Ink (Tim Holtz) and then mounted it on more red card stock.


The poinsettia was cut from a die (Marianne Creatables) and some Antique Linen Distress Stickles (Tim Holtz) were added to the edges.  The petals were layered and some large seed beads (Dollarama) were added to the centre.


I cut holly branches from the Holiday Greens die (Tim Holtz) and scraps of white card stock.  The Stickles were added to the edges.

I rubbed a Christmas Typed Token (Tim Holtz) with some Classic Gold wax paste (Treasure Gold) and added it to the top of a white organza bow with some red burlap string.

Wednesday, November 15, 2017

12 Tags of Christmas - #6


I am finally back with my next offering for the 12 Tags of Christmas - Week 6.  This fun challenge is sponsored by The Funkie Junkie Boutique.


Here is the tag Linda created to inspire us and once again I made a card, which is within the challenge rules.  This time I was inspired by the red (unlike many others, this is a favourite colour for me at Christmas) and the snowflakes.

I started with some cream card stock (Recollections) for the card blank.  Next I added three panels of paper from a pad called St. Nicholas (Graphic 45) that were distressed.  The edges of these panels (and all other elements) were inked with Vintage Photo Distress Ink (Tim Holtz).


I cut a corner piece from some more cream card stock and punched the angled edge with a border punch (Martha Stewart), the name of which has escaped me since I have had it for so long.  Then I ran the corner panel through an embossing folder called Starry Night (Sizzix).


Next I cut snowflakes from the Paper Snowflakes Mini die (Tim Holtz) and cream card stock as well as some gold from my stash (DCWV).

To assemble the card, I stamped the word Joy (Hero Arts) using Aged Mahogany DI (Tim Holtz) onto a scrap of cream card stock and added it to the card with the snowflakes.  Adhesive pearls were added to all the smaller snowflakes and an antique jingle bell (Tim Holtz) was added with some deep red burlap string to the larger snowflake.

I am loving being able to get ahead on my cards and am trying my best to make them flat enough that I can pay regular postage.  I am winning on some and losing on others.

Wednesday, November 1, 2017

12 Tags of Christmas - #5


Here is the next card I have made for week 5 of the 12 Tags of Christmas challenge sponsored by The Funkie Junkie Boutique.


This is Linda's tag and I took my inspiration from the Santa on the stitched panel and the plaid ribbon.

I started with some card stock (Recollections) for my blank and used mostly papers from a Graphic 45 pad called Christmas Carol.  All the papers have been distressed and inked with Vintage Photo Distress Ink.


One panel was created by inked a piece of card stock with Vintage Photo and Walnut Stain Oxides.  Then I used a wood grain stencil and Light Molding Paste (Golden) to add some texture.  As it dried, the paste picked up the colour from the Oxides.  This panel was added on top of the background.

Next I added a panel of snowflake paper.


I used a brass piercing stencil (Fiber Art) to make holes in the red paper and then stitched it by hand with embroidery floss before I added it to the card.


I cut a small panel of cream card stock (Recollections), ran it through an embossing folder called Starry Night (Sizzix) and then distressed the edges and inked them with Vintage Photo DI before I mounted it on top of the red panel.


The image is from a set called Retro Christmas (IndigoBlu) and I stamped it with Frayed Burlap Distress Ink onto a scrap of card stock and then fussy cut it.  The image was added to the cream embossed panel with dimensional foam.

The sentiment was a digital image I received from Digital Delights by Louby Loo and I printed it, fussy cut it and inked it with Vintage Photo DI.

Finally I made a loopy bow from some plaid ribbon that I picked up in Fancy Gap, Virginia and added it with a snowflake charm.

The following products used to create this card came from The Funkie Junkie Boutique:

Sunday, October 29, 2017

12 Tags of Christmas - #4


I have made another card for week 4 of the 12 Tags of Christmas challenge sponsored by The Funkie Junkie Boutique.


Here is Linda's tag and I took my inspiration from the silhouettes.

I started with some card stock from my stash for the blank.  Next I added a panel of music paper from a Christmas pad from Farm House Paper Company that I distressed and inked the edges with Walnut Stain Distress Ink..  You might have to look closely but it is there in the background.


The next panel is embossed with a Snowflakes embossing folder (Cuttlebug) and inked with Walnut Stain.

Next I convinced my husband to cut the carolers and lamp post for me.  I sure hope he appreciates that I am helping him out with these crafty requests.  Every time I ask for something new he has to create the files that talk to the laser cutter and since he is teaching himself the graphics programs, I figure I am assisting him on this path to learning so he owes me - LOL.  He's a good guy!!!!

I added some acetate that was in my stash to the back of the lamp.  It had been inked with some Alcohol Inks and left over from my Halloween project.


Next I die cut a number of holiday greens from scraps of card stock, inked them with some Forest Moss Distress Ink and cut them apart before I added them to make a frame.

Finally I made a computer generated sentiment that I inked with Walnut Stain DI and added it with a loopy burlap string bow.

The following products used to create this card came from The Funkie Junkie Boutique:

Tuesday, October 24, 2017

Funkie Junkie's 12 Tags of Christmas - #3


This is my third offering for the 12 Tags of Christmas challenge sponsored by The Funkie Junkie Boutique.


Here is Linda's tag and I was inspired by the layout and some of the elements but since I didn't have the same ones, I have given it my twist.

I totally forgot to take photos of this one as I put it together so I will describe what I did and then I guess therapy for my lapse is probably in order - LOL.

1.  Started with some red card stock (Wassau) for the blank - this is a 5"x7" card.
2.  Added a panel of striped paper called Cinnamon Stripes (Lasting Impressions) - this was cut on the bias to mimic Linda's stenciling.
3.  Added a strip of venise lace topped by a strip of red burlap ribbon.
4.  Stamped the letters Merry (Distressed Double Text from Recollections) onto some scraps of white card stock using Vermillion Archival Ink (Ranger).
5.  Distressed the edges of the letter squares and ink with the Vermillion Archival Ink.
6.  Punched a little hole in the corner of each letter square (EK Success Hole Punch) and add some striped baker's twine.
7.  Adhered the squares down the left side of the card.
8.  Used Embossing Ink (Versamark) and Red Geranium Embossing Powder (Wendy Vecchi) to alter a wooden "christmas" (laser cut by my husband).
9.  Patted some Vermillion Archival Ink over the top of the embossing powder when it is cool.
10. Used Versamark and Snow Embossing Powder (Recollections) to alter chipboard ornaments (laser cut by my husband).
11.  Added some white twine (Recollections) to the ornaments and hang from the top of the card.
12.  Covered the ends of the twine with a plaid button (my stash)
13.  Scattered some pearl stickers (Kaisercraft).

The following products used to create this card came from The Funkie Junkie Boutique:

Monday, October 23, 2017

Funkie Junkie 12 Tags of Christmas - #2


Today I am presenting the card I have made for the second week of the 12 Tags of Christmas challenge sponsored by The Funkie Junkie Boutique.


Here is Linda's tag for the second challenge and you can see my take on it above.  I was inspired by the colour palette and the layout.  Since I was making a card I knew I needed some card stock for the blank and this time I went for some kraft card (Recollections).


I cut a piece of white card (Staples and added some Light Molding Paste (Golden) through a stars stencil (IndigoBlu).  Note:  The Funkie Junkie Boutique carries a number of wonderful texture pastes that would work but I had this in my stash and wanted to use it before it dried up on me.  Once it was dry I dry brushed some Champagne Gold Metallic Acrylic Paint (DecoArt) over the panel and then roughly dry brushed some White Gesso (Liquitex) over that making sure to leave some of the metallic paint showing.  The edges were distressed and then inked with Frayed Burlap Distress Ink (Tim Holtz).


Next I die cut some snowflakes using a die called Paper Snowflakes (Tim Holtz) and some heavy white card stock (Recollections).  I used my fingers to add some Light Molding Paste to give the snowflakes some rough texture.  When that was dry I rubbed a bit of the metallic paint on the snowflake edges.


I intended to use a Santa stamp that I had but it was way too big so I went online and found one I liked at The Graphics Fairy and printed it on some white card and then cut is out with a scalloped die (Nellie Snellen).  The edges were inked with Frayed Burlap DI.


The sentiment is computer generated, cut with a Fancy Tags die (Spellbinders) and inked with Frayed Burlap DI.


To assemble the card, I added adhesive pearls (Kaisercraft) to two of the snowflakes and a couple of Christmas tickets (Miss Cutie Pie) and a loopy jute bow (The Funkie Junkie Boutique).

The following products used to create this card came from The Funkie Junkie Boutique: