Showing posts with label vintage. Show all posts

Wednesday, March 3, 2021

Steampunk Professor


It is tima again for a new challenge at The Funkie Junkie Boutique Blog and this time it is an easy one - Anything Goes.

We are going with an 'Anything Goes' theme for this challenge and are looking forward to seeing your vintage/shabby chic projects.

I thought it might be fun to go Steampunk this time and use stamps from the Tim Holtz Professor set. This set seems to have left the shop but the main image can be found on the Professor 2 set, which is available.

I got going on this and completely forgot to take any process photos - blame it on Covid confinement and my brain turning to mush. Here is how it came together:

- I started with an 8" square canvas panel that I covered with White Gesso. For this one I added an open wooden frame to the back. I thought this could provide a way to hang to canvas panel although I usually just suggest 3M Command Velcro holders, which work really well. They tuck the canvas panel against the wall while the added frame will allow the panel to sit away from the wall.

- The next step was to paint the whole canvas with Buff Acrylic Paint (Dina Wakley).

- The Professor and three other images from the stamp set were stamped with Jet Black Archival Ink (Ranger) on tissue paper and then glued to the canvas.

- I used Jet Black Archival Ink to add some stenciling with a stencil called Measured (Tim Holtz) and some Texture Paste to add dimension through a stencil called Blocks Small (Dylusions).

- At this point I decided that the buff paint was lighter than what I wanted so I sprayed the whole canvas with Gathered Twigs Distress Spray Stain (Tim Holtz).

- I did the assemblage part of this in a backwards way because I had intended the canvas to be light and the bits and pieces to be dark so it took way longer and was really messy. Since I have a mixture of metal and wooden pieces, I gave everything a coat of White Gesso and then followed that with a coat of Iced Coffee paint. I should have glued everything in place after the Gesso was applied and before I sprayed the canvas with the ink because then I wouldn't have had to add the Iced Coffee paint but I wasn't thinking that day - or many others right now to be honest.

- After the Iced Coffee paint was dry, it still wasn't dark enough so I added some watered down Umber Acrylic Paint (Dina Wakley).

- Next I glued all the pieces to the canvas - there are gears, screws, washers, charms, buttons and all sorts of electrnoic bits - and then touched up any light spots with the Umber paint. If I had Gathered Twigs Distress Paint, I would have used that and then topped it with the Umber paint.

- The next step was to make all the bits look somewhat rusty. To accomplish that I rubbed a variety of wax pastes on with my fingers - Matte Wax Paste in Patina Green, Rusty Brown and Rusty Red (Prima) and Oxynite and Rose Quartz Treasure Gold Metallic Paste (Connoisseur Studios). I used a soft cloth to buff them and just kept adding the pastes until I got a look I was happy with. You will notice when you go to the shop that there are not many colours of Matte Wax showing right now but check out the March Pre-Order section and scroll down where you will find a number of luscious new colours available to order.

- After I was done with the pastes I decided the background was a bit plain so I masked the bits and pieces off and sprayed and dripped some Tarnished Brass Distress Spray Stain (Tim Holtz) over the background.

I had fun making my Steampunk canvas and hope it will inspire you to join us for the Anything Goes challenge. The challenge can be found HERE and runs until 11:55 pm EST on Tuesday, March 16th.

Supplies list:

Stampers Anonymous Tim Holtz Stamp Set - The Professor 2 CMS395
Stampers Anonymous Tim Holtz Layering Stencils - Measured THS012
Ranger Tim Holtz Distress Spray Stain - Gathered Twigs TSS42310
Ranger Tim Holtz Distress Spray Stain - Tarnished Brass TSS42549
Dina Wakley Media Acrylic Paint - Umber, 1 oz Bottle
Prima Marketing Matte Wax Pastes - Rusty Red, Rusty Brown, Green Patine
Silver and Bronze Tone Key Set
Ranger Jet Black Archival Ink
Connoiseur Studios Treasure Gold Wax Pastes - Rose Quartz, Oxynite
Dina Wakley Buff Acrylic Paint
Dylusions Blocks Small Stencil
White Gesso
Wooden Gears, Steampunk Buttons, Hardware and Electronic Parts, Charms

Wednesday, June 10, 2020

Love Words


It is time for the new challenge at The Funkie Junkie Boutique Blog. Suzz is the hostess for this one and calls it Positively Pensive.  Here is how she describes it:

Today is Ballpoint Pen day! The challenge is to thoughtfully use a ballpoint pen on your project. You can doodle, journal, sketch or trace an outline using any color ballpoint pen on your art. Create a vintage or shabby chic project with some form of ink from a ballpoint pen and if it isn't obvious how it was used make sure to tell us in your post!

I thought it would be fun for a change to do an art journal page and since it is June, which is traditionally wedding month (except in the middle of a pandemic) I chose wedding as the theme for this very neutral, vintage page.

I apologize for the lack of process photos but after close to 3 months in lock down, my mind has gone to mush and I simply forgot but here is how you can create a page like mine:

  • Coat page with White Gesso (Dina Wakley)
  • Cover page with Sand Acrylic Paint (Dina Wakley)
  • Use a palette knife to add  Crackled Texture Paste (Wendy Vecchi) through the Flourish stencil (Tim Holtz) in random areas
  • Using Jet Black Archival Ink (Ranger) and a Harlequin stencil (Tim Holtz) add some stenciling
  • Brush White Gesso over the page using a ratty old brush so you can see brush strokes
  • Spray Gathered Twigs Distress Spray Stain over the page and blot some off with a paper towel
  • Spray White Linen Ink Spray (Dylusions) on page
  • Splatter White Gesso over page
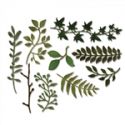
  • Cut leaves and branches from scraps of Kraft Core Shattered card stock (Tim Holtz) using the Garden Greens die set (Tim Holtz)
  • Punch some flowers from the Printery and Vintage Emporium paper pads (Prima) and add flowers to the centres from the Wild & Free Collection (Prima)
  • Hand cut a heart from white corrugated cardboard, coat with Sand Acrylic Paint and rub with Gathered Twigs Distress Ink (Tim Holtz)
  • Adhere a piece of lace to the page followed by the wedding couple Paper Doll (Tim Holtz), the heart, a piece of ephemera (Tim Holtz), the leaves, flowers and buttons
  • Hand print the text using a black ball point pen

Please join us for the challenge, which runs until 11:55 pm EDT on Tuesday, June 23rd. One randomly chosen winner will receive a gift certificate to go shopping at The Funkie Junkie Boutique and the Design Team will choose their 4 top picks with the overall winner receiving an invitation to be a Guest Designer at a future date.

Supplies list with links to The Funkie Junkie Boutique:

Dina Wakley Media Mediums - White Gesso MDM41689
Dina Wakley Heavy Body Acrylic Paint - Sand - 1oz Bottle
Tim Holtz Ranger Distress Stain Spray - Gathered Twigs TSS42310
Ranger Tim Holtz Distress Ink Pad - Gathered Twigs TIM32823
Dyan Reaveley's Dylusions Ink Spray - White Linen DYC37873
Ranger Archival Ink Pad - Jet Black AIP31468
Studio 490 Wendy Vecchi Texture Paste - Crackled WVPASTECRA
Stampers Anonymous Tim Holtz Layering Stencils - Flourish THS032
Stampers Anonymous Tim Holtz Layering Stencils - Harlequin THS016
Tim Holtz Idea-ology Ephemera Pack, Keepsakes TH93958
Scor Tape
Tim Holtz Idea-ology Paper Dolls
White Corrugated Cardboard
Tim Holtz Garden Greens Die
Prima Marketing Printery Paper
Peima Marketing Vintage Emporium Paper
Prima Marketing Flowers
Tim Holtz Kraft Core Shattered Paper
EK Success Flower Punch
Venise Lace & Buttons

Wednesday, May 13, 2020

The Big Five O.


The new challenge at The Funkie Junkie Boutique Blog starts today and Jenny is our hostess this time.  She calls this challenge "Oh Man" and here is how she describes it:

Fathers Day may be a way off yet but there are always other occasions and reasons for making something for the men in our lives. For this challenge create something which you feel has a more masculine look.

At the end of this month my Son-in-Law will be turning 50 so I thought this would be the perfect opportunity to make a card for him. The situation we all find ourselves in right now has spoiled the special plans that they had as a family to celebrate his milestone birthday so the trip to Europe has been cancelled and now he is making this a month-long celebration at home with fun cooking and lots of games with my Daughter and Grandchildren.  He is sad but is really enjoying the time he gets to spend with his family, especially more meaningful since he has an essential business and goes to work every day.

I started this card with a panel of brown card stock from my stash.  I roughly smeared some texture paste around the edge to make a frame.  When it was dry I realized it was too thick in spots and would prevent the next layer from sitting properly so I sanded some of it off.  Next I painted the edge with some Sand Acrylic Paint and Penny Acrylic Paint (Dina Wakley) and then inked it with Walnut Stain Distress Ink.


The next layer was made by patting some Antique Linen Distress Oxide (Tim Holtz) on my kraft sheet, spritzing it with water and dragging a piece of water colour paper through it.  The paper was dried and then the same steps were taken with Forest Moss and Black Soot DO.

I thought I would try adding some stenciling by pouncing a bleach soaked cloth on a stencil but the bleach ran underneath and made big clear patches instead of a nice pattern.  To fix this I ran the paper through more inks - Forest Moss, Peacock Feathers and Walnut Stain Distress Ink (Tim Holtz).  Note to self:  Do not soak the cloth, just dampen it.


Once all the inking was dry I added some random stamping with Jet Black Archival Ink (Ranger) and stamps from the Dapper set and  and The Chemist set (Tim Holtz).  Next I added some Clear Rock Candy Distress Crackle (Tim Holtz) on the top left and bottom right corners.


The next step was to make some of the added elements.  I started by hand cutting a little tag from a cracker box, covered it with some Postale Tissue Wrap (Tim Holtz). inked it with Vintage Photo Di and sponged some Penny Acrylic Paint on the edges.  A piece of burlap string was added to the top.


Jet Black Archival Ink was used to stamp The Professor onto some card stock.  He was then fussy cut and inked with Vintage Photo DI.

I cut some gears from brown card stock using an old Spellbinders die and covered them with white glue and playground sand.  When they were dry I covered them with Black Gesso and then pounced some Penny Acrylic Paint (Dina Wakley) and Melted Chocolate Acrylic Paint (Dylusions) on them randomly.  The same technique was used to alter the numbers, which were die cut from an Alphanumeric die (Tim Holtz).

The quote chip was inked with some Antique Linen DI and then randomly embossed using an Embossing Pen and Patina Oxide Baked Texture (Seth Apter).


The panel of pen nibs was made by covering a stamp from a well-loved old set called Curious Possibility (Tim Holtz) with a layer of toilet paper and pouncing it down into the stamp detail with a 1:1 mixture of water and white glue.  This was done with several layers of toilet paper and then the panel was pulled off the stamp and allowed to dry.  Once dry it was inked with Vintage Photo DI and edged and highlighted with Penny Acrylic Paint.

I hope my Son-in-Law likes the card and isn't upset with the not-so-subtle vintage reference.  If you have a special fellow that you would like to create something for, now is the time to do it and we would love for you to share it with us.  The challenge runs until 11:55 pm EDT on Tuesday, May 26th.

If you enter you have a chance of being the one randomly chosen winner of a gift certificate to shop at The Funkie Junkie Boutique and everyone needs cheering up with new supplies arriving during this lock down.  The Design Team will also choose their top picks with the overall winner receiving an opportunity to be a Guest Designer at a future date.

Supplies list with links to The Funkie Junkie Boutique:

Dina Wakley Heavy Body Acrylic Paint - Sand - 1oz Bottle
Dina Wakley Media Acrylic Paint - Penny, 1oz Bottle
Tim Holtz Distress Inks - Forest Moss, Peacock Feathers, Walnut Stain, Vintage Photo
Tim Holtz Distress Oxides - Forest Moss, Black Soot, Antique Linen
Ranger Archival Ink Pad - Jet Black AIP31468
Ranger Texture Paste Opaque Matte INK44444
Dina Wakley Media Mediums - Black Gesso - 4 oz. Jar MDM41719
Tim Holtz Idea-ology Quote Chips, Theories TH94045
DYLUSIONS PAINTS, MELTED CHOCOLATE DYP46011
Seth Apter Baked Texture - Patina Oxide 17g
Tim Holtz Distress Embossing Pen 2pk TDA71327
Scor Tape
Spellbinders Sprightly Sprockets Die Set
Tim Holtz Clear Rock Candy Distress Crackle Paste
Tim Holtz Stamp Sets - Dapper, Curious Possibility, The Professor, The Chemist
Tim Holtz Postale Tissue Wrap
Tim Holtz Alphanumeric Die Set
Playground Sand

Wednesday, April 29, 2020

Sew Sweet


The new challenge begins today at The Funkie Junkie Boutique Blog and I am the hostess for this one.  I am calling it Sew Sweet and here is what I have to say about it:

Create a shabby chic or vintage project with a sewing theme incorporating items and/or images related to sewing - think rubber stamps of sewing machines or dress forms e.g., fabric, pattern tissue and even notions such as buttons, zippers, thread, etc.

I have created a little mini album full of lots of sewing images and notions.  I used the Stamperia Old Lace paper collection along with a few pieces of paper from the Tim Holtz Dapper pad and my scrap stash.  The album measures 4 1/4" x 5" with a 1" spine.  When I first made it the spine was only 1/2" and it would not close properly so I performed surgery on it and expanded it - holding my breath the whole time since it was already decorated.

The front was decorated with some ruler paper, image from the paper collection, stamped sign, layered flower, buttons, metal hanger, lace and a little pair of metal scissors.  All the paper and card stock used both inside and outside has been distressed and inked with Frayed Burlap Distress Ink.


When you untie the ribbon closure I added you will see a single flip out on the left and an accordion flip out on the right

The left has a tuck spot decorated with lace that hold two cards that could be used for journaling or as photo mounts.  One card is covered with patterned paper and one with pattern tissue.  The right has a ruler belly band that holds two folded cards.  The images on the cards came from a vintage catalogue from J. Rotherham & Co. Ltd. that I found online at archive.org.


When the left flip-out is opened there are two pages with pockets.  The one on the left (back of the flip-out) is decorated with some lace dyed with Antique Linen Distress Ink and contains three cards, two of which have patterned paper and one is a quote I found online.

The right pocket is decorated with a stamped image and contains a little needle book, which has felt inserts.


When the right flip-out is opened there is a centre panel with a flip-up and a flip-down using magnets to ensure they stay closed.  The flip up is decorated with a ribbon holder and has patterned paper on the back for using as a photo mount.  The flip-down can also be used for photos.  Inside this section is a belly band with two tags cut from the paper collection.

To the right of this section is a pocket page containing a notions book that has been created in the same way as the needle book.


The back of the right flip-out has a tuck spot decorated with some vintage sewing tickets and contains another quote card (upside down in the top photo - dah)..

The right side is another pocket page and it holds a vintage button card.

I imagined  this little album would be used to hold information and photos of some favourite sewing projects both as work in process or once finished.  I hope you will join us for the challenge.

The challenge runs through 11:55 pm on Tuesday, May 12th and you have a chance to be the randomly chosen winner of a gift certificate to shop at The Funkie Junkie Boutique or you could be one of the top picks chosen by the Design Team.  The overall pick will receive an opportunity to be a Guest Designer at a future date.

Supplies list with links to The Funkie Junkie Boutique:

Stamperia - Old Lace 12x12 Paper Pack SBBL32
Ranger Tim Holtz Distress Ink Pad - Frayed Burlap TIM21469
Venise Lace Trim - 5/8 inch
Bronze Scissor Charms - Set of 5
Scor Tape
Ranger Inkssentials Mini Ink Blending Tool - With 4 Blending Foams IBT40965
Ranger Archival Ink Pad - Jet Black AIP31468
Magnetic Snaps, Large MET522
Tim Holtz Dapper Paper Collection
Mini Hanger Charm
Paper Artsy Sewing Room Stamp

Saturday, March 28, 2020

Bride's Folio

I am presenting the Saturday Showcase this week at The Funkie Junkie Boutique Blog and have created a Bride's Folio with gorgeous papers from the Le Romantique collection from Graphic 45.

To get all the details on how I put this simple folio together, pop on over to the blog.

Wednesday, February 5, 2020

Love Hearts


It is time for the new challenge at The Funkie Junkie Boutique Blog.  Jenny is our hostess this time and is calling it Love is All Around Us.  

She describes it this way:

With Valentines Day approaching it's time to share a little love. Create something vintage or shabby chic featuring hearts. Here's a few ideas to get you started;


I decided I would use the hearts in this mood board as my inspiration but would go with pinks rather than reds om my vintage card.

Here is how to put this card together:
  • Distress a panel of patterned paper from the Love Story paper pad, ink the edges with Frayed Burlap Distress Ink and adhere to a card blank to create the background
  • Distress a narrow panel, add some ruffled tulle to the back top of the panel and add it about a third of the way down from the top
  • Add a strip of wide venise lace on the bottom of the narrow panel
  • Add another distressed narrow panel on top of the first panel and then add a strip of lace along the bottom
  • Cut two chevrons, distress, ink and add to the bottom panel
  • Cover a wooden Love word with white Gesso and add to the chevrons
  • Hand cut two hearts, distress, layer and add along with some tiny flowers
  • Fussy cut a cupid and add beside the pair of hearts
  • Die cut flourishes from Rose Gold Metallic Kraft Stock and add below chevrons
  • Dye some seam binding with Victorian Velvet Distress Ink and create a loopy bow
  • Paint a small resin heart with some acrylic paint and then rub with some Rose Gold Metallique wax
I love how a bunch of layers can make a card look so difficult when in fact, it is so simple.  I hope you will join us for this challenge.  One randomly chosen entry will receive a gift certificate to shop at The Funkie Junkie Boutique and the Design Team will choose their top picks with the overall winner receiving an opportunity to be a Guest Designer with us at a future date.

Supplies List:

Prima Marketing 12x12 Paper Pad - Love Story
Prima Art Alchemy by Finnabair - Metallique Wax- Rose Gold
Tim Holtz Idea-ology 8 x 8 Metallic 2 Kraft Stock - Rose Gold & Copper TH93780
Ranger Tim Holtz Distress Ink Pad - Frayed Burlap TIM21469
Ranger Tim Holtz Distress Ink Pad - Victorian Velvet TIM27195
Rayon Seam Binding
Venise Lace Trim - 2 inches
Venise Lace Trim - 5/8 inch
Dina Wakley Media Mediums - White Gesso MDM41689
Scor Tape
Ranger Inkssentials Mini Ink Blending Tool - With 4 Blending Foams IBT40965
Tim Holtz Tonic Studios Paper Distresser 370E
Wild Orchid Crafts Mini Roses
Dollarama Resin Heart
Bazzill Card Stock Scrap
Staples White Card Stock for Card Blank
Husband Cut Wood Word
Spellbinders Venetion Motifs Die Set

Wednesday, May 8, 2019

Burlap and Lace


It is time for the next challenge at Frilly and Funkie.  Jenny is our hostess for this one, she calls it I Love It Because ... and describes it this way:

How often do you create something just for you that makes your heart sing? Doesn't it feel great when you do! My challenge to you is to make a vintage or shabby chic piece of art, be it a journal page, a tag, a card, a home decor project etc, that fills you with happiness and makes you smile - don't forget to tell us why you love it so much.

So for this challenge I have made a canvas and I love it because it is a little bit frilly, a little bit funkie, a little bit vintage, a little bit shabby, a little bit mixed media, a little bit country and a little bit rock and roll.  OK forget the last two because I am not a fan of country and it sure isn't rock and roll.


For my canvas substrate I used a piece of mat board that I found hiding in my craft room when I made a halfhearted attempt to purge.  I used Collage Medium (Tim Holtz) to cover it with a piece of lace fabric from my stash.  When it was dry I painted it with some khaki paint but it was way too dark for my liking so I dry brushed White Gesso (Dina Wakely) over it but didn't get carried away trying to cover the khaki paint completely.


Next I cut a piece of corrugated cardboard and ripped the top layer off around the edges.  Using a palette knife I randomly scraped Texture Paste (Ranger) over the exposed corrugations.  When it was dry I adhered it to the lace canvas. I will link to the corrugated section at The Funkie Junkie Boutique because you don't need to rip off the top layer with the kind carried in the shop - I only had one piece of the light left in my stash and wanted the tradition brown colour so this time I grabbed a box and chopped it up.

Four different panels of patterned paper were cut from the Old Lace paper collection (Stamperia) and distressed.  Strips of lace were added to the back of the largest panel and then all the panels were mounted on top of the cardboard panel using fun foam (Dollarama) for dimension.  I fussy cut the dress from the paper pad, added a tiny Latte Adhesive Pearl (Kaisercraft) and then mounted it on top of the panels.

The burlap flowers came next.  The top one is some wired burlap ribbon from my Funkie Junkie Boutique stash.  I pulled one of the wires to ruffle it and then tied it off in the centre.  Once I had the shape I cut the out edge away to allow it to fray and then added a pearl brad to the centre.


The large loopy flower was made by cutting a length of burlap and pulling all the centre threads out along the length making sure to leave at least 3/8" on each side.  One edge was glued to the other edge and then it was rolled along the glued edge, gluing along the way.  Once it dried I spread the loops out to form the flower and sliced off as much off the bottom as I safely could to make it lie flat.  A button was added to the centre.

The bottom flower was made by spreading school glue over and piece of burlap and letting it dry.  Then it was die cut using the Shabby Posies die (Tammy Tutterow), shaped and layered.  Another pearl brad was added to the centre.

I made a loopy bow from the burlap threads I pulled to make the middle flower and added it to the left side and then topped it with a loopy seam binding bow.  To finish it off I added a few buttons to one corner and a filigree piece to the opposite corner.

I hope you will join us for this challenge and create something you love and let us know why you love it.

Links to products The Funkie Junkie Boutique:

Corrugated Cardboard
Stamperia - Old Lace 12x12 Paper Pack
Dina Wakley Media Mediums - White Gesso MDM41689
Ranger Texture Paste Opaque Matte INK44444
Venise Lace Trim - 5/8 inch
White Jute Mesh (Burlap)
Antiqued Bronze Corner Filigree Metal Pieces - Set of 4
Rayon Seam Binding
KAISERCRAFT Pearls - Self Adhesive - Latte
Ranger Tim Holtz Distress Collage Medium Matte TDA47933
Tim Holtz Tonic Studios Paper Distresser 370E

Wednesday, April 24, 2019

Spring Has Sprung - I Hope


It is time for the new challenge at Frilly and Funkie.  Maggi, our hostess for this one calls it Spring is in Full Bloom and describes it like this:

This is my favorite time of the year. Here in the south the trees and shrubs are all blooming and showing their splendor. Many are busy planting their vegetable gardens. The migrating birds have returned to build nests and raise a new family. Your challenge is to create a vintage or shabby chic project that illustrates the magic of spring in bloom!

So, where I live we won't be able to plant for another 5-6 weeks, just lost the last of the mountains of snow a week ago and the temperatures keep plunging every second day so winter coats are still fighting the spring coats for closet space. That means flowers are still a way off for us.  I decided for this challenge I would just feature my new favourite flower stamp set - Country Flowers by Wendy Vecchi.  They look more summer to me but since Mother Nature is off her meds and has no respect for the calendar, I figure we are going straight from winter to summer here.


I started by cutting a panel of card stock and using a scallop circle die to cut a window in it before I ran it through an embossing folder called Victoria.  The panel was distressed and then inked with Dried Marigold and Vintage Photo Distress Ink (Tim Holtz).  I cut a smaller panel of paper from the Spring Farm House paper pad (Prima) and mounted it behind the scallop cut out before I added the panel to the card blank.  I cut a couple of sections from the Amber Moon paper pad (Prima) in my Funkie Junkie Boutique stash to create a couple little pieces if ephemera that I tucked inside the cutout.


Next I stamped the flowers using the solid stamp first using a lighter shade followed by the detail stamp with a darker shade.  The orange flower was stamped with Dried Marigold and Spiced Marmalade and the yellow flowers were stamped with Scattered Straw and Wild Honey.  I used a water brush (Tim Holtz) to smooth out the colour and add a wee bit of shading before I die cut them.  I thought they needed to be toned down a bit so I covered them with some Picket Fence DI and then used some glossy accents to add microbeads to the centres of the flowers.

The leaves were stamped in the same manner as the flowers using Shabby Shutters and Peeled Paint DI.  The butterfly was stamped with Dried Marigold and Gathered Twigs DI and some little Chocolate adhesive pearls (Kaisercraft) were added to the body.  A few more pearls were scattered around to finish off the card.

I hope you will join us for this challenge.  One random winner will receive a gift certificate to go shopping at The Funkie Junkie Boutique and the Design Team will choose their top picks with the overall pick receiving an opportunity to join us as a Guest Designer.

Links to The Funkie Junkie Boutique for products used to create this card:

Prima Marketing Spring Farmhouse 8x8" Paper Pad
Wendy Vecchi MAKE ART Stamp, Die, Stencil Set - Country Flowers
Distress Ink Pads
Scor Tape
Glossy Accents
Kaisercraft Adhesive Pearls - Chocolate
Tim Holtz Water Brush, Detailer Brush Tip TIP33080

Wednesday, March 13, 2019

Fashionably Vintage


It is time for the new challenge at Frilly and Funkie.  Sara Emily, our hostess for this one calls it Pass the Tissues, Please!  She describes it this way:

Since we are still in 'cold season', I always make sure I'm stocked up on tissues in my home, in my purse and in the car. For this theme, I would like to see how you incorporate tissue paper into your vintage or shabby chic project. You can use regular tissues, tissue wrapping paper, sewing patterns or even collage paper, rice papers or tissue wrap designed especially for crafting.

When I made this I was waiting on some new papers I had ordered so I decided to use up some of the pretty and very vintage Graphic 45 papers in my stash. But first I had to decide how to incorporate the tissue theme. I tried making some tissue paper flowers similar to the kind we used to make years ago to plaster on a friends wedding getaway car. Unfortunately the tissue paper is so thin now that didn't turn out well and hit the garbage.I debated using some collage paper but I just used it on a recent card so I wanted something different this time. Then I had an ah-ha moment and decided to make a panel for the card using tissue paper.


Start by crumpling a sheet of tissue into a tight ball.  Notice that the package says premium quality - NOT.  It came from the dollar store but even the tissue from the stationary store isn't much heavier.


Carefully open the ball of tissue up and using a matte medium to adhere it to a piece of heavy card stock.  To make sure it is stuck, use the palm of your hand and pat on it.  Do not rub it or it will tear while it is wet.  Make sure you don't smooth it out too much because you want it to have some texture.


Once it is dry, cut it in strips (I did 3/4" strips) and weave it.  I found it wanted to move and didn't want to stay squared up so I would suggest that you attach it to a grid as you work.  Once you have it woven and really tight, glue all the loose strips on the edge to the strips running the opposite direction and cut it to the size you want.

The final step in making the panel is to ink randomly over it with distress ink to coordinate with the paper you are using.  I used Scattered Straw, Tattered Rose and Bundled Sage (Tim Holtz) since they looked great with the papers from A Ladies Diary (Graphic 45).

The steps to assemble the card are:

1.  Distress the edges of a panel of patterned paper, ink them with Vintage Photo Distress Ink (Tim Holtz) and adhere to the card blank.
2.  Ink the edges of the woven tissue panel with Vintage Photo DI and add it.
3.  Cut a piece of ephemera from the patterned paper, distress and ink the edges and add on top of the woven tissue.
4.  Fussy cut the vintage ladies from the paper pad, ink the edges and add them with some dimensional foam.
5.  Die cut some black branches using the Garden Greens die (Tim Holtz).
6.  Fussy cut the postage stamps from the paper pad, ink the edges and add them on top of the branches.
7.  Die cut three flower petals from each of two patterned papers using the Shabby Posies die (Tammy Tutterow), ink the edges, shape and layer.  Add some shaped black dots for centres.
8.  Punch three petals from a third patterned paper, ink, shape and layer.  Add a button from the chipboard embellishments in the paper collection.
9.  Add all the flowers to the card and then tuck a chipboard clock from the paper collection behind the centre flower to complete the card.

So dig out some tissue type paper and let's see what you can come up with.  The challenge runs through 11:55 pm EST on Tuesday, March 26th.

The following products used to create this card came from The Funkie Junkie Boutique:

Wednesday, January 16, 2019

Key to My Heart


It is the beginning of a new challenge at Frilly and Funkie.  Our hostess for this one is Maggi and she calls it Vintage Valentines.  Here is how she describes the challenge:

It's sweetheart time and what could be more fun than creating Valentine's for our loved ones? For this challenge I want to see vintage valentines in vintage colors like pinks, blues, purples. No bright red please. Show me your vintage side with vintage colors and images. If you need some inspiration, click here to link to a great vintage color palette.

I have created a romantic card with lots of flowers and some gorgeous papers.  It was simple to put together so there are no process photos this time but I will walk you through it.  At the end I will provide links to the supplies I used from The Funkie Junkie Boutique or suggested alternatives in cases where I am using older supplies.

1.  Distress the edges of two pieces of Love Story patterned paper (Prima), one that is 1/4" smaller than the card blank and another that is 1/4" smaller than the first piece and adhere them to the blank.
2.  Add a strip of venise lace across the patterned paper.
3.  Cut the sentiment ephemera from the paper pad and distress it and a romantic image before adding to the card.  I found the image online but have had it in my files for so long that I can't remember the source.
4.  Hand cut a heart from heavy card stock and run it through an embossing folder.
5.  Coat the heart with Versamark, sprinkle with Rose Gold Embossing Powder (Emerald Creek) and heat to melt the powder.  Repeat the process one more time.
6.  Use your fingers to rub some Rose Gold Metallique Wax (Finnabair for Prima) on the raised areas and then glue the heart to the card.
7.  Use the Skeleton Leaves die (Tim Holtz) to cut the leaf branch from white card stock and then cut the leaves from the stem so you have individual leaves.
8.  Add the leaves and a variety of paper flowers to create a bouquet on the card.
9.  Make a loopy bow from pink ribbon (May Arts), add a little bow of white twine and a key charm to it and adhere it to the card.
10.  Punch a butterfly from pink card stock and add some tiny adhesive pearls (Kaisercraft) to the body before adding to the card.

I think this very romantic and very shabby card is so pretty but I need to make something a little less frilly for my husband so I better get at it because Valentine's Day will be here before you know it.  This challenge is the perfect opportunity for you to get your Valentine's cards done so I hope you will create and share the creations with us.

The challenge is open until 11:55 pm EST on Tuesday, January 29th and you have the chance to be the random winner of a gift certificate to The Funkie Junkie Boutique or to be Guest Designer at a future date.

Following are links to supplies used or suggested that can be obtained from The Funkie Junkie Boutique:

Prima Marketing 8x8 Paper Pad - Love Story
Prima Art Alchemy by Finnabair - Metallique Wax- Rose Gold
Emerald Creek Alure Powders - Rose Gold
Sizzix Thinlits Die Set 5pk - Skeleton Leaves by Tim Holtz 663094
Set of 10 Metal Keys for Scrapbooking and Mixed Media
KAISERCRAFT Pearls - Self Adhesive - Pearl
VersaMark Watermark Ink Stamp Pad
Scor-Pal Scor-Tape 1/4" x 27 Yards
Scor-Pal Scor-Tape 1/8" x 27 Yards
Scor-Pal Scor-Tape 3/8" x 27 Yards
Tim Holtz Tonic Studios Paper Distresser 370E
Tim Holtz 5 Inch/ 12.3cm Titanium Snip 816E
Venise Lace Trim - 2 inches - I have this lace too and grabbed one that isn't in stock anymore but this one would be so pretty - now I wish I had used it instead.
Ivory/White Jute Twine - I was out of this great jute twine when I made the card.
May Arts 5/8 Inch Crochet Ribbon - Light Pink - I used a plain ribbon but since it is no longer in stock, I am linking to the lovely crochet ribbon but since it is a bit wider, you might want to just make a couple loops.
Prima Marketing Moon Child Flowers - Crescent Moon and/or
Prima Marketing Moon Child Flowers - Absolute Aurora and/or
Prima Marketing Moon Child Flowers - First Eclipse - These Moon Child flowers would be a nice alternative to the flowers I used from my stash.

Wednesday, December 5, 2018

Recipe Wallet


It is time for the new challenge at Frilly and Funkie and Suzz, who is our hostess for this one is calling it In The Kitchen.  She describes it this way:

This time of the year we find ourselves in the kitchen either preparing food for family and friends or just gathering around with family who is visiting at the kitchen table. Your challenge is to incorporate the kitchen somehow in your project. You can use an object from the kitchen in creating your project or you can use a sentiment or image that reflects the kitchen. You decide how to represent being in your kitchen in your art.

In years past I have made dozens and dozens of cookies at Christmas and most were frozen for eating over the next few months but last year I decided my figure didn't really need that temptation so I didn't bother and this year will be the same.  I still tease my sweet tooth with a dessert once a week but when I want something sweet, I rely on fruit the rest of the time.

Since I usually made cookies from recipes that had been handed down from my Mother, I decided to use this challenge as an opportunity to hand some of these same recipes down to my Granddaughter along with others that had become favourites.  To accomplish this, I created a recipe wallet.

The base for the wallet was made following a tutorial from my teammate Kathy, which can be found HERE.  I then added pockets and tuck spots for recipe cards and a decorated belly band to keep it closed.  I got so intent on making sure I had everything measured correctly and closing properly that I forgot to take process photos but here is how things came together:

The Base
1.  Cut and score a 12" x 12" piece of card stock following Kathy's tutorial.
2.  Round the outer edges with a corner rounder punch.   Note to Santa - I need a better one.
3.  Cut a variety of Christmas papers for each page cutting them so you will have a 1/8" border of card stock showing.  Note: I used mostly Graphic 45 papers from my stash (Winter Wonderland, St. Nicholas and Home Sweet Home) because we have had a postal strike for some time and I have not been able to get new product.  I have linked some alternatives that are in The Funkie Junkie Boutique shop.
4.  Round the corners of the papers and ink the edges with Vintage Photo Distress Ink and then set aside.


5.  Cut pockets from card stock for all the full size pages.  Note:  I cut some where I folded up 1/2" and added side hinges and one was made by folding a piece of card stock in half and adding a thumb notch with a circle punch after the patterned paper was added.
6.  Cut papers to cover the fronts of all the pockets, round the corners and ink with Vintage Photo DI.
7.  Adhere papers to the pocket fronts.


8.  Cut a couple tuck spots from patterned paper, round the corners and ink the edges.
9.  Cut an extra small panel from card stock and patterned paper to use as the closure for the fold ins.

To assemble the wallet base:

1.  Adhere all the papers to the large sections and add the pockets.
2.  Add a thin magnet to the outside of the left fold in and the inside of the extra panel making sure to line the extra panel up since it is still loose at this point.
3.  Add all the patterned papers to the fold in sections and adhere the extra panel to the outside of the right fold in.
4.  Add the tuck spots to the inside of each fold in and add a decorative element to the front of the closure (in this case, an image of a vintage cookbook).


The Belly Band
1.  Cut a strip of card stock 2 1/5" wide and long enough to go around the wallet vertically plus a 2" overlap.  Note: Don't make it really tight because you need to be able to slide it on and off.
2.  Glue the belly band together.
3.  Cut a 3" x 4" piece of card stock and a piece of patterned paper.
4.  Round the corners of the card stock panel and the paper, ink the edges of the paper and add to the panel.
5.  Glue the panel to the centre front of the belly band.
6.  Add a variety of embellishments to the rectangular panel.
  • Ephemera from Graphic 45  Note:  The photo has been altered to remove my Granddaughter's name from the little strip with the postage stamp on it.
  • Loopy seam binding bow dyed with Antique Linen Distress Ink and tied with burlap string
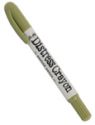
  • Silver tree charm altered with a Peeled Paint Distress Crayon
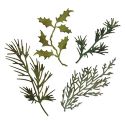
  • Holly leaves cut with Holiday Greens die
  • Little die cut Poinsettia
  • Gingerbread man button from my stash
  • Snowflake that came in a little goodie package from The Funkie Junkie Boutique
  • Punched pine branch
I hope my Granddaughter will give these recipes a try from time to time and if she does, I won't object if she gives me a tiny care package.