Showing posts with label Prima. Show all posts
Wednesday, March 3, 2021
Steampunk Professor
It is tima again for a new challenge at The Funkie Junkie Boutique Blog and this time it is an easy one - Anything Goes.
We are going with an 'Anything Goes' theme for this challenge and are looking forward to seeing your vintage/shabby chic projects.
I thought it might be fun to go Steampunk this time and use stamps from the Tim Holtz Professor set. This set seems to have left the shop but the main image can be found on the Professor 2 set, which is available.
I got going on this and completely forgot to take any process photos - blame it on Covid confinement and my brain turning to mush. Here is how it came together:
- I started with an 8" square canvas panel that I covered with White Gesso. For this one I added an open wooden frame to the back. I thought this could provide a way to hang to canvas panel although I usually just suggest 3M Command Velcro holders, which work really well. They tuck the canvas panel against the wall while the added frame will allow the panel to sit away from the wall.
- The next step was to paint the whole canvas with Buff Acrylic Paint (Dina Wakley).
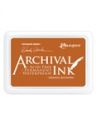
- The Professor and three other images from the stamp set were stamped with Jet Black Archival Ink (Ranger) on tissue paper and then glued to the canvas.
- I used Jet Black Archival Ink to add some stenciling with a stencil called Measured (Tim Holtz) and some Texture Paste to add dimension through a stencil called Blocks Small (Dylusions).
- At this point I decided that the buff paint was lighter than what I wanted so I sprayed the whole canvas with Gathered Twigs Distress Spray Stain (Tim Holtz).
- I did the assemblage part of this in a backwards way because I had intended the canvas to be light and the bits and pieces to be dark so it took way longer and was really messy. Since I have a mixture of metal and wooden pieces, I gave everything a coat of White Gesso and then followed that with a coat of Iced Coffee paint. I should have glued everything in place after the Gesso was applied and before I sprayed the canvas with the ink because then I wouldn't have had to add the Iced Coffee paint but I wasn't thinking that day - or many others right now to be honest.
- After the Iced Coffee paint was dry, it still wasn't dark enough so I added some watered down Umber Acrylic Paint (Dina Wakley).
- Next I glued all the pieces to the canvas - there are gears, screws, washers, charms, buttons and all sorts of electrnoic bits - and then touched up any light spots with the Umber paint. If I had Gathered Twigs Distress Paint, I would have used that and then topped it with the Umber paint.
- The next step was to make all the bits look somewhat rusty. To accomplish that I rubbed a variety of wax pastes on with my fingers - Matte Wax Paste in Patina Green, Rusty Brown and Rusty Red (Prima) and Oxynite and Rose Quartz Treasure Gold Metallic Paste (Connoisseur Studios). I used a soft cloth to buff them and just kept adding the pastes until I got a look I was happy with. You will notice when you go to the shop that there are not many colours of Matte Wax showing right now but check out the March Pre-Order section and scroll down where you will find a number of luscious new colours available to order.
- After I was done with the pastes I decided the background was a bit plain so I masked the bits and pieces off and sprayed and dripped some Tarnished Brass Distress Spray Stain (Tim Holtz) over the background.
I had fun making my Steampunk canvas and hope it will inspire you to join us for the Anything Goes challenge. The challenge can be found HERE and runs until 11:55 pm EST on Tuesday, March 16th.
Supplies list:
Stampers Anonymous Tim Holtz Stamp Set - The Professor 2 CMS395
Stampers Anonymous Tim Holtz Layering Stencils - Measured THS012
Ranger Tim Holtz Distress Spray Stain - Gathered Twigs TSS42310
Ranger Tim Holtz Distress Spray Stain - Tarnished Brass TSS42549
Dina Wakley Media Acrylic Paint - Umber, 1 oz Bottle
Prima Marketing Matte Wax Pastes - Rusty Red, Rusty Brown, Green Patine
Silver and Bronze Tone Key Set
Ranger Jet Black Archival Ink
Connoiseur Studios Treasure Gold Wax Pastes - Rose Quartz, Oxynite
Dina Wakley Buff Acrylic Paint
Dylusions Blocks Small Stencil
White Gesso
Wooden Gears, Steampunk Buttons, Hardware and Electronic Parts, Charms
Wednesday, April 24, 2019
Spring Has Sprung - I Hope
It is time for the new challenge at Frilly and Funkie. Maggi, our hostess for this one calls it Spring is in Full Bloom and describes it like this:
This is my favorite time of the year. Here in the south the trees and shrubs are all blooming and showing their splendor. Many are busy planting their vegetable gardens. The migrating birds have returned to build nests and raise a new family. Your challenge is to create a vintage or shabby chic project that illustrates the magic of spring in bloom!
So, where I live we won't be able to plant for another 5-6 weeks, just lost the last of the mountains of snow a week ago and the temperatures keep plunging every second day so winter coats are still fighting the spring coats for closet space. That means flowers are still a way off for us. I decided for this challenge I would just feature my new favourite flower stamp set - Country Flowers by Wendy Vecchi. They look more summer to me but since Mother Nature is off her meds and has no respect for the calendar, I figure we are going straight from winter to summer here.
I started by cutting a panel of card stock and using a scallop circle die to cut a window in it before I ran it through an embossing folder called Victoria. The panel was distressed and then inked with Dried Marigold and Vintage Photo Distress Ink (Tim Holtz). I cut a smaller panel of paper from the Spring Farm House paper pad (Prima) and mounted it behind the scallop cut out before I added the panel to the card blank. I cut a couple of sections from the Amber Moon paper pad (Prima) in my Funkie Junkie Boutique stash to create a couple little pieces if ephemera that I tucked inside the cutout.
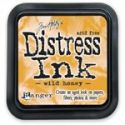
Next I stamped the flowers using the solid stamp first using a lighter shade followed by the detail stamp with a darker shade. The orange flower was stamped with Dried Marigold and Spiced Marmalade and the yellow flowers were stamped with Scattered Straw and Wild Honey. I used a water brush (Tim Holtz) to smooth out the colour and add a wee bit of shading before I die cut them. I thought they needed to be toned down a bit so I covered them with some Picket Fence DI and then used some glossy accents to add microbeads to the centres of the flowers.
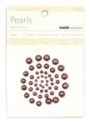
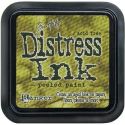
The leaves were stamped in the same manner as the flowers using Shabby Shutters and Peeled Paint DI. The butterfly was stamped with Dried Marigold and Gathered Twigs DI and some little Chocolate adhesive pearls (Kaisercraft) were added to the body. A few more pearls were scattered around to finish off the card.
I hope you will join us for this challenge. One random winner will receive a gift certificate to go shopping at The Funkie Junkie Boutique and the Design Team will choose their top picks with the overall pick receiving an opportunity to join us as a Guest Designer.
Links to The Funkie Junkie Boutique for products used to create this card:
Prima Marketing Spring Farmhouse 8x8" Paper Pad
Wendy Vecchi MAKE ART Stamp, Die, Stencil Set - Country Flowers
Distress Ink Pads
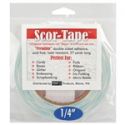
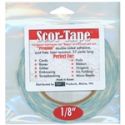
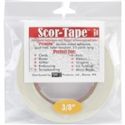
Scor Tape
Glossy Accents
Kaisercraft Adhesive Pearls - Chocolate
Tim Holtz Water Brush, Detailer Brush Tip TIP33080
Wednesday, July 4, 2018
Butterflies and Sunflower
It is time for the new challenge at Frilly and Funkie. This time I am the hostess and I am calling it "B" Happy. Here is how I describe the challenge:
Create a shabby chic or vintage project that makes you happy and features birds, bees and/or butterflies. You must use at least one of these things with wings and it must have a place of prominence on your creation but if you wish to use two or more, please feel free to do that.
If I have to choose between bugs and butterflies, the butterflies are going to win every time although I am not really afraid of bugs - they just aren't as pretty to look at.
I made a shabby card with a little mixed media on it for my offering and here is how I did it:
- Cover a piece of card stock with Botanical Collage Paper to create a background panel (Tim Holtz).
- Dry brush thin coat of White Gesso (Prima) over the panel.
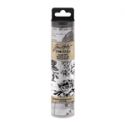
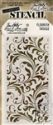
- Use White Embossing Paste (Ranger) through Flourishes Stencil (Tim Holtz) to add texture to the panel.
- Randomly ink panel with Tea Rose and Orange Blossom Archival Ink (Wendy Vecchi).
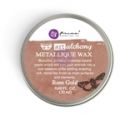
- Distress edges of panel and rub edges with Rose Gold Wax Paste (Prima).
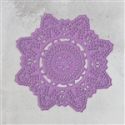
- Die cut a Crochet Doily (Prima) and rub edges with Rose Gold Wax Paste.
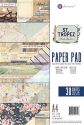
- Cut a tag from St. Tropez paper (Prima), distress edges and ink with Vintage Photo Distress Ink (Tim Holtz).
- Add Burlap string to top of tag.
- Die cut petals from crinoline using Pinwheel Posies die (Tammy Tutterow).
- Dye petals using Wild Honey Distress Ink (Tim Holtz).
- Layer petals and add a carved coconut shell button (upside down) to the centre.
- Die cut leaves from Garden Green die (Tim Holtz), shape and then ink with Peeled Paint Distress Ink (Tim Holtz).
- Punch small butterflies, coat with Rose Gold Wax Paste and add brown pearls (Kaisercraft) for body.
- Coat large butterfly (cut by my husband on his laser machine) with Clear Crackle Paste (Prima).
- Cover with Rose Gold Wax Paste and add brown pearls for body.
- Add background panel to card blank (Bazzill card stock) and adhere crochet doily on top with a strip of venise lace.
- Adhere tag using foam dimensionals and then add the leaves and sunflower.
- Add the butterflies and some copper sequins.
Wednesday, June 6, 2018
Adore
Today is the start of the new challenge at Frilly and Funkie. Sara Emily is the hostess and is calling it Letter Perfect but read what she has to say about it because it isn't quite what you might expect.
According to Merriam Webster, 'letter perfect' is defined as "correct to the smallest detail". We're not asking you to be immaculate or flawless; we just want to see letters or words on your vintage or shabby chic project. They don't have to be the focus, but be sure we can see them!
I recently got a new Prima paper pad called Love Story and thought I would use it to make this card. Here is how it came together:
1. Cut a 6"x12" piece of xx and fold it in half to make the card blank.
2. Cut a large piece for the background, distress it and ink it with Frayed Burlap Distress Ink.
3. Die cut a square doily from the Kraft Core, ink the edges and add it on the right of the card.
4. Cut a smaller panel from the Love Story pad, distress and ink it and add it on the left.
5. Add a strip of venise lace to the smaller panel.
6. Fussy cut some ephemera from the Love Story pad, distress and ink them before adhering them on top of the smaller panel.
7. Use three colours of Kraft Core and the Shabby Posies die to cut two petals of each.
8. Ink the edges, shape the petals and layer them.
9. Add large seed beads to the centres with Glossy Accents.
10. Use the Garden Greens die to cut some branches from the Kraft Core and add them to the card.
11. Make a loopy bow from burlap string and tuck it beside the flowers.
12. Add embossing paste through a Flourish stencil to a chipboard heart.
13. Cover the heart with a coat of White Gesso.
14. Paint the heart with Tattered Rose Distress Paint.
15. Rub White Gold Metallic wax paste over the raised flourish design and adhere the heart to the card.
16. Ink the word Adore (made from mat board) with Frayed Burlap DI and add it to the heart.
I hope you will join us for this fun challenge. One randomly chosen winner from the entries will receive a gift certificate to go shopping at The Funkie Junkie Boutique and the Design Team will choose their top picks with the overall top pick getting an opportunity to guest design with the team.
The following products used to create this card came from The Funkie Junkie Boutique - a great place to shop with the best customer service:
Wednesday, April 25, 2018
Mostly Neutral
It is time for the newest challenge at Frilly and Funkie and this time, Sara Emily is our hostess and calls it Neutral Point of View and describes it this way:
We're seeing a lot of pastel and brighter colors this time of year. For this challenge we're inviting you to step away from all that color and play with your neutral art supplies. You can add a few pops or hints of color, but be sure we see mainly neutrals on your vintage or shabby chic design. (Think black, white, gray, brown, beige, cream, ivory; even gold and silver.)
I went with mostly grey, white and black for my neutrals but there is a tiny bit of pink added.
I started with some grey card stock for my card blank and used a number of papers from a pad called Rose Quartz (Prima). First came a large panel for the background and then I added two smaller panels of different designs along with a couple of tiny fishtail elements.
Next I added a doily cut from a scrap of black card stock using the crochet doily die from Prima and then a sentiment that I fussy cut from one of the papers. Some venise lace was added as a border at the bottom of the sentiment.
The big Prima flower came next with a beaded stick pin that I created from my stash along with a feather and some tulle and then a bit of pink crochet lace ribbon was tucked underneath the flower. Tip: Always keep even the smallest leftover bits of ribbon because they can make great added elements for your cards even if there isn't enough to create a bow.
Finally I altered a metal flower corner with some Snow Cap Mixative Alcohol Ink and added it.
I hope you will join us for this challenge. it runs until 11:55 pm EST on May 8th so you have lots of time to create.
Subscribe to:
Posts (Atom)