Wednesday, March 27, 2019

Tea for Three


It is time for the new challenge at Frilly and Funkie.  Suzz is our hostess for this one and is calling it March Madness.  Here is how she describes it:

Don't be afraid, the challenge isn't going to require you to use basketball inspired images. Instead I want you to be inspired by Alice in Wonderland. I started from this quote of a conversation between the Mad Hatter and Alice: The Mad Hatter asks Alice: "Have I gone Mad?" and Alice replies "I am afraid so. You're entirely bonkers. But I'll tell you a secret. All the best people are." The challenge is to take any idea or concept from this wonderful tale to inspire your project. There are so many wonderful bits or pieces to be inspired by like the Queen of Hearts, the mad hatter, the looking glass, tea party or Alice herself. The possibilities are endless. Anything can be your inspiration but make sure you reference what inspired your art from the story!

I decided that I wouldn't be literal and show images from Alice in Wonderland but rather take my cues from one of the themes in the book - the Mad Hatter's Tea Party and TEA.  Then I proceeded to get carried away and go over the top.


I conned convinced my sweet husband to draw a tea cup for me and then cut some out of chipboard on his laser cutter - best retirement toy purchase ever.  Two cups were inked with Victorian Velvet and one with Weathered Wood Distress Ink (Tim Holtz) because they matched the papers I planned to use perfectly.  The cups were decorated with some little punched pieces that were inked with the two Distress Inks and topped with adhesive pearls.


Next I printed a couple of tea-related quotes onto scraps of white card stock and cut them into tag shapes.  Once cut they were inked with a blend of the Distress Inks and then Translucent Embossing Paste (Wendy Vecchi) was added on top through a Flourish stencil (Tim Holtz).  A hole was punched in the top and some ribbon (May Arts) and fibres from my stash were added.  A few adhesive pearls finished off the tags.

Patterned paper from the Poetic Rose pad (Prima) was used for this card.  The card is 6"x6" so first I cut a panel slightly smaller and distressed the edges before adhering it to the front.  The next step was to cut three panels 3 1/2"x5 1/4", 2 1/2"x5 1/4" and 1 1/2"x5 1/4".  I distressed the edges of each panel and added a strip of lace from my Funkie Junkie Boutique stash across the top.  I used some scraps of card stock to create pockets on the back of the two narrower panels to accommodate the tags.

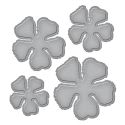
To assemble the front, I adhered the background first and then added the three panels.  The tea cups were added to the side and a trio of Rose Quartz flowers (Prima) with some ribbon bits (May Arts) tucked between them was added to the left side.  The flowers and ribbon are also from my Funkie Junkie Boutique stash.

A silver Tea Pot charm was altered with some Snow Cap Mixative Alcohol Ink (Tim Holtz), sanded a bit to give it an antique look and added to the card with a piece of the pink ribbon.


I decorated the inside with a couple of paper panels on the right side and a large pocket to hold some tea bags on the left side.

I know this card is really shabby but it certainly talks tea to me. I hope you will join us for the March Madness challenge,

Ranger Tim Holtz Distress Ink Pad - Victorian Velvet TIM27195
Ranger Tim Holtz Distress Ink Pad - Weathered Wood TIM20257
Stampers Anonymous Tim Holtz Layering Stencils - Flourish THS032
Ranger Adirondack Alcohol Ink - Snow Cap Mixative AL31611
Prima Marketing A4 Paper Pad - Poetic Paper
Studio 490 Wendy Vecchi Embossing Paste - Translucent WVPASTETRN
Scor-Pal Scor-Tape 1/4" x 27 Yards
Scor-Pal Scor-Tape 3/8" x 27 Yards #SP214
Tim Holtz Tonic Studios Paper Distresser 370E
Tim Holtz 5 Inch/ 12.3cm Titanium Snip 816E
Ranger Inkssentials Mini Ink Blending Tool - With 4 Blending Foams IBT40965
Ranger Inkssentials Alcohol Ink Applicator With 10 Blending Felts TIM20745
Venise Lace Trim - 1/2 inch wide

Saturday, March 16, 2019

Saturday Showcase at Frilly and Funkie.

I am presenting the Saturday Showcase at Frilly and Funkie.  My showcase is all about Tim Holtz Wildflower Stems #2 and here is a peek at one of the projects I have made.


To get all the details and see other projects made with the same die set, just go to the Frilly and Funkie blog here.

Wednesday, March 13, 2019

Fashionably Vintage


It is time for the new challenge at Frilly and Funkie.  Sara Emily, our hostess for this one calls it Pass the Tissues, Please!  She describes it this way:

Since we are still in 'cold season', I always make sure I'm stocked up on tissues in my home, in my purse and in the car. For this theme, I would like to see how you incorporate tissue paper into your vintage or shabby chic project. You can use regular tissues, tissue wrapping paper, sewing patterns or even collage paper, rice papers or tissue wrap designed especially for crafting.

When I made this I was waiting on some new papers I had ordered so I decided to use up some of the pretty and very vintage Graphic 45 papers in my stash. But first I had to decide how to incorporate the tissue theme. I tried making some tissue paper flowers similar to the kind we used to make years ago to plaster on a friends wedding getaway car. Unfortunately the tissue paper is so thin now that didn't turn out well and hit the garbage.I debated using some collage paper but I just used it on a recent card so I wanted something different this time. Then I had an ah-ha moment and decided to make a panel for the card using tissue paper.


Start by crumpling a sheet of tissue into a tight ball.  Notice that the package says premium quality - NOT.  It came from the dollar store but even the tissue from the stationary store isn't much heavier.


Carefully open the ball of tissue up and using a matte medium to adhere it to a piece of heavy card stock.  To make sure it is stuck, use the palm of your hand and pat on it.  Do not rub it or it will tear while it is wet.  Make sure you don't smooth it out too much because you want it to have some texture.


Once it is dry, cut it in strips (I did 3/4" strips) and weave it.  I found it wanted to move and didn't want to stay squared up so I would suggest that you attach it to a grid as you work.  Once you have it woven and really tight, glue all the loose strips on the edge to the strips running the opposite direction and cut it to the size you want.

The final step in making the panel is to ink randomly over it with distress ink to coordinate with the paper you are using.  I used Scattered Straw, Tattered Rose and Bundled Sage (Tim Holtz) since they looked great with the papers from A Ladies Diary (Graphic 45).

The steps to assemble the card are:

1.  Distress the edges of a panel of patterned paper, ink them with Vintage Photo Distress Ink (Tim Holtz) and adhere to the card blank.
2.  Ink the edges of the woven tissue panel with Vintage Photo DI and add it.
3.  Cut a piece of ephemera from the patterned paper, distress and ink the edges and add on top of the woven tissue.
4.  Fussy cut the vintage ladies from the paper pad, ink the edges and add them with some dimensional foam.
5.  Die cut some black branches using the Garden Greens die (Tim Holtz).
6.  Fussy cut the postage stamps from the paper pad, ink the edges and add them on top of the branches.
7.  Die cut three flower petals from each of two patterned papers using the Shabby Posies die (Tammy Tutterow), ink the edges, shape and layer.  Add some shaped black dots for centres.
8.  Punch three petals from a third patterned paper, ink, shape and layer.  Add a button from the chipboard embellishments in the paper collection.
9.  Add all the flowers to the card and then tuck a chipboard clock from the paper collection behind the centre flower to complete the card.

So dig out some tissue type paper and let's see what you can come up with.  The challenge runs through 11:55 pm EST on Tuesday, March 26th.

The following products used to create this card came from The Funkie Junkie Boutique: