Sunday, June 30, 2019

Inspired by Seth Apter


I love the work of Seth Apter, a fabulous artist from New York and when he offered an online workshop through Stencil Girl I was quick to sign up.  I have been collecting the supplies for the project he demonstrates in the workshop but until I have everything on hand, I decided to tackle a background using things from my stash but following his instructions.  This is my first attempt and I thought I would turn it into a butterfly canvas.

Since I was doing this just for fun, I didn't take any process photos but will try to describe what I did - hope I remember since I did this a couple months ago.

I started by covering a 6" square canvas board with black gesso and then added a variety of marks with acrylic paints through stencils.  Splashes of colour were added with Gelatos but the board was so rough, I found it didn't blend out as it would have on a smooth card or paper surface.  Seth's Patina Oxide Baked Texture embossing powder was added in random spots by using an embossing pen to make something for the powder to adhere to.  Some Aquamarine gilding wax was also rubbed here and there.


Next I created a couple frames for my butterfly by die cutting two elements from Seth's Drip Dry die set.  They were thickly coated with black gesso and then rubbed with some purple gilding wax.  The butterfly is a Tim Holtz die cut and I painted it with some metallic paints and then used a fine Micron pen to draw in the lines before I added it to the canvas.


The body of the butterfly is a turn screw from an old computer that I wrapped with embroidery floss, wire and a torn strip of fabric.  This wrapping technique is something Seth demonstrated on a craft segment on YouTube.

I haven't entered any challenges for a while so I thought for a change I might enter these ones:

Creative Artiste Challenge #50 - Anything Mixed Media Goes
More Mixed Media Challenge - Anything Goes + Optional Colour Purple

Saturday, June 22, 2019

Saturday Showcase - Tim Holtz Transparent Wings


It is my turn to present the Saturday Showcase at Frilly and Funkie and I have made a couple of projects with the Tim Holtz Transparent Wings to share with you. 


Here is a peek at one of the projects.  To get all the details and see what else I made, pop over to Frilly and Funkie.

Wednesday, June 19, 2019

Home = Kitchen


It is time for the new challenge at Frilly and Funkie.  Sara Emily is our hostess this time and is calling it Home, Sweet, Home.  She describes it this way:

Whether your house is grand or modest, neat or messy, there's no place like home. Houses get bought and sold, but home stays with you forever. For this challenge, I would like to see how you interpret what home means to you on your vintage or shabby chic project.

When I think of home I always think of the kitchen and cooking.  I love to cook and when we have company they always hang out in the kitchen so it has become the centre of our home.  My late Mother was a fabulous cook so I learned to cook at a very young age and in turn taught my daughter to cook.  I thought I would make a scrapbook layout of my daughter cooking because I was sure I had some photos of her.

In these photos, she is three in the one on the right and is making bran muffins on one of her visits to my Mom.  She is five in the one on the left and is making perogies with my Mother-in-Law (I see playing cards on the table so I suppose Go Fish was played on breaks).  In the one in the middle she is seven and is kneading bread and I am amazed at how focused she was.  She is a wonderful cook and is a far better bread maker than I am.  She makes sourdough bread almost weekly and it is to die for.  Despite my ability to cook, I have never made good scalloped potatoes but she sure can.

One funny memory of her cooking was coming home from work to a lovely clean kitchen until I happened to look up and saw purple spots on the ceiling.  She had decided to make something with blueberries in the blender and forgot to put the lid on tight.  Another time she was so pleased with herself because she made some no bake cookies just before Christmas without any assistance and they were huge and really, really, really sweet -  almost like fondant icing wrapped around a maraschino cherry.  We suggested she might like to take them to school for her classmates and she was thrilled that we would let her do that - whew, dodged that one!

So here is how this layout came together.  Once I found the photos, I scanned them, converted them to grayscale and cleaned them up as best I could before I printed them.


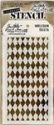
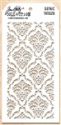
I started with a 12"x12" piece of mat board to use as my substrate and used collage medium to carefully cover it with vintage images of recipes, which I then proceeded to cover up - go figure.   First I used some texture paste (Ranger) and a Harlequin stencil (Tim Holtz) to add a bit of texture in two corners. and then I dry brushed some White Gesso (Dina Wakley) over it.


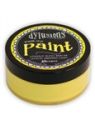
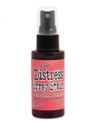
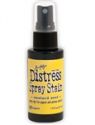
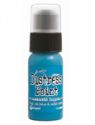
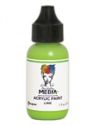
A dry brushed coat of Lemon Zest Acrylic Paint (Dylusions) came next.  That was far brighter than I wanted so I added some spray inks - Abandoned Coral and Mustard Seed Distress Spray Stain (Tim Holtz), Blazing Sun Glitz Spritz and Burnished Brass Moon Shadow Mist (Lindys) and White Linen (Dylusions).


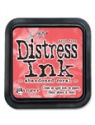
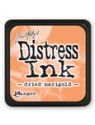
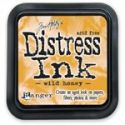
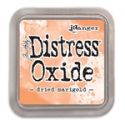
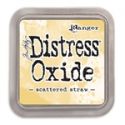
When the sprays were dry I added some Scattered Straw and Dried Marigold Distress Oxide along with Dried Marigold, Wild Honey and Abandoned Coral Distress Ink (Tim Holtz).


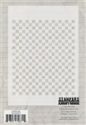
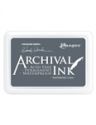
Next I added some stenciling with Watering Can Archival Ink (Wendy Vecchi) and a Checkmate stencil (Wendy Vecchi) and Abandoned Coral DI and Mini Chicken Wire Reversed stencil (TCW).

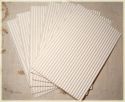
Now that I had covered the recipes, it was time to add the layout.  I started with a strip of venise lace followed by three strips of papers from the Garden Goddess paper pad (Graphic 45) that I distressed and then a couple of strips of white corrugated cardboard.

The photos were distressed and mounted on some scraps of plain paper from the Garden Goddess pad before they were added on top of the corrugated cardboard.

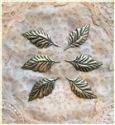
I die cut a couple of flourishes from scraps of white card stock and adhered them before adding a variety of paper flowers (Wild Orchid Crafts and Recollections).  A filigree butterfly that my husband cut for me was inked with Dried Marigold and Scattered Straw DO (Tim Holtz) and then added some dollar store adhesive pearls to the body.  Finally I used the Alpha Numeric die set (Tim Holtz #660056) in my stash to cut the word SWEET from some scraps of card stock.

I hope you will join us for this great challenge.  One randomly chosen winner will receive a gift certificate to go shopping at The Funkie Junkie Boutique - always great prices and fabulous customer service.

The design team will choose their top picks with the overall winner receiving an opportunity to be a Guest Designer at a future date.

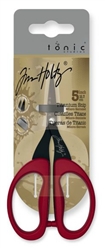
Following are links to products used from The Funkie Junkie Boutique:

Graphic 45 - Garden Goddess - 12x12" Patterns & Solids Pad

Wednesday, June 5, 2019

Embellishments, Trinkets & Trims


The new challenge at Frilly and Funkie begins today and Jenny is the hostess this time.  She calls it Embellishments, Trinkets and Trims and here is what she has to say about it:

Linda sells a huge array of beautiful embellishments, trinkets and trims in her store, from metal filigree pieces and charms to buttons, laces and ribbons. They can be the important focal point on a project or the final finishing touches that complete it. However you wish to use them lets see those embellishments, trinkets and trims in action on your vintage or shabby chic entries.


I decided to alter a very inexpensive composition notebook and make the embellishments the focal point.


I gave the cover a coat of White Gesso (Dina Wakley) and then added a layer of torn strips of Melange Tissue Wrap (Tim Holtz) using Collage Medium (Tim Holtz) to adhere it.


The next step was to add some texture in random areas on the front and back with a stencil called Gothic (Tim Holtz) and texture paste (Ranger).  Once the paste was dry I gave it another coat of White Gesso.


Then I used Gel Medium to adhere all sorts of embellishments on the front cover - venise lace, buttons, metals and gems (some seed beads were added later).


A good coat of White Gesso was added next.  Tip:  Insert a piece of waxed or parchment paper inside the front and back cover to keep the paint from seeping inside.


Now it was time for lots of paint layers.  I used Cracked Pistachio and Mermaid Lagoon Distress Paint (Tim Holtz) along with Lime and Peacock Acrylic Paint (Dina Wakley).  More lime was added after the photo was taken.


I used some Garden Patina Archival Ink (Wendy Vecchi) and two stencils, Checkmate and Dots and Stripes Borders (Wendy Vecchi) to add some random stenciling on the front and back.

Once the paints were dry I rubbed wax paste on all the raised areas.  I used some from my stash but will link to some in the shop that would work well.  Then I splattered some watered down White Gesso over the outside.

Since the inside covers had text on them, I carefully covered them with White Gesso and then used Collage Medium to add some turquoise tissue (Dollarama) that I crumpled up and then carefully opened up again.

I hope you will dig into your stash and create something to share with us.  The Design Team will choose their top picks with the overall winner receiving an opportunity to be a Guest Designer at a future date.  One randomly chosen winner will receive a gift certificate to go shopping at The Funkie Junkie Boutique.

Links to The Funkie Junkie Boutique:

Tim Holtz Idea-ology Adornments Floral TH93789