Wednesday, August 28, 2019

Bits and Bobs


I love this title and it is just what Suzz, our hostess is calling the new challenge at The Funkie Junkie Boutique Blog.  Here is what she has to say about it:

"Do you have a pile of leftover scraps from projects previously made or even a half finished project waiting for you to get the time to complete it? This is the challenge for you! It is time to pull out those scraps, remnants or half finished projects and pull them together into a fabulous shabby chic or vintage project. Make sure to mention in your post what part of your project was a scrap or remnant."


I have a couple boxes where I save my bits and bobs.  One box holds backgrounds that I made and didn't use or only used a portion of.  The other box holds extras of elements I made for various projects or items I have pulled off old projects and was planning to recycle.


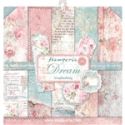
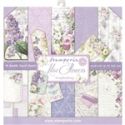
On my first dig through the boxes, I grabbed these items because I decided to use the Stamperia Lilac Flowers paper collection for my card and thought they might work.  In the end I used only some of what you see here and found other elements in the box I thought would work better.

Here is how this card came together with the bits and bobs items marked in bold:

  • Cut a layer of purple card stock and add a layer of patterned paper for the background
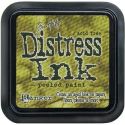
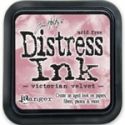
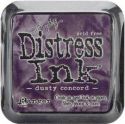
  • Ink the edges of the patterned paper (and all papers) with Dusty Concord Distress Ink (Tim Holtz)
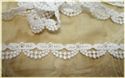
  • Add one half of a die cut doily (Prima) to the patterned paper background
  • Cut an angled pocket from the purple card stock with an extra amount on the sides and bottom
  • Score the extra amounts and fold them to create some depth to the pocket
  • Cut patterned paper and add to the front of the pocket
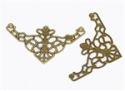
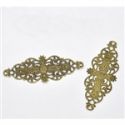
  • Add a die cut border (Spellbinders) to the patterned paper pocket front
  • Punch a circle from the patterned paper and add to the back of a resin frame (Dollarama) before adding to the pocket
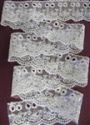
  • Add a piece of lace to the pocket
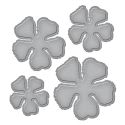
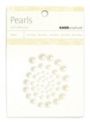
  • Add adhesive pearls (Kaisercraft) to the centres of three flowers (See Note) before gluing them to the pocket
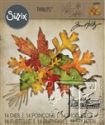
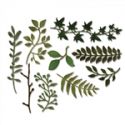
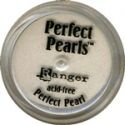
  • Coat some die cut branches (Tim Holtz) with Perfect Pearls (Ranger) and tuck in the flowers
  • Add a stick pin made from pearls and beads


  • Cut tags from the patterned paper and top with satin ribbon (Fabricland) and adhesive pearls (Kaisercraft)
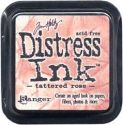
  • Make a tag from some embossed card stock (Tim Holtz) that has been inked with Dusty Concord Distress Ink (Tim Holtz) and top with satin ribbon and an adhesive pearl


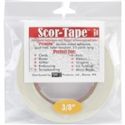
  • Cut the envelope image from the paper collection, score, fold and adhere together using double sided tape (Scor) making sure not to go all the way to the top with the tape so you can tuck the flap inside
  • Create a gift card insert with purple card stock and patterned paper

Note:  The flowers were made as follows:

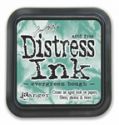
  • One flower is made from layers of die cut crinoline petals (Tammy Tutterow Shabby Posies) dyed with Distress Ink (Tim Holtz)
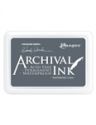
  • One flower is made from die cut card stock petals (Tammy Tutterow Shabby Posies) inked with Distress Ink (Tim Holtz) and stamped with a script stamp and Watering Can Archival Ink (Wendy Vecchi)
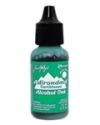
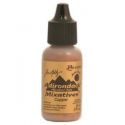
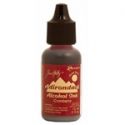
  • One flower is made from hand cut paper-backed metal foil tape (Home Depot) petals that have been embossed and inked with alcohol inks (Tim Holtz)

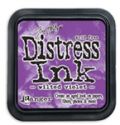
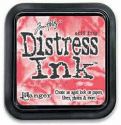
Unfortunately I don't recall exactly what colour inks I used since the flowers were made some time ago.  If I had to take a guess though, I would say the Distress Inks might be Wilted Violet and Worn Lipstick and the Alcohol Inks might be Purple Twilight and Cranberry so I will link those but don't hold me to it.

I hope you will grab some of your bits and bobs and create something for the challenge.  It runs through 11:55 pm EST on Tuesday, September 10th.  As always the Design Team will choose their top picks with the overall winner receiving an invitation to be a Guest Designer at a future date.  Also, one randomly chosen winner will receive a gift certificate to go shopping at The Funkie Junkie Boutique.

Supplies list, including links to The Funkie Junkie Boutique:

French Script Texture Fade (Tim Holtz)
Paper-Backed Foil Tape (Home Depot)
Paisley Palooza Embossing Folder (Sizzix
Crochet Doily Die (Prima)
Ironwork Accents Die (Spellbinders)
Script Stamp (Recollections)
Card Stock (Recollections)
Pearl Headed Pin (Fabricland)
Beads (Bead Landing)
Resin Frame (Dollarama)
Satin Ribbon (Fabricland)


Wednesday, August 21, 2019

Denim Collage


Today, I am sharing a new "just for fun" project.  I made this denim collage with all sorts of scraps and bits from both my sewing and craft stash.

Items such as muslin, burlap, lace, calico, canvas, beads, buttons and fibres along with a few metals have been stitched or glued onto the denim squares.  The squares were then mounted on a 12" x 12" stretched canvas that has some texture from Molding Paste (Golden) through a Harlequin stencil (TCW) and a tiny dots border stencil that was cut by my husband.  The canvas also has a light wash of watered-down Khaki Acrylic Paint (Craftsmart).

This was not difficult to do and it certainly was lots of fun.  Now off to play with something else.

Wednesday, August 14, 2019

Zig Zag Mini Album - Again


It is time for the new challenge at The Funkie Junkie Boutique Blog and Sara Emily, our hostess for the challenge, is calling it 'Let's Do It Again'.  Here is what she has to say about it:

Have you ever made something that you wish you could do over? Perhaps it was a technique you tried and didn't get the results you were hoping for. Maybe you didn't have just the right product you wanted to make your project just perfect. Or maybe a friend asked you to make something like it for them. Now's your chance for a do-over. Choose one of your own posted vintage or shabby chic projects and do it over with a bit of a twist. Be sure to link back to the post of the project you are making over and tell us why you wanted to do it a second time and what's different about it this time. We like to see your entry be in the vintage or shabby chic style we prefer.

I am constantly wishing I had done a project differently so when I started to think about which project I would do over, I was overwhelmed. In the end I decided I would remake this small zig zag mini album I made for a Saturday Showcase some time ago and then I got completely carried away.

This time the plan was to make a larger album with fabric covers and use one paper collection from Stamperia for the inside.  I had intended to make it so that photo mats for 4" x 6" photos would fit but I miscalculated my measurements for the zig zag base by 1/4" on both the long and short side and of course I didn't discover that until it was put together with all the pockets, etc. and I made the first photo mat.  All was not lost though because I found out that Walmart will print 3" x 4" photos so I made mats for that size as well as some smaller sizes they print, such as 2" x 3" and 1.3" x 2".

Here are the measurements and instructions for the base album that I should have made to accommodate 4" x 6" prints and then I will walk you through the album - be prepared for a long post.

Pages:

  • Cut 7 pieces 4 1/2" x 7" out of heavy card stock
  • Score the 7 pieces on the long side at 3/8" and 1/2" (This will give you a little 1/8" gusset to accommodate thickness created with pockets, inserts and embellishments)
  • Fold all the score lines and go over them with a bone folder (I found it easiest to fold the 1/2" line first and then the 3/8" line next)\
  • Cut both ends of the 3/8" strip on a slight angle on each of the 7 pieces (optional)
  • Cut 1 piece 4 1/2" x 6 1/2" out of heavy card stock


  • Join each of the pieces together by adhering the inside of the 3/8" strip to the plain edge of another piece making sure you are creating a zig zag as you go along.  You will end with the 8th piece that has no scored lines.  NOTE:  the outside pieces on each end will not be decorated as they are the pieces that will be glued to the cover insides
  • Ink the zig zag along the edges and in the gussets on both sides (I used Frayed Burlap Distress Ink for all inking)

Covers:

  • Cut 2 pieces of chipboard or mat board 5" x 7"
  • Cut 2 pieces of quilt batting 5" x 7"
  • Glue the quilt batting to each cover
  • Cut 2 pieces of fabric 7" x 9"


  • Centre the batting side of the cover on the wrong side of the fabric and glue the excess fabric to the cover making sure to pull tight so the finished cover will be smooth and make sure to tuck the corners so they will be neat
  • Set the covers aside until the inside is done
  • Cut 2 strips of ribbon long enough to make bows that will accommodate the thickness of the finished inside (optional if you think your album will stay closed on its own - it turns out mine would have so I could have left the ribbon out)
  • Glue one strip of ribbon across the inside of each cover
  • Cut 2 pieces of card stock 4 3/4" x 6 3/4" and ink the edges
  • Glue a piece to the inside of each cover over the ribbon
To finish the album glue the unfinished cards stock pages to each cover inside.  You will end up with 8 pages on the front and 6 pages on the back.

Here is a look at the album with peeks at the mats and journaling cards.  In addition to the Stamperia paper, I did use a bit of coffee dyed paper that I made and then over inked with Distress Inks. 

Starting with the floral cover and flipping to the left . . . .


Left side - pocket decorated with piece die cut from Rose Gold Metallic Kraft Stock and inked with a blend of Mushroom and Copper Mixative Alcohol Ink - includes folded photo mat

Right Side - pocket decorated with little postage stamps that have been stamped with a tiny bee using Watering Can Archival Ink - includes 2 tri-fold photo mats


Left side - pocket decorated with a belly band with text from the paper collection - includes tabbed photo mat and small photo mat/journaling card

Right Side - two corner pockets decorated with punched flowers and leaves die cut from Rose Gold Metallic Kraft Stock and the Garden Greens die - includes two tags


Left Side - pocket decorated with border punched strip - includes folded photo mat

Right Side - tuck spot made from die cut postage stamp shape cut in half and decorated with a smaller version - includes journaling card and tag


Left Side - pocket decorated with a tuck spot with rounded corners and a die cut flourish heat embossed with Patina Oxide Baked Texture - includes tabbed photo mat and small photo mat/journaling card

Right Side - vertical band decorated with part of a circle element cut from the paper collection - includes 2 journaling cards


Back cover - not decorated so the album will lie flat on a table


Left Side - corner pocket with overlay embossed with French Script Texture Fade and filigree metal corner altered with mixture of Mushroom and Clover Alcohol Ink - includes large photo mat

Right Side - pocket decorated with punched border strip - includes folded photo mat


Left Side - two pockets decorated with punched flowers - includes tiny photo mats/journaling cards

Right Side - pocket decorated with filigree metal heat embossed with Patina Oxide Baked Texture - includes folded photo mat


Left Side - postage stamp tuck spot - includes journaling card and tag

Right Side - band decorated with piece die cut from Turquoise Metallic Kraft Stock and inked with mixture of Mushroom and Copper Mixative Alcohol Inks - includes 2 journaling cards


The front again - decorated with lace, layered flowers, die cut leaves cut from the Fall Foliage die set and Rose Gold Metallic Kraft Stock inked with a mixture of Mushroom and Copper Mixative Alcohol inks, a dragonfly die cut using the Geo Insects die set and heat embossed with Aegean Sea Baked Velvet (from the Mediterranean set) and finally some text from the paper collection

I had intended to take a picture of the album spread open all the way but because it is 51 1/2" long, I could not get it all in the camera view and if I could have it probably would have been so tiny you would have needed a magnifying glass to see it.

If you managed to stay with me, I hope you will join in on the challenge and share your remake.  One randomly chosen winner will receive a gift certificate to shop at The Funkie Junkie Boutique and the Design Team will their top picks with the overall winner receiving a chance to be a Guest Designer at a future date.

Supplies list with links to The Funkie Junkie Boutique:

Flower Punch - EK Success
Small Circle Punch - EK Success
Venetian Motifs Die Set - Spellbinders
Postage Stamps Die Set - Spellbinders
French Script Texture Fade - Tim Holtz
Flower Petals - Recollections
Tiny Roses - Wild Orchid Crafts
3/8" Cream Satin Ribbon - Kate's Paperie
1/4" Cream Satin Ribbon - Fabricland
Fabric and Batting - Fabricland
Border Punches - Martha Stewart
Tim Holtz Idea-ology 8 x 8 Metallic 2 Kraft Stock - Rose Gold & Copper TH93780
Tim Holtz Idea-ology 8 x 8 Metallic Jewels Kraft Stock
Seth Apter Baked Velvet - Mediterranean Kit
Sizzix Chapter 2 Tim Holtz Thinlits Geo Insects 664180