Showing posts with label canvas. Show all posts

Wednesday, January 6, 2021

Life is a Beautiful Ride


Today is the start of a new challenge at The Funkie Junkie Boutique Blog.  I am the hostess this time and am calling it Put A Good Word In!  Here is how I describe the challenge:

Create a shabby chic or vintage projects that includes a word or words that are positive or happy or uplifting in nature. Single words or sentiments/quotes can be used. Given what we have all been through for the last months nothing sad or negative please.

I was digging through some untouched ignored bins in my craft space and came across this resin bicycle that I bought on a visit to the US a few years ago and thought it was high time I used it. Then I set about trying to come up with some appropriate words to go with it. I found this sentiment online and it spoke volumes to me.

At any time in our life and especially in times like this it is so easy to think nothing is beautiful but even in the midst of all the problems and trials we experience there is something beautiful to latch on to. Right now it might be that we have become closer to our families because we are spending more time together or we can rejoice because our communities have stepped up in a big way to help each other and especially those that are alone. It might be that we can be thankful for all the technology that we have so we can stay connected or it might be something fun like having had the time to learn something new. It is true that the times are tough but life is still a beautiful ride even with obstacles.

I thought I would make a whimsical little canvas to showcase my bicycle. I used a variety of Dina Wakley acrylic paints along with scraps of paper from Graphic 45 and some dies from Tim Holtz and inks from Tim and Wendy Vecchi. Normally I would share my process with you but this time I am just giving you a sneak peek.  I am presenting the Saturday Showcase on January 9th where I will detail how I created it so save the date and check out the post on The Funkie Junkie Boutique Blog.

Wednesday, September 2, 2020

Bird on a Branch


The new challenge at The Funkie Junkie Boutique Blog starts today and Suzz, our hostess is calling it Birds. Here is how she describes it:

For this Challenge I want you to be inspired by our flying friends. You can take the challenge literally and have images or die cuts of birds on your art, you can be inspired by the words describing birds or even showcase their homes. Make sure to share with us how you were inspired by the birds.

I decided to take the challenge literally and show a bird on my project. I was inspired by a canvas I saw online with a bird and a branch but then went off in my own direction.

I started by covering an 8 x 10" canvas board with White Gesso. I used some Wild Honeysuckle Coral Stardust Ink Spray and some Roast Chestnut IZink Pigment Ink like watercolours by mixing them in small puddles of water on my kraft sheet and then painting them onto the canvas. I did a layer of the Coral first, the the Roast Chestnut and then more Coral. Note: I forgot to take a photo at the end of this step but I am sure you can see the colour below the stenciling.


Next I added some stenciling with a Mini Ledger Stencil and some Coffee Archival Ink. I also used a Criss-Cross stencil I designed myself and my husband cut to add some texture with Textue Paste.


My husband designed and cut the branch with leaves from chipboard for me and I gave it a coat of White Gesso. I used my finger to add some roughness on the wood with texture paste and then painted it with Melted Chocolate Acrylic Paint followed by some Umber Acrylic Paint. The leaves were painted with Aloe Acrylic Paint.

The flowers were punched from a paper collection called Garden Goddess, the edges inked with Gathered Twigs Distress Ink and some tiny dollar store gems were added to the centres.


The little bird is cut from some fine corrugated cardboard that I had in my stash. I have a large stencil of different birds and I just traced him and then cut him out. Next I have him a coat of White Gesso followed by some Sedona Acrylic Paint and then a dry brushing of more Gesso. Once the paint was dry I rubbed some Rose Quartz wax paste over the raised areas and then added a gem for an eye.


The clock was cut from a cracker box by my husband and then I coated it with Umber Acrylic Paint, a sprinkling of playground sand and finally a coat of Mod Podge.


I ran a strip of Rose Gold Metallics Kraft Stock through an embossing folder called Paisley Palooza to create a textured strip for the background. I also die cut a scalloped circle from card stock, ran it through a Bubble embossing folder, inked the edges with Gathered Twigs DI and dry brushed White Gesso onto the highlights. Sorry I forgot to photograph this step - brain turning to mush being home for so long.

I die cut a circle from cracker box material, coated it with White Gesso and then inked it with Dried Marigold Distress Ink. I used the Bubble stencil and some Coffee Archival Ink to add some markings and then covered the circle with some Clear Rock Candy Distress Crackle Paste. The Crackle Paste was really thick (a.k.a. pretty well dead) so it didn't really crack well.


To assemble the canvas, I put the metallic strip down first, followed by the scalloped circle, the clock and the stenciled circle. The branch was added next followed by the bird. Finally I added some iridescent sequins and a little Small Talk sticker that I inked with Gathered Twigs.

I hope you will join us for the challenge, which runs until 11:55 pm EDT on Tuesday, September 15th. One randomly chosen winner will receive a gift certificate to shop at The Funkie Junkie Boutique and the Design Team will choose their Top 4 Picks with the overall winner receiving an opportunity to be a Guest Designer at a future date.

Supplies list:

Dina Wakley Media Mediums - White Gesso MDM41689
Seth Apter Izink Pigment - Roast Chestnut 80638
Dina Wakley Acrylic Paint - Aloe, Umber, Sedona
Dylusions Paints, Melted Chocolate DYP46011
Ranger Archival Ink Pad - Coffee AIP31451
Tim Holtz Distress Ink Pads - Gathered Twigs, Dried Marigold
Stampers Anonymous Tim Holtz Layering Stencils - Bubble THS002
Tim Holtz Idea-ology 8 x 8 Metallic 2 Kraft Stock - Rose Gold & Copper TH93780
Ranger Texture Paste Opaque Matte INK44444
Scor Tape
Ranger Inkssentials Mini Ink Blending Tool - With 4 Blending Foams IBT40965
Tim Holtz Distress Crackle Paint - Clear Rock Candy
Tim Holtz Idea-ology Small Talk Stickers
Graphic 45 Garden Goddess 12" x 12" Paper
Lindy's Wild Honeysuckle Coral Stardust Ink Spray
Treasure Gold Rose Quartz Wax Paste
Mini Ledger & Criss Cross Stencils
Circle and Scalloped Circle Dies
Mini Flower Punch
Micro Gems
Chipboard Branch with Leaves & Chipboard Clock Iridescent Sequins

Wednesday, August 5, 2020

Stenciled Canvas


Today is the start of the new challenge at The Funkie Junkie Boutique Blog.  Jenny is our hostess for this one and she is calling it Stencilmania.  Here is how she describes it:

Stencils are such versatile tools - you can add colour through them, add texture and patterns with them, draw with them, emboss with them, print with them and so much more. So for this challenge we want you to get creative with your stencils, adding as many layers as you dare to create a vintage or shabby chic project to share with us all.

I thought it might be fun to make a mixed media canvas this time and here is how it came together.

I started with a round canvas that is 7 3/4" in diameter and was cut by my husband from the heavy chipboard that you find inside the vinyl covers of three ring binders - crafter's recycling at its finest.


Next I gave both sides a good coat of White Gesso (Dina Wakley) and then added some stenciling with Texture Paste (Ranger). I used the Bubble and Burlap stencils (Tim Holtz) and one I call Cracks that my husband made for me.


The canvas was covered with Aloe Acrylic Paint (Dina Wakley) and then using my ratty bristle brush I added some Sand Acrylic Paint (Dina Wakley).


I added lots of colour next using Burnt Orange and Roast Chestnut IZink Pigment Inks (Seth Apter) and Umber, Cheddar and Sedona Scribble Sticks(Dina Wakley)

Using a Sizzix Circles Die Set I cut a couple of circles from cracker boxes, coated them with White Gesso on the plain side and then painted the larger one with Umber Acrylic Paint (Dina Wakley) and the smaller one with Sand Acrylic Paint (Dina Wakley).


I wanted a bit of interest on the larger circle so I thought maybe I could get a wet or tone on tone pattern look by adding some Walnut Stain Distress Oxide (Tim Holtz) through the burlap stencil (Tim Holtz). It did look wet but wasn't very visible. I took my heat gun to it to set it and was surprised but happy to see the stenciling turn a lighter colour and pop against the dark brown.


The next step was to colour the butterfly, which is a die cut from the Tattered Butterflies set (Tim Holtz). I used the Burnt Orange and Roast Chestnut IZink Pigment Inks and then coloured the body with Umber Acrylic Paint.


Embellishments were prepared next. A strip of French Design Tape (Tim Holtz) was added to a piece of card stock. Some drywall tape was painted with Sand Acrylic Paint and a Small Talk Sticker (Tim Holtz) was inked with Antique Linen Distress Ink (Tim Holtz).

To assemble the canvas, I layered each circle on dimensional foam, and then added the butterfly to the top circle along with some thread. Each embellishment strip was added next and finally I removed the backs from some brads and added them to the drywall tape.

I hope you will join us. The challenge runs until 11:55 pm EDT, Tuesday, August 18th. One randomly chosen winner wilkl receive a gift certificate to shop at The Funkie Junkie Boutique and the Design Team will choose their 4 top picks with the overall winner receiving an opportunity to be a Guest Designer at a future date.

Dina Wakley Media Mediums - White Gesso MDM41689
Dina Wakley Heavy Body Paint - Aloe - 1oz Bottle
Dina Wakley Heavy Body Acrylic Paint - Sand - 1oz Bottle
Dina Wakley Media Acrylic Paint - Umber, 1 oz Bottle
Stampers Anonymous Tim Holtz Layering Stencils - Bubble THS002
Stampers Anonymous Tim Holtz Layering Stencils - Burlap THS007
Tim Holtz Distress Texture Paste 3oz Crackle TDA71303
Seth Apter Izink Pigment - Burnt Orange 80640
Seth Apter Izink Pigment - Roast Chestnut 80638
Ranger Tim Holtz Distress Oxide Pad - Walnut Stain
Ranger Tim Holtz Distress Ink Pad - Antique Linen TIM19497
Dina Wakley Media Scribble Sticks MDA54733
Dina Wakley Media Scribble Sticks 2
Tim Holtz Idea-ology French Design Tape
Tim Holtz Sizzix Bigz Die - Tattered Butterfly by Tim Holtz
Scor Tape Tim Holtz Small Talk Idea-ology Stickers
Making Memories Brads
Gutterman Black Thread
Drywall Tape
Sizzix Circles Framelits Die Set
Handmade Cracks Stencil

Saturday, February 22, 2020

Saturday Showcase - AALL & Create


I am presenting the Saturday Showcase at The Funkie Junkie Boutique Blog this week.  I have decided to showcase one of the AALL & Create stamps that will be arriving in the shop soon.  To find out how I made this canvas, just click HERE and you will be taken to the blog for all the details.

Wednesday, February 19, 2020

Little Angel


It is time for the new challenge at The Funkie Junkie Boutique Blog and Suzz who is our hostess for this one is calling it Leap Into the Odd.  Here is how she describes this fun theme:

2020 is a leap year which means we will have an additional day in February ending on an odd number of days. The definition of odd is "different from what is usual or expected; strange." My challenge to you is to create something odd or unusual. Also you must tell us what is odd or unusual in your project when you share it with us!

When I first started to think about what I might create I was a little stymied but then the idea for this collage popped into my head.  Most often when I see an angel or fairy depicted, they are females so I thought it would be fun to make an angel out of this little boy.  Given that he is all dressed up, I am betting that he is really a little devil in disguise.

I was having so much fun creating that I forgot to take any process photos so stick with me and I will walk you through it.

I started by preparing the 8" x 8" deep stretched canvas itself. First I used a Harlequin stencil (Tim Holtz) with some texture paste (Ranger) to add texture in random areas on both the front and sides. Then I covered the whole canvas with White Gesso (Dina Wakley).

The canvas was then covered with Sand Acrylic Paint (Dina Wakley) and then some watered down Peacock Acrylic Paint (Dina Wakley) was brushed and sponged on randomly.  Finally some water was added to some Gathered Twigs Distress Oxide on my kraft sheet and the canvas was pounced onto the beads that formed to give the appearance of splatters.

Next I started to assemble the collage elements, which are a mixture of fibers, papers from the Dapper paper pad (Tim Holtz) and Idea-ology items.  The lace and cheesecloth have been dyed with Vintage Photo Distress Ink (Tim Holtz).  Text paper from Dapper was inked with Gathered Twigs DI while the old book paper was inked with Vintage Photo and Cracked Pistachio DI.  The ruler is paper from the Dapper pad and has not been altered.

The paper doll (Tim Holtz) was inked with Vintage Photo DI and his Transparent Wings (Tim Holtz) were inked from the back with a combination of Aqua, Mushroom and Copper Mixative Alcohol Ink (Tim Holtz).  I used Vintage Photo DI to ink both the Chit Chat Sticker and the Quote Chip (Tim Holtz).

I dyed some tea bag paper with some Gathered Twigs and Vintage Photo DI and then used Coffee Archival Ink (Ranger) and the stamp from a set called Border Lines (Seth Apter) to create the strip on the right of the collage.

Finally I added a Trinket Pin (Tim Holtz), a rusted piece of hardware and a button (from The Funkie Junkie Boutique but used with the back side showing).

So there you have my little angel collage.  I hope you will think about something odd and join us for the challenge.  It runs until 11:55 pm EST on Tuesday, March 3rd.  One randomly chosen entry will receive a gift certificate to go shopping at The Funkie Junkie Boutique and with all the new products coming in, that would be a nice thing to have.  The Design Team will choose their top four picks and the overall winner will receive an opportunity to be a Guest Designer with us at a future date.

Supplies list:

Dina Wakley Media Mediums - White Gesso MDM41689
Ranger Texture Paste Opaque Matte INK44444
Stampers Anonymous Tim Holtz Layering Stencils - Harlequin THS016
Dina Wakley Acrylic Paints - Sand, Peacock
Tim Holtz Distress Inks - Vintage Photo, Gathered Twigs and Cracked Pistachio DI, Gathered Twigs DO
Tim Holtz Alcohol Ink -Aqua, Mushroom, Copper Mixative and Blending Solution
Ranger Archival Ink Pad - Coffee AIP31451
Tim Holtz Idea-ology Chitchat Stickers TH92998
Carved Coconut Shell Buttons - 5/8"
Scor Tape
8" x 8" Deep Stretched Canvas
Tea Bag Paper
Old Book Paper
Burlap
Lace
Cheesecloth
Tim Holtz Idea-ology - Dapper Paper Pad, Trinket Pin, Quote Chip, Transparent Wings
Seth Apter Border Lines Rubber Stamp Set

Wednesday, November 6, 2019

Leaf Collage


It is time for the next challenge at The Funkie Junkie Boutique Blog.  Ginny, our hostess for this one calls it 'Fabulous Fall' and describes it like this:

It's the wonderful season where the leaves are changing and the air is crisp and our thoughts turn to pumpkin spice everything. For this challenge create a Fall inspired project.

I don't want to be a downer but by this time of year at my house all the gorgeous fall colours are over and we are left with mostly bare branches and whatever colour we have is dull yellow and carpets the ground - my poor husband is struggling to get all the leaves bagged up and out of here because they won't compost fast enough to avoid a soggy mess.  The air is certainly crisp, which is way better than hot and humid but sadly we have more rainy days than sunny ones.  As the temperatures continue dropping that rain is going to turn into the dreaded snow.  The stores are already packed with Christmas decorations and that wonderful aroma of pumpkin spice is being replaced by cinnamon pine cones - a lovely aroma too but makes me want to scream NOOOOOOOO since it is too soon.

So given the current state of affairs in my neck of the woods, I have decided to make a leaf collage in more neutral tones.

I began by adding some rough texture to a stretched canvas with Texture Paste (Ranger) and a palette knife.  Then I covered everything with some White Gesso (Dina Wakley) and once that was dry followed it with some watered down Sand Acrylic Paint (Dina Wakley).


Next I prepared the various elements that I wanted to layer on the canvas.  Some Copper Metallic Kraftstock (Tim Holtz) was die cut with the Garden Green (Tim Holtz) die and another piece was embossed with a Honeycomb Embossing Folder (Tim Holtz).


A piece of corrugated cardboard was painted with some Ancient Acrylic Paint (Dina Wakley and a couple pieces of paper from the Old Lace pad (Stamperia) were torn and the edges inked with Vintage Photo Distress Ink (Tim Holtz).


Some tea bag paper was dyed with Vintage Photo, Gathered Twigs and Walnut Stain DI (Tim Holtz).


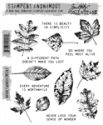
For the focal point I used Jet Black Archival Ink to stamp a leaf from the Leaf Prints set (Tim Holtz) on a piece of torn old book paper, inked the edges with Vintage Phot DI and then coated it with three layers of Vintage Beeswax Baked Texture (Seth Apter).

To complete the collage layers a bit of copper wire was threaded through a black button from my stash.  I added some crochet ribbons, a piece of the faux leather I made for the last challenge and a Big Chat sticker (Tim Holtz) that was inked with Vintage Photo DI.

I hope you will join us for the challenge.  One random winner will receive a gift certificate to shop at The Funkie Junkie Boutique and the Design Team will choose their top picks with the overall pick receiving an opportunity to join us as a Guest Designer at a future date.

Supplies list with links to The Funkie Junkie Boutique:

Leaf Prints Stamp Set (Tim Holtz)
Ranger Texture Paste Opaque Matte INK44444
Dina Wakley Media Mediums - White Gesso MDM41689
White Corrugated Cardboard - 15 Sheets
Stamperia - Old Lace 12x12 Paper Pack SBBL32
Ranger Archival Ink Pad - Jet Black AIP31468
VersaMark Watermark Ink Stamp Pad
Ranger Tim Holtz Distress Ink Pad - Vintage Photo TIM19527
Ranger Tim Holtz Distress Ink Pad - Walnut Stain TIM19534
Ranger Tim Holtz Distress Ink Pad - Gathered Twigs TIM32823
Seth Apter Baked Texture - Vintage Beeswax 17g
May Arts 5/8 Inch Crochet Ribbon - Black
May Arts Ivory Mesh Ribbon - 1.5"
Tim Holtz Idea-ology 8 x 8 Metallic 2 Kraft Stock - Rose Gold & Copper TH93780
Sizzix Thinlits Die Set 9PK - Garden Greens by Tim Holtz 661206
Tim Holtz Idea-ology Big Chat Stickers TH93192
Dina Wakley Media Acrylic Paint - Ancient, 1oz Bottle
Dina Wakley Heavy Body Acrylic Paint - Sand - 1oz Bottle
Ranger Inkssentials Mini Ink Blending Tool - With 4 Blending Foams IBT40965
Scor-Pal Scor-Tape 1/4" x 27 Yards
Bubble and Honeycomb Set Texture Fade (Tim Holtz)
Old Book Page
Black Button
Copper Wire
Tea Bag Paper

Wednesday, August 21, 2019

Denim Collage


Today, I am sharing a new "just for fun" project.  I made this denim collage with all sorts of scraps and bits from both my sewing and craft stash.

Items such as muslin, burlap, lace, calico, canvas, beads, buttons and fibres along with a few metals have been stitched or glued onto the denim squares.  The squares were then mounted on a 12" x 12" stretched canvas that has some texture from Molding Paste (Golden) through a Harlequin stencil (TCW) and a tiny dots border stencil that was cut by my husband.  The canvas also has a light wash of watered-down Khaki Acrylic Paint (Craftsmart).

This was not difficult to do and it certainly was lots of fun.  Now off to play with something else.

Sunday, June 30, 2019

Inspired by Seth Apter


I love the work of Seth Apter, a fabulous artist from New York and when he offered an online workshop through Stencil Girl I was quick to sign up.  I have been collecting the supplies for the project he demonstrates in the workshop but until I have everything on hand, I decided to tackle a background using things from my stash but following his instructions.  This is my first attempt and I thought I would turn it into a butterfly canvas.

Since I was doing this just for fun, I didn't take any process photos but will try to describe what I did - hope I remember since I did this a couple months ago.

I started by covering a 6" square canvas board with black gesso and then added a variety of marks with acrylic paints through stencils.  Splashes of colour were added with Gelatos but the board was so rough, I found it didn't blend out as it would have on a smooth card or paper surface.  Seth's Patina Oxide Baked Texture embossing powder was added in random spots by using an embossing pen to make something for the powder to adhere to.  Some Aquamarine gilding wax was also rubbed here and there.


Next I created a couple frames for my butterfly by die cutting two elements from Seth's Drip Dry die set.  They were thickly coated with black gesso and then rubbed with some purple gilding wax.  The butterfly is a Tim Holtz die cut and I painted it with some metallic paints and then used a fine Micron pen to draw in the lines before I added it to the canvas.


The body of the butterfly is a turn screw from an old computer that I wrapped with embroidery floss, wire and a torn strip of fabric.  This wrapping technique is something Seth demonstrated on a craft segment on YouTube.

I haven't entered any challenges for a while so I thought for a change I might enter these ones:

Creative Artiste Challenge #50 - Anything Mixed Media Goes
More Mixed Media Challenge - Anything Goes + Optional Colour Purple

Wednesday, May 8, 2019

Burlap and Lace


It is time for the next challenge at Frilly and Funkie.  Jenny is our hostess for this one, she calls it I Love It Because ... and describes it this way:

How often do you create something just for you that makes your heart sing? Doesn't it feel great when you do! My challenge to you is to make a vintage or shabby chic piece of art, be it a journal page, a tag, a card, a home decor project etc, that fills you with happiness and makes you smile - don't forget to tell us why you love it so much.

So for this challenge I have made a canvas and I love it because it is a little bit frilly, a little bit funkie, a little bit vintage, a little bit shabby, a little bit mixed media, a little bit country and a little bit rock and roll.  OK forget the last two because I am not a fan of country and it sure isn't rock and roll.


For my canvas substrate I used a piece of mat board that I found hiding in my craft room when I made a halfhearted attempt to purge.  I used Collage Medium (Tim Holtz) to cover it with a piece of lace fabric from my stash.  When it was dry I painted it with some khaki paint but it was way too dark for my liking so I dry brushed White Gesso (Dina Wakely) over it but didn't get carried away trying to cover the khaki paint completely.


Next I cut a piece of corrugated cardboard and ripped the top layer off around the edges.  Using a palette knife I randomly scraped Texture Paste (Ranger) over the exposed corrugations.  When it was dry I adhered it to the lace canvas. I will link to the corrugated section at The Funkie Junkie Boutique because you don't need to rip off the top layer with the kind carried in the shop - I only had one piece of the light left in my stash and wanted the tradition brown colour so this time I grabbed a box and chopped it up.

Four different panels of patterned paper were cut from the Old Lace paper collection (Stamperia) and distressed.  Strips of lace were added to the back of the largest panel and then all the panels were mounted on top of the cardboard panel using fun foam (Dollarama) for dimension.  I fussy cut the dress from the paper pad, added a tiny Latte Adhesive Pearl (Kaisercraft) and then mounted it on top of the panels.

The burlap flowers came next.  The top one is some wired burlap ribbon from my Funkie Junkie Boutique stash.  I pulled one of the wires to ruffle it and then tied it off in the centre.  Once I had the shape I cut the out edge away to allow it to fray and then added a pearl brad to the centre.


The large loopy flower was made by cutting a length of burlap and pulling all the centre threads out along the length making sure to leave at least 3/8" on each side.  One edge was glued to the other edge and then it was rolled along the glued edge, gluing along the way.  Once it dried I spread the loops out to form the flower and sliced off as much off the bottom as I safely could to make it lie flat.  A button was added to the centre.

The bottom flower was made by spreading school glue over and piece of burlap and letting it dry.  Then it was die cut using the Shabby Posies die (Tammy Tutterow), shaped and layered.  Another pearl brad was added to the centre.

I made a loopy bow from the burlap threads I pulled to make the middle flower and added it to the left side and then topped it with a loopy seam binding bow.  To finish it off I added a few buttons to one corner and a filigree piece to the opposite corner.

I hope you will join us for this challenge and create something you love and let us know why you love it.

Links to products The Funkie Junkie Boutique:

Corrugated Cardboard
Stamperia - Old Lace 12x12 Paper Pack
Dina Wakley Media Mediums - White Gesso MDM41689
Ranger Texture Paste Opaque Matte INK44444
Venise Lace Trim - 5/8 inch
White Jute Mesh (Burlap)
Antiqued Bronze Corner Filigree Metal Pieces - Set of 4
Rayon Seam Binding
KAISERCRAFT Pearls - Self Adhesive - Latte
Ranger Tim Holtz Distress Collage Medium Matte TDA47933
Tim Holtz Tonic Studios Paper Distresser 370E

Thursday, December 6, 2018

Santa Canvas


It is time for the December challenge at Stamps and Stencils.  This will also be the final challenge as Sue has decided to close the challenge blog.  It has been a fabulous journey and I want to thank Sue for the opportunity to serve on her team.  Sue is responsible for kick starting my love of mixed media when she hosted me for a day of creating together on two separate occasions when I was visiting England.  She will tell you that on the first get-together, I didn't even know what distress ink was.  Now I have lots of supplies and my husband is quick to call her an enabler and I am quick to call her a cherished and very talented friend.

Thanks to some weird weather patterns here, I have been struggling with headaches so I made this canvas and completely forgot to take any photos as I went along - headache, brain fog or old age?

Here is how to put it together:

1.  Coat an 8"x8" deep edge stretched canvas with White Gesso (Liquitex).
2.  Paint with Calico Red Acrylic Paint (Folk Art)
3.  Using Jet Black Archival Ink (Ranger), stamp onto torn pieces of tissue paper with a Sheet Music Stamp (Kaisercraft)
4.  Glue tissue paper pieces randomly over canvas front and sides with Mod Podge
5.  Mix Calico Red paint with some Glazing Medium (Liquitex) and repaint the canvas
6.  Add some stenciling with Translucent Embossing Paste (Wendy Vecchi) and a Poinsettia mini stencil (Tim Holtz)
7.  Randomly spray with Tarnished Brass Distress Spray Stain (Tim Holtz) - wipe off any that lands on the clear poinsettias
8.  Randomly sponge on some white acrylic paint (DecoArt) - wipe off any that lands on the clear poinsettias
9. Stamp the Santa head from Retro Christmas (IndigoBlu) using Versamark (Tsukineko) and emboss with Gold embossing powder (recollections and then fussy cut
10.  Die cut a circle (Sizzix) from card stock and paint with Calico Red Acrylic Paint.
11.  Emboss circle with Starry Night embossing folder (Sizzix) and rub with Classic Gold wax paste (Connoisseur Studios)
12.  Distress edges of the circle and outline with a gold pen (Sakura)
13.  Die cut a number of poinsettia petals (Marianne Creatables)
14.  Paint with Champagne Gold Metallic Acrylic Paint (DecoArt)
15.  Shape the petals, layer and add seed beads for the centres using Glossy Accents (Ranger)
16.  Cut "greenery" using Holiday Greens die (Tim Holtz) and rub with some Classic Gold wax paste

To assemble:

1.  Mount the circle with dimensional foam
2.  Add the Santa head to the circle with dimensional foam
3.  Add the poinsettias and "greenery" with Soft Gel Medium (Golden)

You have until 20:00 UK time on January 2nd to share a creation with us so I hope you will.

Thursday, November 8, 2018

Inspiration Post at Stamps and Stencils


I am sharing an inspiration post today at Stamps and Stencils.  To see how I made this bright heart, pop on over to Stamps and Stencils.

Thursday, November 1, 2018

Bonfire Night


It is time for the new challenge at Stamps and Stencils.  Toni who is our hostess for this one calls it Remember, Remember, the 5th of November and here is how she describes it:

I've got a 'bonfire night' challenge for you this month. As a child, I used to love bonfire night. My dad would come home from work with a box of fireworks and packets of sparklers for us and we couldn't wait to get outside and enjoy the show! I'd love to see your art works based on fire and fireworks. Think bursts of colour. Let rip with the colour sprays, glitter, and paints. Let's have a bit of fun and brighten up these dark days with COLOUR ! Just remember it must be mixed media and include stamps or stencils or even both.

Bonfire night is a celebration only found in the UK and since it doesn't happen here in Canada, I struggled with what to make.  I could have made something bright and colourful that bore no resemblance to the celebration or I could try to be literal.  I decided to be literal and although this is a simple piece, I hope it does justice to the theme.


I started by covering a 6"x6" canvas board with black Gesso (Liquitex) and then dry brushed some Stormy Gray Acrylic Paint (Craftsmart) over it, wiping some back with a baby wipe.


Next I used Miss Moneypenny, Goldfinger and Vodka Martini Metallic Paint (IndigoBlu) through a fireworks stencil (custom made by my husband) to create the bursting fireworks with a gradient of colour.


The next step was to use Crackled Texture Paste (Wendy Vecchi) through a stencil called Whimsical Houses (IndigoBlu) to add the three small houses.


After the houses were dry I placed the stencil back over them and used Gathered Twigs, Frayed Burlap, Pumice Stone, Hickory Smoke, Aged Mahogany and Scattered Straw Distress Ink (Tim Holtz) to give them some colour.

I hope you will join us for this challenge and if you don't live in the UK, just get out your stamps and stencils to show us a colourful creation.

Wednesday, October 24, 2018

Impressive


It is the start of a new challenge at Frilly and Funkie.  This one is called Impress Us and is hosted by the lovely Sara Emily who describes it this way:

Who doesn't want to make a great first impression? For this challenge, we would like you to use your embossing folders or any other way you can make an impression on your vintage or shabby chic project. Go ahead and 'Impress Us' with your creativity!

I decided to make my frilly project with a lot of mixed media this time and here is how it came together:

  • Coat a 6"x6" stretched canvas with White Gesso
  • Cover with Melted Chocolate Acrylic Paint
  • Use an old gift or credit card and randomly scrape some texture paste over the paint layer 
  • Knock back the white with some Vintage Photo Distress Ink
Note:  I originally wanted to knock back the white with some diluted Melted Chocolate paint but discovered that it turns pink when you add water or white paint to it - baby food meat was not the look I was after.

  • Create a leaf texture plate by cutting various leaf shapes with chipboard and the Fall Foliage die and then glue them to another piece of chipboard
  • Run the custom texture plate and some card stock through a die cutting machine using a variety of plates and shims to create an embossed panel
  • Ink the panel with Vintage Photo Distress Ink to bring up the highlights (I could have used a heavier hand so the camera could see what the eye sees in real life)
  • Cut a rectangle out of chipboard and use Versamark with Copper Embossing Powder to cover
  • Repeat this process four more times
  • While the last layer is still hot, ink a leaf stamp from Nature's Wonder with Jet Black Archival Ink and press into the embossing and leave it there until the embossing gets cold before you pull off the stamp
Note:  If the stamp impression looks too dark in spots because of the design, you can rub some copper wax on it to lighten it up as I did.

  • Cut a narrow strip of brown card stock and emboss with a border folder from the set called Love
Note:  This is an old texture fade set but there are other Tim Holtz texture fades at The Funkie Junkie Boutique that would work.

  • Use the smallest flower from the Tattered Florals die and some scraps of patterned paper to cut six petals (I used some Memoranda paper)
  • Shape the petals and ink the edges with Vintage Photo Distress Ink
  • Layer the petals in pairs to create 3 flowers and add adhesive pearls for centres
  • Cut some branches from brown card stock using the Garden Greens die
To assemble:
  • Add a strip of burlap to the canvas and top with the embossed border
  • Ink a little strip of venise lace with some Antique Linen Distress Ink and add to the right side of the embossed border
  • Adhere the embossed leaf panel and then add the leaf impression mounting it on foam dimensionals
  • Add the flowers and branches and then tuck a loopy bow made from burlap string under the top flower

Here is a close-up to show you some of the embossing that is difficult to see on the main photo, especially the leaf panel at the top.

I hope you will join us for this challenge.  It runs until 11:55 pm Eastern time on Tuesday, November 6th so you have lots of time to create. 

The following products used to create this canvas came from The Funkie Junkie Boutique: