

It is time for the next challenge at Frilly and Funkie. Jenny is our hostess and calls this one Haunted Halloween. Here is what she has to say about it:
It's time to get your freak on and go all out for Halloween. We want to see your ghouls and ghosts and things that go bump in the night. It's going to be spooktacular!!!
I don't get all carried away with Halloween, especially now that I live in a neighbourhood where most of the people are like me - retired and old.😃😃 My Grandchildren don't live close by so I don't get them knocking at the door on Halloween but we still buy treats for them to have when they come to visit. Of course whether they get any depends on if my husband doesn't eat them all first. Anyway, despite all that I did create something Halloween themed and even made it frilly. Here is how it is done:

1. Crumple up some tissue, open it back up and glue it to both sides of a large tag.

2. Cover the tissue layer with Black Gesso and allow to dry thoroughly.
3. Coat the Gesso layer with Crackle Medium and allow to dry thoroughly.


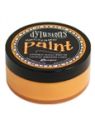
4. Paint over the Crackle Medium layer with Squeezed Orange acrylic paint. Note: The thicker this layer of paint is, the larger the cracks but working the paint too much can produce smaller cracks as you can see on the back side.

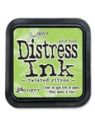
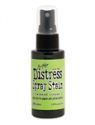
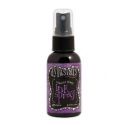
5. Once the top layer of paint is dry spray with Crushed Grape Ink Spray and Twisted Citron Distress Spray Stain.

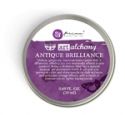
6. Cover some wooden letters with Black Gesso and then rub with Amethyst Magic Antique Brilliance Wax.
7. Cover a wooden skull (cut and engraved by my husband) with Black Gesso and then use a blending foam to add Watering Can Archival Ink.
8. Use a metallic green gel pen to fill in the eyes of the skull.

9. Using the Shabby Posies die, cut petals from scraps of various patterned papers from Graphic 45. Shape the petals, ink with Black Soot Distress Ink, layer and add buttons for centres.
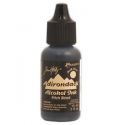
10. Alter a bat charm with Pitch Black Alcohol Ink and add to a bead chain.
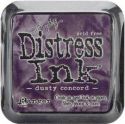
11. Dye some seam binding with Twisted Citron and Dusty Concord Distress Ink.
To assemble:
1. Weave a strip of narrow purple ribbon through some black crochet ribbon and add to tag.
2. Add flowers and tuck some leaves (leftover from another project) underneath.
3. Use Gel Medium to adhere the skull and the letters.
4. Add the seam binding to the top of the tag and then tie with some burlap string.
5. Use jump rings to add the bead chain to the burlap string.
I hope you will join us for this Halloween challenge. You have a chance to be a Guest Designer with us at a future date if the Design Team selects your entry as their Top Pick and one randomly chosen winner will receive a gift certificate to go shopping at The Funkie Junkie Boutique.
The following products used to create this tag came from The Funkie Junkie Boutique:
 |  |  |  |  |  |
 |  |  |  |  |  |
 |  |  |  |  |  |
 |  |  |

Oooh! Love that crackly background with the mult layers of cool colors! Fabulous and spooky Halloween tag!
ReplyDeleteWow! Such great texture and Spooktacular Halloween colors! Love this one Cec!
ReplyDeleteWhat wonderful textures and crackle on your spooky tag Cec!
ReplyDeleteWow! that crackled background is amazing! It's almost a shame to cover it up, but all your embellishments really compliment it so well. Purple and green are my favorite Halloween colors! Well done! I'm sorry you don't get any little visitors at Halloween. We get way more than our share, but we pretty much ask for it with our Halloween display and Elvis playing live a couple doors down. Party on Hawthorne Rd. every year! Sending hugs!
ReplyDeleteLove how you did that crackled background. Faboolous tag!
ReplyDeleteOh my Cec that crackle background is superb!!! I love the spooky colours and your choice of embellishments which add to the whole drama xx
ReplyDelete