

It is time for the new challenge at Frilly and Funkie. Maggi is our hostess for this one, which is called Tis the Season for Gift Giving! Here is what she has to say about it:
It's that time of the year where we're all thinking about the perfect gift for our friends and families! For this challenge, create a vintage or shabby chic gift for a special someone in your life. Your gift could be a simple as a handmade card or tag, or an elaborate piece of home decor. Maybe you like to place your gifts in handmade boxes? Your imagination is the only limit on this challenge!
I thought I might make a new advent calendar for my Grandchildren. The calendar is very large and difficult to photograph because of the metallic frame and background so I apologize in advance for the quality of the pics.
I had an idea to make little boxes to hold treats but then I had to figure out how to make the boxes and that turned out to be easy when I found a free e-book online with patterns for all sorts of boxes. You can download the book HERE and make the calendar as follows:
Use the box pattern found on page 68 called 1-Piece Double-Wall Folding Box. Print that page and then measure the pattern to get an idea of the dimensions. Once you have the dimensions, substitute your own measurements following the pattern as a guideline. In all I made 10 different sized boxes with a single box for a few sizes and multiples for others.

Cut each box from extra heavy cream card stock (Recollections) and then prepare for folding by angling edges as shown and then adding double-sided tape but do not fold yet. Note: The tape for the first folds of the box (four small sections) go on the outside and the tape for the second folds goes on the inside (three longer sections). Ink all the outside edges with Vintage Photo Distress Ink over the fold edges.
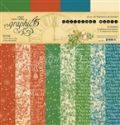
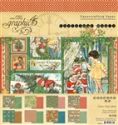
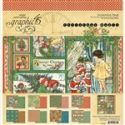
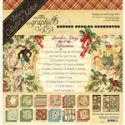
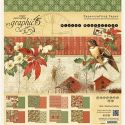
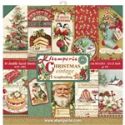
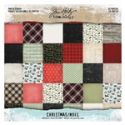
Cut patterned paper for the four outside edges and the top of each box making the paper 1/16" smaller all around and ink with Vintage Photo DI. I wanted to use up some Graphic 45 Christmas papers leftover from last year, which means they won't be available at The Funkie Junkie Boutique but I will link some other Christmas paper options that would be fabulous substitutes.

Adhere the papers and then fold the box and secure the taped portions. Note: I discovered that I needed to further angle the flaps that go inside to close the box by trimming each side of the front flap and the front of each side flap.
Lay the boxes out to decide how you want them to look and then set about to find a frame, which turned out to be easy when I went to a local charity job.
To alter the frame. discard the glass and coat the frame and the chipboard backing with White Gesso before painting it with some metallic paint. Add the chipboard and a layer of cardboard to the frame.
Set the boxes on the frame until happy with the layout and then take a photo so you can remove them to decorate.


Decorate the top of each box with a computer-generated number and embellishments of your choice (I have used lots of things from old stash and from The Funkie Junkie Boutique that I had in the house but the store has lots more great items so check it out). Glue the boxes to the chipboard panel using Gel Medium. Here is a summary for each box:
1. Snowflake from cream card stock mounted on snowflake from kraft card stock and topped with adhesive pearl
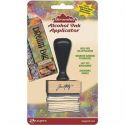
2. Mitten charm altered with Cranberry Alcohol ink and tied with some red soutache braid
3. A couple rows of ric rac
4. A rosette made from patterned paper topped with a red adhesive pearl
5. A pair of adhesive pearl florishes
6. A jingle bell charm tied with burlap string
7. Tiny poinsettia with seed beads for centre and punched pine branches
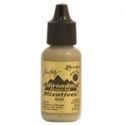
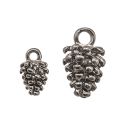
8. A pine cone altered with Gold Mixative Alcohol Ink and tied with gold ribbon
9. A trio of snowflakes topped with adhesive pearls and a red pearl on the number tag
10. Crisscrossed ribbon
11. A trio of star sequins
12. Die cut holly topped with red gems
13. Adhesive pearls scattered on swirls
14. Large reindeer charm altered with Gold Mixative Alcohol Ink
15. Fluted star altered with Gold Mixative Alcohol Ink
16. Washi tape and adhesive pearls
17. Die cut holly topped with red gems
18. Ribbon bow with tiny jingle bell
19. Tree made from candy dots
20. Gold ribbon band topped with die cut snowflake
21. Tiny poinsettia with seed beads for centre and punched pine branches
22. Stocking charm altered with Gold Mixative Alcohol Ink and tied with cream twine
23. Tiny snowflake from kraft card stock topped with adhesive pearl
24. Red sequin wreath topped with satin bow

Decorate the top of the frame with greenery and poinsettias created from red and green card stock and the Holiday Greens die and a poinsettia die. Once the poinsettia layers are assembled, add seed beads to the centres and then attach all the embellishments using Gel Medium.
I love the way this looks but I have concerns about all the boxes staying closed when they are filled and the frame is leaning on the fireplace mantle. If they don't pop open, they actually open quite easily by gently squeezing the sides to reveal a little gap where little fingers can reach in and pull the top open. Since my Grandchildren have to share each box and they are 9 and 12 I will be filling it with things like coins, wrapped hard candies, mini chocolate bars and even two movie passes. I really wanted this to be reusable but if the boxes pop open, they are getting glued shut.
This was a labour of love but it really was time-consuming so I hope they like it - I know they will love the contents of the boxes.
This challenge is open for two weeks and one randomly chosen entrant will receive a gift certificate for The Funkie Junkie Boutique while the Design Team will choose their top picks with the overall pick receiving an invitation to be a Guest Designer at a future date. I hope you will join us.
The following products used to create this advent calendar came from The Funkie Junkie Boutique.
 |  |  |  |  |  |
 |  |  |  |  |  |
 |  |  |  |  |  |
 |  |  |  |  |  |
 |  |  |  |

Oh Cec I'm in total awe of this fantastic perpetual advent calendar! Each of those boxes is a little work of art in itself and I love how you've mounted them so beautifully with the festive foliage arrangement at the top to make them portable. I'm sure your grandkids will love it to bits xx
ReplyDeleteYou had me at little boxes! I love, love, love this project! What a fun and festive way to usher in the holidays! I need to make one of these for the Littles. I love your gorgeous poinsettia swag across the top of the frame. Each little box is a gem, and you are so terribly clever! Thanks for the link, too! Thanksgiving hugs!
ReplyDeleteI saw this and was enthralled! What a wonderful idea and it is so lovely! All those wonderful little boxes with all their own charm and then the gorgeous framed backdrop! This is so cool! Happy Thanksgiving Cec!
ReplyDeletePrecioso
ReplyDeleteSaludos
Cec, you make me wish for grandkids, so I can spoil them rotten like this! What an amazing labor of love that will be enjoyed year after year! Each one of those tiny gift boxes is so sweet and festive, but mounting them on that frame with the gorgeous poinsettia garland makes for one AMAZING gift! Maybe if I start now I could have one done by the time I have grandkids. Thank you for your inspiration and the link, too. Hugs!
ReplyDeleteThis will be so cherished by your grandchildren!! Love that each box is unique and beautiful with bells and charms! Gorgeously done!! Also, loved your idea to alter the metal with alcohol ink as well!
ReplyDelete