
I am back with another project created with digital papers from my friend Elizabeth Robinson. I used collections called Brenda's Garden and The Apiarists Cottage both of which can be found in her Etsy Shop, A Printer's Daughter.
I have created a folio style garden diary, full of places to document what you planted along with growing instructions, tips, etc. This diary however, will not be used by me because I do not have a green thumb.
I have created a slideshow to give you a glimpse into all the pages of the folio.
To create the base of the folio, I cut two pieces of heavy cardstock 7"x10 1/4" and then scored one at 4 3/4" and 9 3/4" on the long side. The second one was scored at 1/2" and 5 1/2" on the long side. All the score lines were folded and burnished and then the 1/2" sections were glued together to create the spine.
Note: All surfaces were covered with the patterned paper cut 1/16" smaller on all sides and inked with Gathered Twigs Distress Ink.
When you first open the folio there are pages with tags. Two pockets were created to hold the tags by cutting cardstock 4 5/8"x 3 1/2" and folding the bottom half inch up. Gussets were added to the sides by folding 1" wide strips of light cardstock in half. The pockets were given a thumb notch with a circle punch. The tags themselves were hand cut and topped with some black organza ribbon.
When you open the tag pages out you will see side pockets created in the same manner as the tag pockets. The cutting measurements for these are 6 7/8"x3 1/2". The side pockets hold folded cards that are blank inside for writing.
The centre two inside pages have pockets made of faux rice paper and hold little booklets with one signature in each. The signatues are made with coffee dyed copy paper. To make the faux rice paper just crumple up tissue paper into a tight ball, open it up and repeat a few times. Lay it out on a large piece of waxed paper (put some newsprint under the waxed paper) or a silicone mat and coat with a 50/50 mixture of pva glue and cold watered down coffee or tea. Allow to dry overnight and then peel off the waxed paper. Trim any dried glue from the edges.
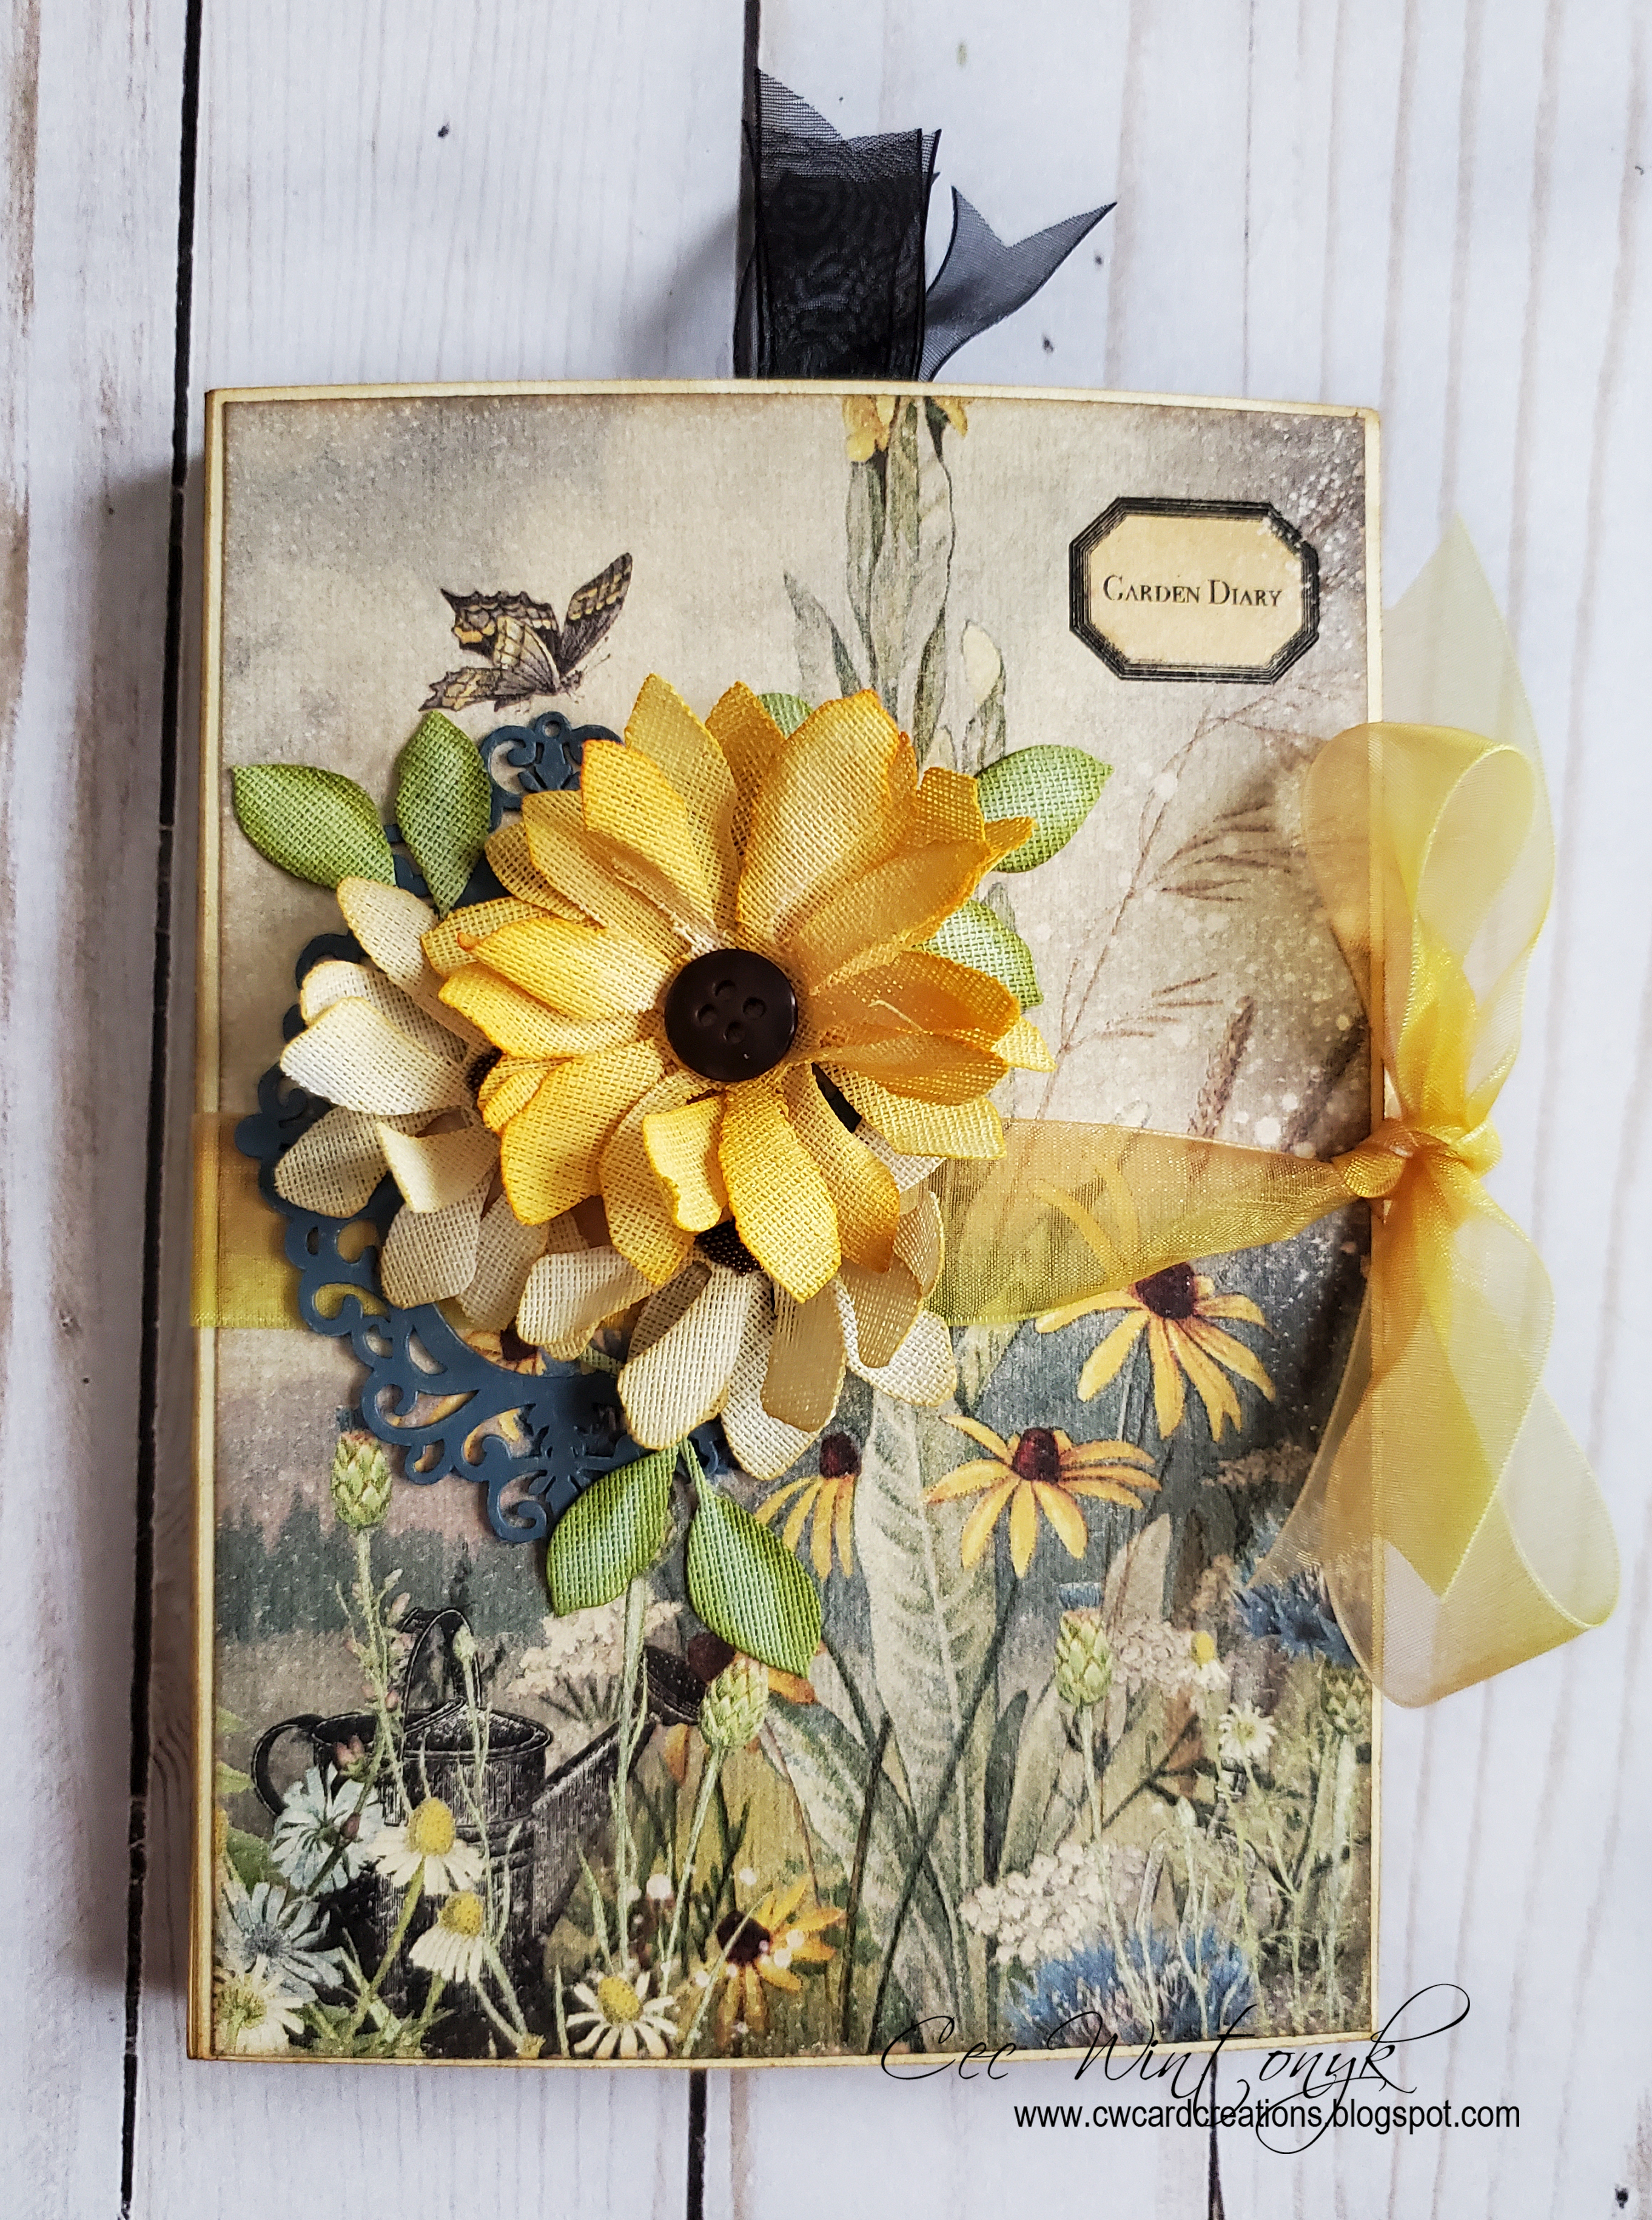
I decorated the front by first adding some organza ribbon to act as a closure. Next came a fancy oval frame that my husband cut on his laser machine from an old cracker box before I painted it with acrylic paint. The flowers were cut from crinoline (woven interfacing) using the Tim Holtz Tattered Florals die and the leaves were cut with the Tim Holtz Garden Greens Thinlets die. The flowers were dyed with Wild Honey and Antique Linen Distress Ink and the leaves were dyed with Peeled Paint Distress Ink before they were shaped and allowed to dry thoroughly. Microbeads were added to the centres of the small flowers and a button was added to the centre of the large flower.
Once again Elizabeth has created some fabulous papers to work with and using them to create this folio was great fun.
No comments:
Post a Comment
I love to hear what you think about my work, so please leave me a comment.
Thanks!
Cec