

It is the start of a new challenge at Frilly and Funkie. This one is called Impress Us and is hosted by the lovely Sara Emily who describes it this way:
Who doesn't want to make a great first impression? For this challenge, we would like you to use your embossing folders or any other way you can make an impression on your vintage or shabby chic project. Go ahead and 'Impress Us' with your creativity!
I decided to make my frilly project with a lot of mixed media this time and here is how it came together:

- Coat a 6"x6" stretched canvas with White Gesso
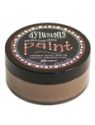
- Cover with Melted Chocolate Acrylic Paint
- Use an old gift or credit card and randomly scrape some texture paste over the paint layer
- Knock back the white with some Vintage Photo Distress Ink

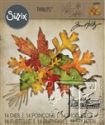
- Create a leaf texture plate by cutting various leaf shapes with chipboard and the Fall Foliage die and then glue them to another piece of chipboard
- Run the custom texture plate and some card stock through a die cutting machine using a variety of plates and shims to create an embossed panel
- Ink the panel with Vintage Photo Distress Ink to bring up the highlights (I could have used a heavier hand so the camera could see what the eye sees in real life)

- Cut a rectangle out of chipboard and use Versamark with Copper Embossing Powder to cover
- Repeat this process four more times
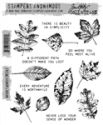
- While the last layer is still hot, ink a leaf stamp from Nature's Wonder with Jet Black Archival Ink and press into the embossing and leave it there until the embossing gets cold before you pull off the stamp

- Cut a narrow strip of brown card stock and emboss with a border folder from the set called Love

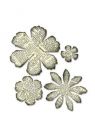
- Use the smallest flower from the Tattered Florals die and some scraps of patterned paper to cut six petals (I used some Memoranda paper)
- Shape the petals and ink the edges with Vintage Photo Distress Ink
- Layer the petals in pairs to create 3 flowers and add adhesive pearls for centres
- Cut some branches from brown card stock using the Garden Greens die
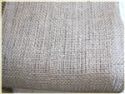
- Add a strip of burlap to the canvas and top with the embossed border
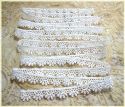
- Ink a little strip of venise lace with some Antique Linen Distress Ink and add to the right side of the embossed border
- Adhere the embossed leaf panel and then add the leaf impression mounting it on foam dimensionals
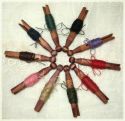
- Add the flowers and branches and then tuck a loopy bow made from burlap string under the top flower

Here is a close-up to show you some of the embossing that is difficult to see on the main photo, especially the leaf panel at the top.
I hope you will join us for this challenge. It runs until 11:55 pm Eastern time on Tuesday, November 6th so you have lots of time to create.
The following products used to create this canvas came from The Funkie Junkie Boutique:
I hope you will join us for this challenge. It runs until 11:55 pm Eastern time on Tuesday, November 6th so you have lots of time to create.
The following products used to create this canvas came from The Funkie Junkie Boutique:
 |  |  |  |  |  |
 |  |  |  |  |  |
 |  |  |  |  |  |
 |  |

Cec, this is amazing, and I am so impressed! What a clever way to customize your own embossing panel! I love that idea, and may just have to borrow it! Your copper panel is just gorgeous and makes a fabulous focal point along with that flower cluster. This is a favorite for me from your talented hands! Hugs!
ReplyDeleteCec, it has been years since I used the deep embossing technique and I thank you most sincerely for bringing that back to mind. This. is. gorgeous! The copper and brown create such a rich feel and the techiques are flawless. The idea of creating your own custom embossing panel is pure genius, and like Sara Emily, I am going to borrow that one from you. Love, love, love!!!! Hugs!
ReplyDeleteLovely canvas! I love how you embossed and used the impressions both front and back to highlight the beautiful effect with copper embossing powder.
ReplyDeleteCec I love it! So glad you used the deep embossing technique to create that beautiful focal point and I love that you created your own bespoke embossing panel! Love it! xx
ReplyDeleteBeautiful creation! So 'Fall'! Ive always loved copper and bronze embossing powder and you've really created a masterpiece with this one, quite an inspiration.
ReplyDelete