Monday, December 26, 2016
My Heart Soars
Here is a sneak peak of some inspiration I have for you today on the IndigoBlu blog. Pop on over and check out my newest canvas.
Tuesday, December 20, 2016
Home and Family
It is time for me to show you my first December IndogoBlu project. I am sharing this post with Gio and Ksenija so pop on over to the IndigoBlu blog and check out what they have created.
To get a better look at any of the photos just click on them to bring up a larger version. It has been snowing and dull and grey where I live so taking photos has been a challenge in itself.
This month the theme for the International Design Team is Count Your Blessings and I think the sentiment on this card is perfect for the theme and works so well with the wonderful stamp.
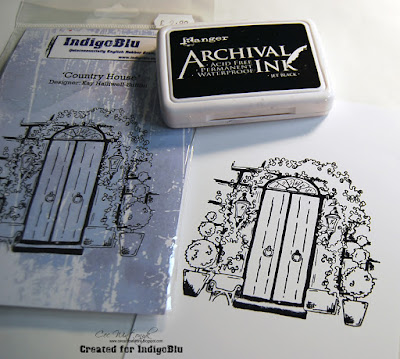
I stamped the Country House image on some white card stock with Jet Black Archival Ink.
Then I used Weathered Wood and Faded Jeans Distress Ink to create a dusky sky. I also decided at the last minute to add some Hickory Smoke Distress Ink.
Next I added some stars with the Stars stencil and Pantry White paint.
The image was coloured with Prismacolors that I blended with Gotrick OMS.
I painted a scrap piece of card stock with Vodka Martini Metallic paint and then punched a number of snowflakes with a Martha Stewart border and corner punch.
I mounted the image panel on some black card stock before I added it to the card blank. Once it was down I decided that the bottom needed help since I had just painted it with the Vodka Martini Metallic paint thinking it might pass for snow but it didn't so I used my finger to swirl some texture paste on the bottom and while it was still wet I sprinkled on some Unicorn Sparkles. Tip: If you find an oops you want to fix and your card is glued together, just use some painter's masking tape to protect the rest of the card.
To finish the card I created the sentiment on the computer and inked the edges with Weathered Wood Distress Ink. I added a bit of snow to the greenery and the lamps with a white gel pen and then adhered my falling snowflakes.
Friday, December 9, 2016
Winner of Giveaway
I am sad that there weren't more people interested in the fabulous stamp set from IndigoBlu that I was giving away. These are high quality red rubber stamps and will be a great addition to the winner's craft stash. I was in England a few weeks ago and had the pleasure of spending a day at the IndigoBlu headquarters and saw the stamps being made - with love and great care.
My husband drew a name for me and congratulations go to MiamiKel. Please email me at cwcardcreations@rogers.com with your snail mail address so I can get the stamps set off to you.
My husband drew a name for me and congratulations go to MiamiKel. Please email me at cwcardcreations@rogers.com with your snail mail address so I can get the stamps set off to you.
Thursday, December 1, 2016
Christmas Star
It is time for a new challenge at Stamps and Stencils and this time Toni, our hostess is calling it Christmas Wishes. She describes it this way:
"Ahhhh! Christmas, like it or lump it, it rolls around every year and seems to arrive faster than ever. If you celebrate Christmas, it's likely that you'll be making cards, gift tags, decorations or even creating your own wrapping paper. My Christmas Wish is to see some of the creative things you make, in order to spread a little seasonal love to your families and friends. My only request is that you include some stamping or stenciling or even both!"
Since the tree was going up this week I decided it was only fitting to make another ornament to hang on it. This one started as a wooden circle made by my husband on the laser cutter (loving that machine).
I gave it a coat of Liquitex Gesso and then crumpled up some tissue paper and glued that on along with some sewing thread. Next I added Golden Light Molding Paste through an IndigoBlu stencil called Stars.
Once everything was dry I covered it in DecoArt Dark Red acrylic paint. Then I laid the stencil back down and stippled on some DecoArt Champagne Gold Metallics acrylic paint. Next I gave it a light coat of Mod Podge to seal it.
The lopsided star was also cut on the laser cutter and the rays are waste from some wooden cross pendants that my husband cut for a craft show at a local church. I cut them up and attached them between two circles that I punched from a cracker box.
The star and rays were coated with Gesso and then I added some Golden Course Pumice Gel to the star before I covered them with more of the Champagne Gold. I attached the rays to the back of the star and added some large seed beads to the star before adhering it to the circle. My adhesive of choice for this sort of thing is IndigoBlu's new Super Thick Slap it On.
I made a bead chain for a hanger with a small loop at the top so I can wire the ornament to the tree as I do with all my ornaments.
Here is a close-up of the finished ornament since it wanted to turn when I was trying to take a photo of it hanging..
I hope you will take a break from all the Christmas planning and grab some time in your craft room to create something for this challenge.
Subscribe to:
Comments (Atom)


