Wednesday, December 9, 2020

Joy


It is time for a new challenge at The Funkie Junkie Boutique Blog. Sara Emily is our hostess and is calling this one Deck The Hals! Here is how she describes it:

For this challenge, we would like to see those vintage or shabby chic Christmas decorations! This is not about Christmas cards this time, but think about tree ornaments, wreathes, vignettes, mantle or table decorations, etc. with a Christmas theme.

I have created a little vignette to add some Christmas cheer to my creative space since I am not doing much in the way of decorating this year. There will only be two of us for Christmas this year and all family gatherings that I usually host in December have been cancelled due to the pandemic. Since nobody is coming to the house I decided not to put a tree up but have hung a couple of wreaths and placed some Santas around so this will add to my minimilistic decor.

I didn't take any process photos because the weather and light were horrible but here is how it came together:

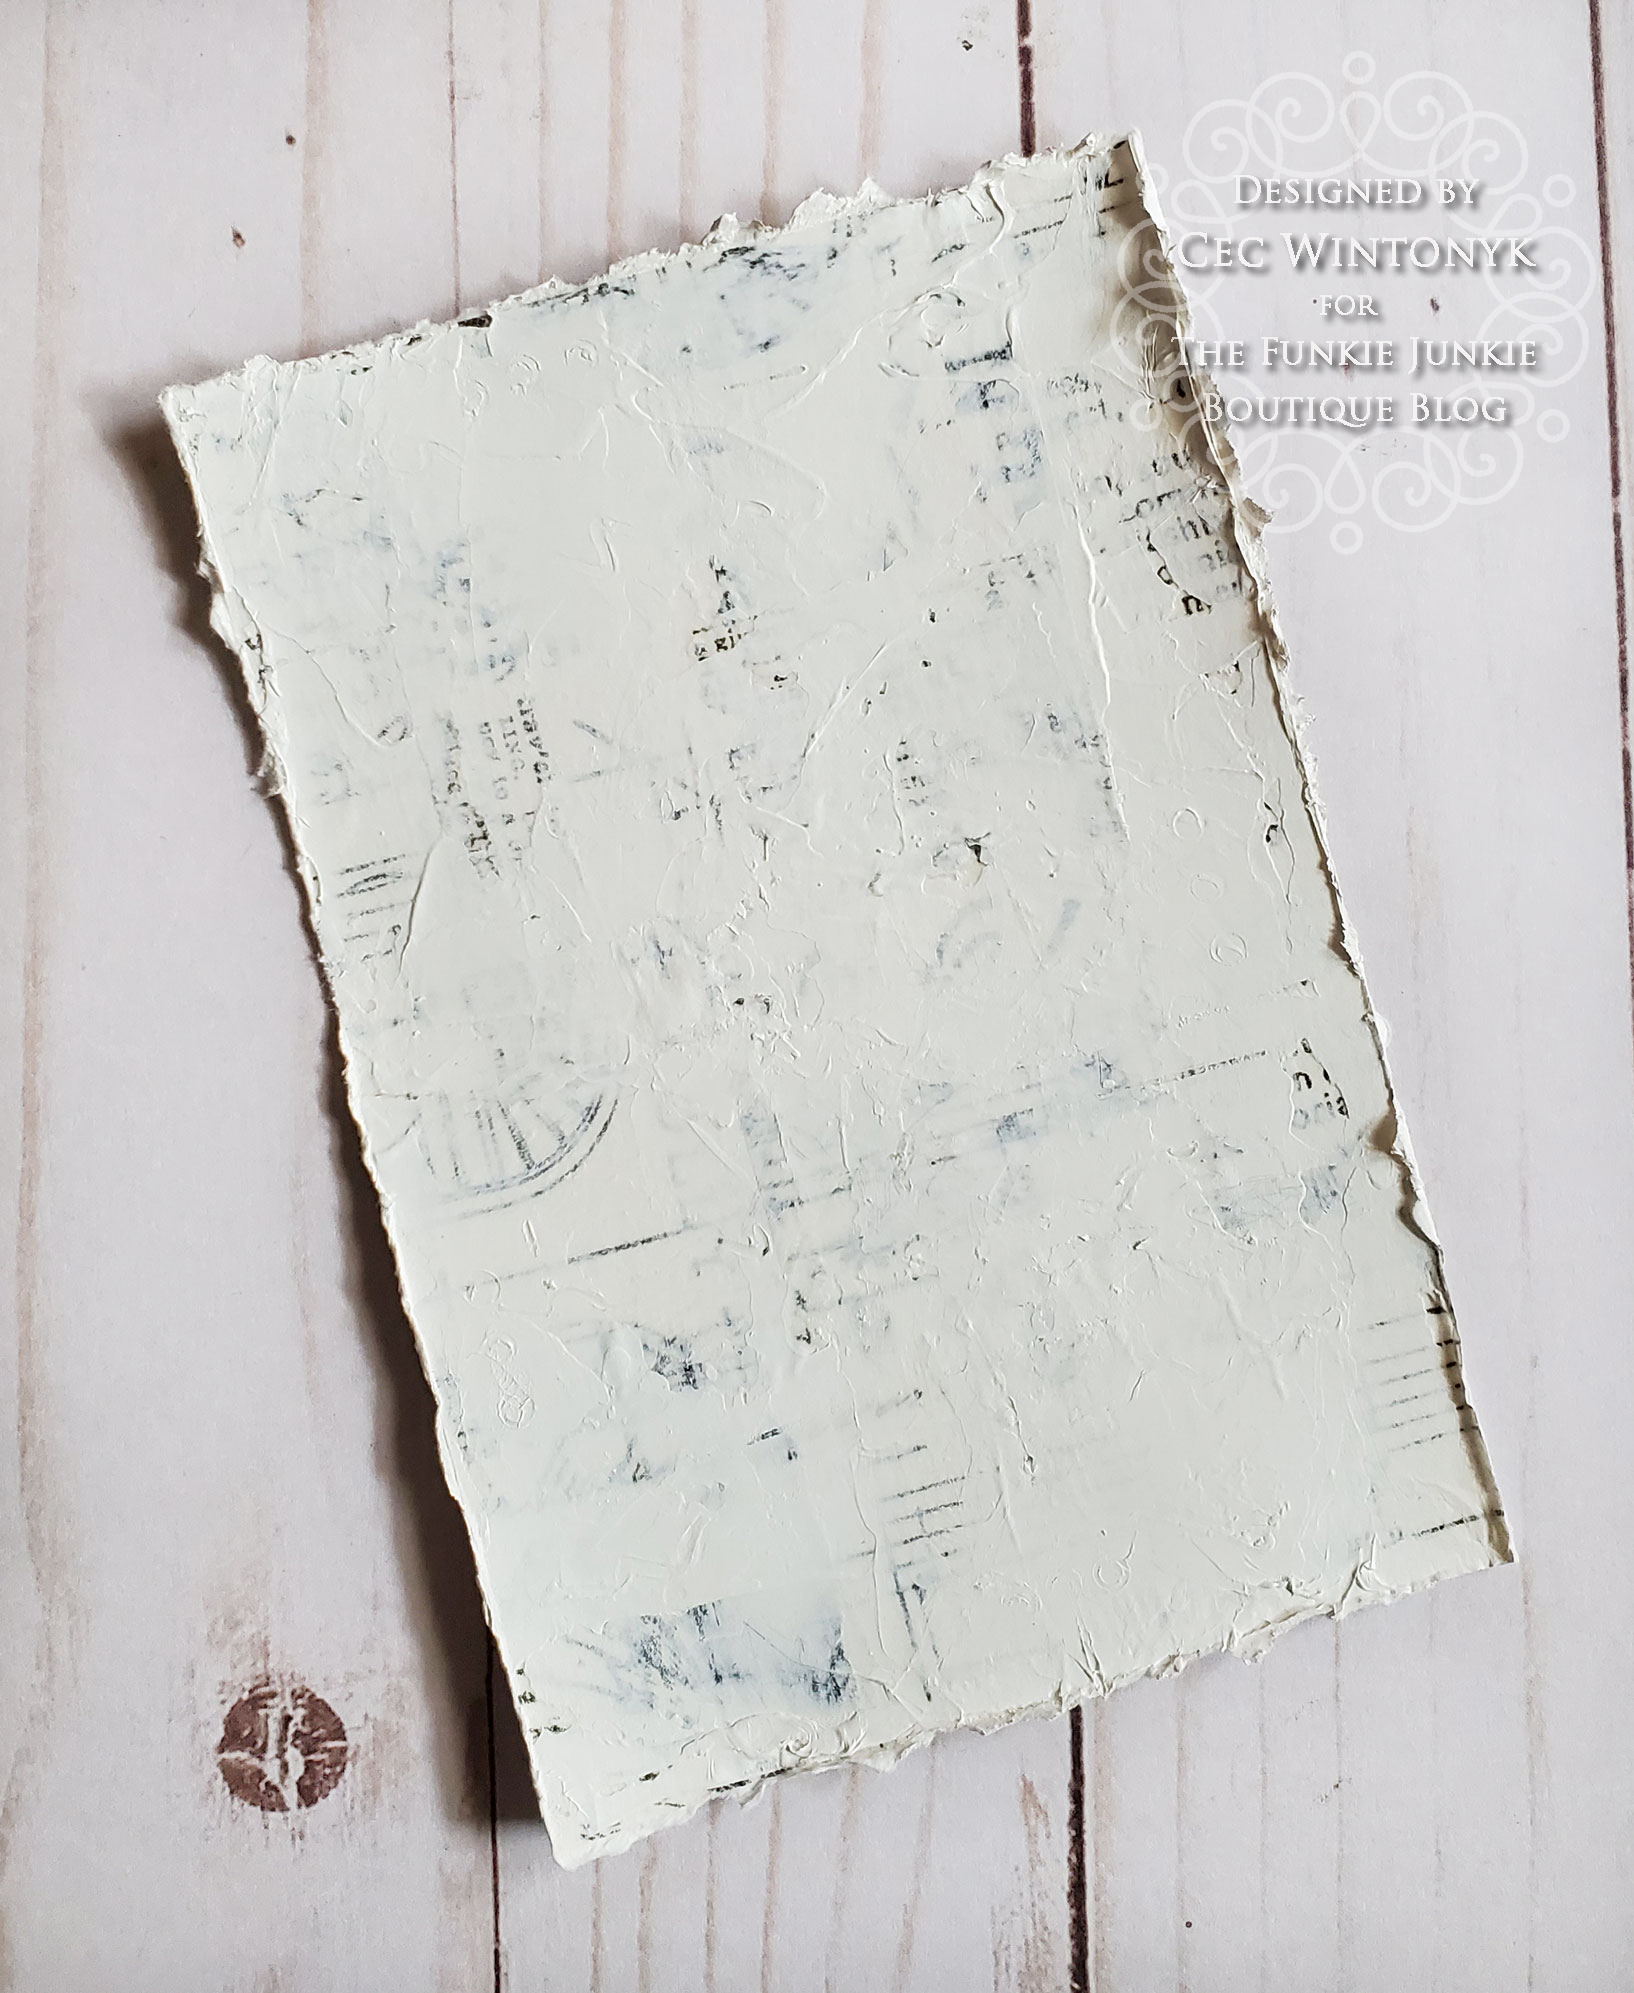
I turned a stretched canvas from the dollar store upside down and covered the wood frame with White Gesso (Dina Wakley) and then followed that with Texture Paste (Ranger) using my palette knife to make it bumpy. I painted the canvas on the inside with a couple coats of a dusky blue paint but you could used Stormy Sky Distress Paint if you have it.

My husband cut me a couple of trees out of chipboard and I painted them with a coat of Evergreen Acrylic Paint (Dina Wakley) first followed by a coat of a dark green paint from my stash but you could use Forest Green Distress Paint. Once the paint was dry I coated the trees with Mod Podge Matte to seal in the paints. More Texture Paste was pounced on the branches to look like it just snowed.

The next step was to cut lots of greenery from scrap pieces of card stock using the Holiday Greens and Festive Greens die sets (Tim Holtz). The greens were inked with some Forest Green Distress Ink (Tim Holtz). I also cut some berries from red card stock using the Festive Greens set.

A couple of Christmas Paper Dolls (Tim Holtz) were colourized with Copic Markers. Next I used scraps of paper leftover from a bunch of Graphic 45 Christmas collections and a die set from Sizzix by Pete Hughes called Santa's Workshop to cut a bunch of Christmas gifts. I also used some Silver Metallic Kraft Stock (Tim Holotz) to cut one of the gifts, some of the bows and the stars.

The Alpha Tiles spelling out the word JOY were covered with a watered down coat of Elephant Acrylic Paint (Dina Wakley), rubbed with Hickory Smoke DI and then edged with Pewter Wax Paste. To assemble the vignette I adhered the trees to the inside canvas along with the stars. Then I added the gifts using dimensional foam to mount them. The greenery was added to the top and bottom and then the tiles and paper dolls were added.

My handy husband made me a little wooden easel to display this vignette so it now has a place of pride on the credenza across from my desk and that means I have a wee bit of Christmas cheer in this room.

I hope you will join us for the challenge. It can be found HERE and runs through 11:55 PM on Tuesday, December 22nd so there is time to make some decor for your home or tree. One random winner will receive a gift certificate to shop at The Funkie Junkie Boutique and the Design Team will choose their top four picks with the overall winner receiving an opportunity to be a Guest Designer at a future date.

Supplies list:

Tim Holtz Idea-ology Paper Dolls Christmas TH94090
Dina Wakley Media Acrylic Paint - Evergreen, 1oz Bottle
Dina Wakley Media Acrylic Paint - Elephant, 1oz Bottle
Ranger Tim Holtz Distress Ink Pad - Forest Moss TIM27133
Ranger Tim Holtz Distress Ink Pad - Hickory Smoke TIM43232
Sizzix Chapter 4 Thinlits Die Set - Santa's Workshop 664495 by Pete Hughes
Scor Tape
Ranger Inkssentials Mini Ink Blending Tool - With 4 Blending Foams IBT40965
Tim Holtz Festive Greens Die Set
Tim Holtz Holiday Greens Die Set
Ranger Texture Paste
Dina Wakley White Gesso
Tim Holtz Metallic Kraft Stock (Silver)
Graphic 45 Christmas Paper Scraps
Copic Markers
Hobbycraft Alpha Tiles
Folk Art Forest Green Acrylic Paint
Dollarama 5"x7" Stretched Canvas
Dimensional Foam
Martha Stewart Glue Pen
Pewter Wax Paste

Wednesday, November 25, 2020

Gratitude Journal


It is time for the new challenge at The Funkie Junkie Boutique Blog. Suzz, our hostess for this one is calling it A Time to be Grateful and here is how she describes it:

Around this time of the year when we start to get into the holidays and the rush of everything it is a good time to reflect on what we are grateful for. My challenge to you is to capture that in your art. Show what you are grateful for in any type of project, it could be a journal page, a card, or anything else that expresses your gratitude. You choose how to show your thankfulness and share it with us.

I thought it might be fun to make a little paper bag Gratitude Journal that is part junk journal and part mini album. I started with a kraft lunch size bag and I find that the ones you get from the grocery store, which is where mine came from, are not always the same so I dug through the pack to find the one that was the best of the lot. There are often little tears on the opening but since this was going to be part junk journal, I was OK with that.

To start, I laid the bag as it came out of the package on my craft mat with the opening on the left and the bottom on the right facing up. I opened the bottom to the right and added Scor tape on each side of the narrow section and folded it back to make a little narrow pocket. Next, I folded the whole bottom to the left to create a flip out. Leaving the flip out folded to the left I folded the bag from the opening all the way to the right to make the top cover.

Next I cut a variety of panels of paper from the Stamperia Oriental Garden collection and added them to the front, inside front, middle, flip out inside, flip out outside and back. Each panel was inked with Gathered Twigs Distress Ink before I glued them down.

Next I made pockets for the inside, middle and both sides of the flip out.


The next step was to make the junk journal that was stitched in the fold of the front cover. To make this I cut and folded a variety of single sided papers with a bit of an Oriental look from my stash and inked the edges. I also inked a few pages of copy paper that I had tea dyed some time ago. I also used my computer to print a piece of tracing paper, folded it in half lengthwise and created a tube. Then I used some deckle scissors to cut each end and then folded the two open ends together. All the pages were stacked to make a signature.

I added a variety of tuck spots throughout the junk journal. The tuck spots have images from free online sources, such as the New York Public Library Digital Collection and I printed them, trimmed them and inked them before they were added. Here are a few examples of the pages and a look at the little tracing paper print that becomes a pocket when the signature is sewn into the bag.


The next step was to stitch the signature into the book in the fold between the inside front cover and the middle. Once it was in I realized it was too thick and would not stay closed so that is why I made the vertical belly band.

I wanted to fill the pockets with some Gratitude quote tags and some tags that could be used as journaling spots. The quote tags are computer generated on cream card stock and then hand cut. The hole at the top was punched and a reinforcement was inked with Gathered Twigs DI and added. The journaling spot tags are cut from cream card stock that I printed with an Oriental text pattern on one side. I added some paint and stenciling to the opposite side along with an embellishment - punched butterfly, die cut red sun and die cut fern. The journaling tags have some red raffia added to the top. I decorated the pockets with items cut from the paper collection as well as computer generated images. The number 8 is a die cut and apparently is a special number in Japanese culture.


I also added a couple of simple rectangular journaling spots to the pocket created in the bag opening when the signture was stitched in. Finally I made a belly band to hold the whole journal shut by cutting a strip of paper from the collection and then adding the computer generated text.

I know that the US is celebrating their Thanksgiving tomorrow and that always is a time to express gratitude but those of us who don't live in the US can also use this time to be grateful as well. With the world in such turmoil and the pandemic raging, I am grateful that I have followed the guidelines and I am safe and well. I am also grateful that so many of you are also safe and well.

I hope you will enter the challenge. It runs through 11:55 pm EST on Tuesday, December 8th. One randomly chosen winner will receive a gift certificate to shop at The Funkie Junkie Boutique and the Design Team will choose their Top Picks with the overall winner receiving an opportunity to be a Guest Designer at a future date.

Supplies list:

Stamperia - Oriental Garden 12x12 Paper Pack SBBL58
Ranger Tim Holtz Distress Ink Pad - Gathered Twigs TIM32823
Ranger Archival Ink Pad - Jet Black AIP31468
Dina Wakley Heavy Body Acrylic Paint - Sand - 1oz Bottle
Scor Tape
Ranger Inkssentials Mini Ink Blending Tool - With 4 Blending Foams IBT40965
Tim Holtz Alphanumeric Die Set #660056
Tim Holtz Garden Green Die Set #661206
EK Success Circle Punch
Wendy Vecchi Dots and Stripes Border Stencil
Geometric Stencil
Martha Stewart Butterfly Punch
Raffia

Wednesday, November 11, 2020

Celebrate


Today is the start of a new challenge at The Funkie Junkie Boutique Blog and I am hosting this one. I decided to call it Celebrate and here is how I describe it:

Your challenge is to create a shabby chic or vintage project to celebrate someone or something special. Since celebrations are happy occasions, your project should be made with lots of happy, bright colours. Keep your dull or neutral colours to a minimum please because as winter approaches we will have lots of that naturally so your bright colours must be predominant.

I have made this card for my Brother's birthday and it better arrive on time since his special day is tomorrow (I mailed it last week because the post office is running behind during the pandemic so keeping fingers crossed). I am glad I had a good excuse because these days it sure is a struggle to find things to celebrate.

I am presenting the next Saturday Showcase (November 14th) over at The Funkie Junkie Boutique Blog and will give you a step by step look at how this came together then so mark your calendar and pop over there on Saturday.

In the meantime I hope you have something to celebrate and can join us for the challenge. It runs until 11:55 pm EST on Tuesday, November 24th. One randomly chosen winner will receive a gift certificate for The Funkie Junkie Boutique and the Design Team will choose their top picks with the overall winner receiving an invitation to be a Guest Designer at a future date.

Wednesday, October 28, 2020

The Heart of the Home


It is time for the next challenge at The Funkie Junkie Boutique Blog. Jenny is hosting this one, calls it Home is Where the Heart is! and describes it this way:

What does 'home' mean to you? Maybe it's a place of safety, somewhere you live with family or friends, or a place that holds treasured memories. It may be somewhere you can be yourself or a place from where you can grow and thrive. Whatever 'home' means to you create a project of your choice that represents it.

When you ask me to think about home, I always gravitate to the kitchen. When we entertain, it is usually by giving a dinner party since I love to cook. When our guests come, they invariably park themselves on the stools at the breakfast bar in the kitchen. When she was younger I spent hours with my Daughter as she learned to cook and that bonding happened with both my Grandchildren once they got old enough to cook with me. To me the kitchen is the heart of the home and it has my heart.

With Christmas approaching I thought it might be fun to make a recipe mini album, which would make a nice little stocking stuffer, especially if I were to fill it with recipes. This time I only added a couple and a bunch of blank recipe cards.

I used heavy black card stock to create my album. For the cover I cut two pieces 7" x 4 1/2" and scored both on the long side of each at 1 1/2". Once the score lines were folded and burnished with a bone folder, the 1 1/2" sections were overlapped and glued together to create the spine.

I also cut two pieces 5 3/4" x 4 1/4" and scored them on the long side at 1/2" to make two pages. The 1/2" sections were folded and burnished with a bone folder and then adhered to the inside of the spine centred from top to bottom with one 1/2" section facing to the left and lining up against the fold of the spine and the other adhered with the 1/2" section facing to the right and lining up against the fold of the spine. This will give you a 1/2" space between each page and the covers.

Next I covered the inside of the cover and all the pages with patterned paper that was cut 1/8" smaller on each side and then inked with Vintage Photo Distress Ink. I used a variety of papers primarily from Graphic 45 Christmas Time along with a few from my stash, including some leftovers from Graphic 45 St. Nicholas.


I created a variety of pockets. For the inside of the front cover I made an angled corner pocket and decorated it with an image from the paper collection and some greenery die cut using Metallic Kraft Stock Jewels and Holiday Greens die set, both from Tim Holtz.

The front of the first page has two pockets. The little narrow one is simple decorated with a strip of mini stamps cut from the St. Nicholas paper collection while the larger pocket has no embellishment.


The angled pocket is filled with some journaling cards that I made with images of retro Christmas cookbook covers. The narrow pocket on the front of the first page has more journaling cards made from kitchen word art while the large pocket contains a few blank recipe cards.


The back of the first page has a horizontal pocket decorated with some ephemera cut from the St. Nicholas paper. I also made a tabbed divider for the pocket. In front of the divider I have included a recipe and behind there are some blank recipe cards.

The front of the second page has been created the same way as the front of the first page but this time I decorated the narrow pocket with a Crochet die cut from Tim Holtz. The narrow pocket has more journaling cards and the larger pockets has more blank recipe cards.


The back of the second page has been created the same way as the back of the first while on the inside back cover I added a simple band decorated with some fussy cut ephemera. The band holds a recipe wallet style folder with blank cards.


To keep the wallet folder closed I used some tiny clear self adhesive Velcro dots. I just inked them with Vintage Photo DI to make them blend in.

All of the pocket fillers were removed temporarily while I decorated the outside. The first step was to add a length of ribbon across the middle of the whole cover, including the spine. Then I covered the front, spine and back with patterned paper and embellished the front.

I started with a piece of word art that I inked and embellished with a couple of metallic punched hearts. I added a row of stamps cut from the Christmas Time paper collection and then used the Holiday Greens and Festive Greens die sets (Tim Holtz) to cut poinsettias and greenery from plain papers from the Graphic 45 paper collections and some Metallic Kraft Stock.

The final step was to make a bead chain for the spine out of beads and a little Christmas Tree charm that I altered with Meadow and Gold Mixative Alcohol Ink (Tim Holtz).

We would like to see how your artist vision of what home means to you. The challenge runs until 11:55 pm EST on Tuesday, November 10th. One randomly chosen winner will receive a gift certificate to shop at The Funkie Junkie Boutique and the Design Team will select their four Top Picks with the overall winner receiving an opportunity to be a Guest Designer at a future date.

Supplies list:

Graphic 45 - Christmas Time - 8x8 Collection 4502118
Sizzix Alternations Tim Holtz Thinlits Dies - Holiday Greens 658759
Sizzix Tim Holtz Thinlits Crochet 664178
Ranger Tim Holtz Distress Ink Pad - Vintage Photo TIM19527
Ranger Adirondack Alcohol Ink - Meadow
Ranger Adirondack Alcohol Ink - Gold Mixative TIM22053
Ranger Tim Holtz Alcohol Blending Solution
Tim Holtz Idea-ology 8 x 8 Metallic Jewels Kraft Stock
Ranger Inkssentials Mini Ink Blending Tool - With 4 Blending Foams IBT40965
Scor Tape
Graphic 45 St. Nicholas Paper Pad 8"x8"
Tim Holtz Festive Greens Thinlets Die Set
The Paper Studio Old World Winter Paper Pad
The Paper Studio Black Gem Flourish
My Stash Plaid Ribbon. Gold Chain, Gold Jump Rings, Gold Head Pins, Beads
Recollections Heavy Card Stock - Black, Cream

Wednesday, October 14, 2020

Halloween Elegance


It is time for the new challenge at The Funkie Junkie Boutique Blog. Sara Emily, who is hosting this one has named it Purple, Orange, Green! Eek! It's Halloween! and describes it this way:

I love Halloween, and I would love to see your vintage or shabby chic Halloween creations, whether it be a card, tag, canvas, or any other make! If Halloween is not your cup of tea, simply use the colors purple, orange and green on your project to play along.

I haven't really been into Halloween since I was a kid although I did attempt to go for it when my daughter was little for her sake. I even went as far as making her costumes with the pirate being the least successful (it was the badly done face make-up) and a Rainbow Bright costume being the most successful despite the hours and hours of sewing.  In the past few years the only effort I made was to buy treats for the few kids that come to the door and to ensure that the treats were something my husband would eat for months following. This year because of the pandemic I am not even going that far. I don't know if they plan to ban traditional Halloween activities but even if they don't I will not be turning the porch light on and will not be opening the door until this virus takes a hike.

So for Sara Emily's challenge I was going to go the three colour route and make something non-Halloween but then I remembered that I had a mask in a box of kid-friendly craft supplies. It was actually a full face mask made of cardboard that I bought very cheaply at Michaels eons ago. I thought it might be fun to alter it and make an elegant mask much like the Venetian Masks.


I started by cutting down the mask to create the shape I wanted - easy to do with a kraft knife. The next step was to cover it roughly with texture paste. Then I convinced my husband to cut two identical spider webs from a cracker box and I glued them together to make them thicker but still bendable.


The spider web was then glued to the mask along with a bunch of paper flowers.


Everything was then given a generous coat of Heavy Black Gesso.


A row of purple sequins was glued around the edge of the mask and the eyes. Then the sequins and all the flowers were rubbed with Amethyst Antique Brilliance Wax Paste. I found a sparkly spider in my stash and covered it with watered-down PVA glue and then sprinkled a mixture of Orange, Green and Purple fine glitter on it before I adhered it to the mask.

The final touches on my mask were to add some black feathers, green gems and purple sheer ribbon ties.

I have no idea what I am going to do with this mask but perhaps when it is safe to do Halloween again, my Granddaughter might like it assuming it is safe before she is too old to go out trick or treating - that isn't a negative thought just a realistic one since she is already 14.

I hope you will share your Halloween or Non-Halloween project with us. The challenge can be found HERE and runs until 11:55 pm EDT on Tuesday, October 27th. One randomly chosen winner will receive a gift certificate to shop at The Funkie Junkie Boutique and the Design Team will choose their top four picks with the overall winner receiving an opportunity to be a guest designer at a future date.

Supplies list:

Ranger Texture Paste Opaque Matte INK44444
Prima Art Alchemy by Finnabair - Antique Brilliance - Amethyst Magic
Prima Art Basics - Heavy Gesso - Black or use Dina Wakley Media Mediums - Black Gesso - 4 oz. Jar MDM41719
Black Feathers
Green Gems
Sheer Purple Ribbon
Purple Sequin String
Cardboard Face Mask

Wednesday, September 30, 2020

Fall Foliage


It is time for the next challenge at The Funkie Junkie Boutique Blog and Jenny is our hostess for this one. She is calling it Fall Foliage and here is how she describes it:

According to most search engines the Fall season has officially begun so we should be starting to see the emergence of all those beautiful Autumnal colours, unless Mother Nature throws us a curve ball! Let's celebrate them anyway by creating a vintage or shabby chic project in traditional Fall shades that includes some form of foliage like leaves, berries and so on

I just received a fabulous sketched flower stamp set by Dina Wakley called Always Flowers and that became my inspiration for this card.


I started by covering a panel of card stock with some Melange Tissue Wrap and then I distressed the edges.


After carefully adding the lovely tissue wrap, I proceeded to cover most of it with some Texture Paste - lol.


I forgot to take photos along the way when I altered the textured panel but the steps I took were:

1. Patted some Wild Honey, Vintage Photo and Gathered Twigs Distress Ink on a kraft sheet, spritzed with water and pounced the panel on the puddles
2. Added some texture paste through a Bubble stencil
3. Used Jet Black Archival ink to stamp some text from the Entomology stamp set


Next I used Jet Black Archival ink to stamp the flower images on watercolor card stock. Each flower was then fussy cut.


To colour the flowers I used a variety of Scribble Sticks - Lime, Evergreen, Olive, Cheddar, Tangerine, Ruby and Lemon - with a watercolour paint brush. The method I use is to spritz a tiny but of water on my kraft sheet and then rub the stick in the water to create a little puddle of colour that I can dip my brush into. If I want a little more concentrated colour I wet the brush and rub it right on the stick.

To assemble the card I distressed a panel of rusty red card stock and added that to my card blank and then topped it with my textured panel. Next I added my flowers, a strip of burlap and a Small Talk sticker inked with Vintage Photo DI. Finally I added a loopy bow created from Burlap String.

This bright card will likely be heading to my Niece for her birthday, which happens not long after all the bright colours have faded and fall is coming to a close, just when she might need something cheerful in these difficult times.

I hope you will join us for the challenge, which runs until 11:55 pm EDT on Tuesday, October 13th. One randomly chosen winner will receive a gift certificate to shop at The Funkie Junkie Boutique and the Design Team will choose their Top Picks with the overall winner receiving an opportunity to be a Guest Designer with us at a later date.

Supplies list:

Dina Wakley Media Stamp - Always Flowers MDR66224
Stampers Anonymous Tim Holtz Rubber Stamps - Entomology
Ranger Texture Paste Opaque Matte INK44444
Tim Holtz Distress Inks - Vintage Photo, Gathered Twigs, Wild Honey
Ranger Archival Ink Pad - Jet Black AIP31468
Dina Wakley Scribble Sticks
Stampers Anonymous Tim Holtz Layering Stencils - Bubble THS002
Burlap String
Scor Tape
Ranger Inkssentials Mini Ink Blending Tool - With 4 Blending Foams IBT40965
Tim Holtz Melange Tissue Wrap
Tim Holtz Small Talk Idea-ology Stickers

Saturday, September 19, 2020

Saturday Showcase at The Funkie Junkie Boutique Blog

Today I am presenting the Saturday Showcase feature at The Funkie Junkie Boutique Blog and I am focusing on Tim Holtz Speckled Egg.

This is one of the projects I created but to get all the details on how it came together and to see what else I came up with, check out the blog post HERE.

Wednesday, September 16, 2020

Christmas Backgrounds


Today is the beginning of the challenge at The Funkie Junkie Boutique Blog and I am the hostess for this one.  I am calling it Staying in the Background and here is how I describe it:

My challenge to you is to create your own background and use it in a shabby chic or vintage project - no pre-printed patterned paper this time. You can create the background in any number of ways and it can be simple or intricate. Using embossing folders. stencils, dies, stamps, washi tape, paints, inks or a gel press are just a few ideas. Make sure you give a brief description of how you created your background in your post.

I decided to make some more simply decorated Christmas cards for the challenge. All my cards are quite flat intentionally so I can mail them with standard letter mail postage, which is already obscene at $1.07 + 13% tax for a single stamp (they give us a break if we buy a book of 10 - 97 cents each plus 13% tax).


For this first card I used Versamark to randonly stamp snowflakes from an old stamp set over some white card stock. Then I heat embossed the snowflakes with Clear embossing powder. Once the embossing was cool, I inked over the whole panel with Stormy Sky, Tumbled Glass and Faded Jeans Distress Ink. The embossing acted as a resist but to ensure that the snowflakes popped, I took a paper towel and rubbed it over the panel.


I forgot to take a photo of the embellishment process but it was very simple. I cut some branches from some white shimmer card stock using the Holiday Greens die set. I also die cut an oval from Metallic Kraft StockJewels . The sentiment was cut for me by my husband.

To assemble the card I added a panel of the Metallic Kraft Stock to the card blank, then added the background panel followed by the embellishments.


For the next card, I made a painted background. Using one of my ratty brushes I painted crisscrosses on white card stock with Ruby, Evergreen and Ancient Acrylic Paint.


I used scraps of card stock to cut a poinsettia and branches from a die set called Festive Greens. The branches and the poinsettia centre were painted with the Ancient Acrylic Paint.


To assemble the card I added a panel of red card stock to the card blank and then adhered the painted background. Next came a little strip of green card stock that I ran through a dots embossing folder. The sentiment was painted with Ancient Acrylic Paint and added along with the poinsettia and branches.


For the final card I put some Faded Jeans, Tumbled Glass and Stormy Sky Distress Ink on my kraft sheet, added some water and dragged a piece of white card stock through it. Once it was dry I used Faded Jeans Distress Ink and a stars stencil to add some stenciling.


I cut a large snowflake from the shimmer card stock using the Flurry #3 die and split it in half.


To assemble this card I added a panel of dark blue card stock to my card blank and then added the stenciled panel on top. The split snowflake was added to the back of a strip of card stock that I ran through a swirls embossing folder and then the sentiment was painted with white paint mized with Pearlizing Medium and added.

I would love to see your backgrounds so do join us in the challenge, which can be found HERE and runs until 11:55 pm on Tuesday, September 29th. One randomly chosen entrant will win a gift certificate to shop at The Funkie Junkie Boutique and with all the new products arriving, that should be super fun. The Design Team will choose their top picks and the overall winner will receive an opportunity to Guest Design at a future date.

Supplies list:

Tim Holtz Distress Inks - Faded Jeans, Tumbled Glass, Stormy Sky
Tim Holtz Thinlets Dies - Flurry #3, Holiday Greens, Festive Greens
Dina Wakley Acrylic Paints - Ruby, Evergreen, Ancient
Tim Holtz Idea-ology 8 x 8 Metallic Jewels Kraft Stock
Stampers Anonymous Tim Holtz Layering Stencil - Falling Stars THS115
VersaMark Watermark Ink Stamp Pad
Ranger Inkssentials Mini Ink Blending Tool - With 4 Blending Foams IBT40965
Scor Tape
Recollections Clear Embossing Powder
Cuttlebug Embossing Folders - D'Vine Swirls, Swiss Dots
Spellbinders Petite Ovals Large Die Set

Wednesday, September 2, 2020

Bird on a Branch


The new challenge at The Funkie Junkie Boutique Blog starts today and Suzz, our hostess is calling it Birds. Here is how she describes it:

For this Challenge I want you to be inspired by our flying friends. You can take the challenge literally and have images or die cuts of birds on your art, you can be inspired by the words describing birds or even showcase their homes. Make sure to share with us how you were inspired by the birds.

I decided to take the challenge literally and show a bird on my project. I was inspired by a canvas I saw online with a bird and a branch but then went off in my own direction.

I started by covering an 8 x 10" canvas board with White Gesso. I used some Wild Honeysuckle Coral Stardust Ink Spray and some Roast Chestnut IZink Pigment Ink like watercolours by mixing them in small puddles of water on my kraft sheet and then painting them onto the canvas. I did a layer of the Coral first, the the Roast Chestnut and then more Coral. Note: I forgot to take a photo at the end of this step but I am sure you can see the colour below the stenciling.


Next I added some stenciling with a Mini Ledger Stencil and some Coffee Archival Ink. I also used a Criss-Cross stencil I designed myself and my husband cut to add some texture with Textue Paste.


My husband designed and cut the branch with leaves from chipboard for me and I gave it a coat of White Gesso. I used my finger to add some roughness on the wood with texture paste and then painted it with Melted Chocolate Acrylic Paint followed by some Umber Acrylic Paint. The leaves were painted with Aloe Acrylic Paint.

The flowers were punched from a paper collection called Garden Goddess, the edges inked with Gathered Twigs Distress Ink and some tiny dollar store gems were added to the centres.


The little bird is cut from some fine corrugated cardboard that I had in my stash. I have a large stencil of different birds and I just traced him and then cut him out. Next I have him a coat of White Gesso followed by some Sedona Acrylic Paint and then a dry brushing of more Gesso. Once the paint was dry I rubbed some Rose Quartz wax paste over the raised areas and then added a gem for an eye.


The clock was cut from a cracker box by my husband and then I coated it with Umber Acrylic Paint, a sprinkling of playground sand and finally a coat of Mod Podge.


I ran a strip of Rose Gold Metallics Kraft Stock through an embossing folder called Paisley Palooza to create a textured strip for the background. I also die cut a scalloped circle from card stock, ran it through a Bubble embossing folder, inked the edges with Gathered Twigs DI and dry brushed White Gesso onto the highlights. Sorry I forgot to photograph this step - brain turning to mush being home for so long.

I die cut a circle from cracker box material, coated it with White Gesso and then inked it with Dried Marigold Distress Ink. I used the Bubble stencil and some Coffee Archival Ink to add some markings and then covered the circle with some Clear Rock Candy Distress Crackle Paste. The Crackle Paste was really thick (a.k.a. pretty well dead) so it didn't really crack well.


To assemble the canvas, I put the metallic strip down first, followed by the scalloped circle, the clock and the stenciled circle. The branch was added next followed by the bird. Finally I added some iridescent sequins and a little Small Talk sticker that I inked with Gathered Twigs.

I hope you will join us for the challenge, which runs until 11:55 pm EDT on Tuesday, September 15th. One randomly chosen winner will receive a gift certificate to shop at The Funkie Junkie Boutique and the Design Team will choose their Top 4 Picks with the overall winner receiving an opportunity to be a Guest Designer at a future date.

Supplies list:

Dina Wakley Media Mediums - White Gesso MDM41689
Seth Apter Izink Pigment - Roast Chestnut 80638
Dina Wakley Acrylic Paint - Aloe, Umber, Sedona
Dylusions Paints, Melted Chocolate DYP46011
Ranger Archival Ink Pad - Coffee AIP31451
Tim Holtz Distress Ink Pads - Gathered Twigs, Dried Marigold
Stampers Anonymous Tim Holtz Layering Stencils - Bubble THS002
Tim Holtz Idea-ology 8 x 8 Metallic 2 Kraft Stock - Rose Gold & Copper TH93780
Ranger Texture Paste Opaque Matte INK44444
Scor Tape
Ranger Inkssentials Mini Ink Blending Tool - With 4 Blending Foams IBT40965
Tim Holtz Distress Crackle Paint - Clear Rock Candy
Tim Holtz Idea-ology Small Talk Stickers
Graphic 45 Garden Goddess 12" x 12" Paper
Lindy's Wild Honeysuckle Coral Stardust Ink Spray
Treasure Gold Rose Quartz Wax Paste
Mini Ledger & Criss Cross Stencils
Circle and Scalloped Circle Dies
Mini Flower Punch
Micro Gems
Chipboard Branch with Leaves & Chipboard Clock Iridescent Sequins

Wednesday, August 19, 2020

Christmas Gift Card Holders


It is time for the new challenge at The Funkie Junkie Boutique Blog.  Sara Emily is our hostess for this one called It's A Wrap. Here is what she has to say about it:

Whenever I hear this term, I think of something that's finished or completed. But for this challenge, we want you to share your vintage or shabby chic gift wrapping, gift box or bag or perhaps a set of gift tags. Or maybe you might take a different approach and use a wrap die cut or gift packaging on your project -- just be sure to tell us what your 'wrap' is if it's not obvious!

When I saw this challenge I immediately knew that I needed to work on something for Christmas. Since there is zero chance I am going shopping at the mall during a pandemic, I will doing most of the shopping for Christmas online. I have Grandchildren that are at the age where they want to select their own gifts so I decided on gift card holders for this challenge. I normally take them shopping for their birthday, give them a budget and they pick their own presents and along with lunch out that Grandma buys, they walk away very happy. This year they got gift cards purchased online at stores where they like to shop in person but can shop online. It wasn't as much fun for me but it worked and I can see Christmas being much of the same although I do plan to ask their Mother for a shopping list of things I can buy online. I am getting quite proficient at hitting the SUBMIT button since I am buying everything online, including groceries right now.

I made a quartet of very simply decorated but different gift card holders. Since some e-gift cards can be cut into the shape of an normal gift card, a couple of the holders will accommodate that type but when you print from some sites, you have to fold the gift card so two of the holders are made with space to accommodate that type.


For all of the holders I used the Festive Greens and Holiday Greens die sets from Tim Holtz. If they are no longer available in the store I will link to suggested alternatives. Since I am on a mission to use up leftovers and scraps in my stash I also used leftovers from a couple of Graphic 45 Christmas paper pads that were in my stash along with some of the Metallic card stock pads from Tim Holtz.


  • Cut a strip of card stock 4" wide x 8 1/2" long
  • On the long side score at 2 1/2", 2 7/8", 5 7/8" and 6 1/4"
  • Fold all score lines and burnish with bone folder
  • Cut patterned paper to cover the back, front bottom and front top (I cut mine so it was 1/16" smaller on all four sides)
  • Ink edges with Vintage Photo Distress Ink
  • Cut two pieces of card stock 1 3/8" wide x 2 3/8" long for the gussets
  • Score on the short side at 1/2" and 5/8"
  • Fold gussets and burnish with bone folder
  • Adhere to the inside of the front bottom and back with double sided tape
  • Add velcro fasteners or make a belly band to keep holder shut
  • Decorate as desired - I just added a fussy cut element from the paper and a pair of die cut holly leaves with adhesive pearls

For the next one, I was inspired by a little double flip box that I found online HERE. I used the template shown on the blog but did my own measurements and actually messed up when I did the outside so the top isn't quite as flat as it should be. I will explain in the instructions.


  • Cut one piece of card stock 5 5/8" x 4 3/8
  • On the long side score at 1/2", 1", 4 5/8" and 5 1/8"
  • Cut out sections and angle edges as shown on the template
  • Fold to create box bottom
  • Cut one piece of card stock 8 7/8" x 3 1/2"
  • On long side score at 2", 2 1/2", 6 3/8" and 6 7/8" - the centre section needs to be at least 1/4" longer than the box bottom and I only added 1/8"
  • Cut out sections and angle edges as shown on the template
  • Fold to create double flip top
  • Die cut a label for the closure
  • Add magnets to right side of flip top and to back of the label closure
  • Cut patterned paper for both sides of the flip top inside and out as well as the back of the label closure
  • Adhere the box bottom to the inside bottom of the double flip top piece making sure it is centred
  • Decorate as desired - I used the Festive Greens die set and Gold Metallic card stock


  • Cut one piece of card stock 4 1/4" x 5 1/2" for base
  • Cut patterned paper to fit base and ink edges with Vintage Photo DI
  • Cut one piece of card stock 3" x 4 1/2" for a mat and centre over base
  • Cut one piece of card stock 5 1/2" x 4 1/4"
  • On long side score at 2 3/4" and fold like a card
  • Dye a strip of seam binding with Antique Linen DI and attach to outside of folded card to act as a closure
  • Adhere folded card to mat
  • Cut three pieces of patterned paper to fit insides and the front, ink edges and adhere
  • Fussy cut an element from the paper pad and add to inside as pocket
  • Decorate inside and front


  • Cut one piece of patterned paper 3 1/2" x 7 1/4"
  • On long side score at 3 5/8"
  • Cut a thumb notch at one end using a circle punch
  • Fold and adhere with a narrow strip of double sided tape on each side
  • Cut a piece of patterned paper 3 3/4" x 3"
  • On short side score at 1 1/2" and fold
  • Adhere the pocket section to the inside of the top and add Velcro closures
  • Decorate as desired - I used a mixture of die cuts and plain and metallic card stock

I hope you will join us for the challenge. It runs until 11:55 pm EST on Tuesday, September 1st. One randomly chosen winner will receive a gift certificate to shop at The Funkie Junkie Boutique and the Design Team will choose their top four picks with the overall winner receiving an invitation to be a Guest Designer at a future date.

Supplies list:

Sizzix Alternations Tim Holtz Thinlits Dies - Holiday Greens 658759
Sizzix Tim Holtz Thinlits Die Set - Funky Festive Florals 664221
Graphic 45 - Christmas Magic - 8x8" Pad
Tim Holtz Idea-ology 8 x 8 Metallic Kraft Stock
Tim Holtz Idea-ology 8 x 8 Metallic Jewels Kraft Stock
Ranger Tim Holtz Distress Ink Pad - Vintage Photo TIM19527
Ranger Tim Holtz Distress Ink Pad - Antique Linen TIM19497
Ranger Inkssentials Mini Ink Blending Tool - With 4 Blending Foams IBT40965
Scor Tape
Rayon Seam Binding
Graphic 45 St. Nicholas 8"x8" Paper Pad
Tim Holtz Festive Greens Thinlets Die Set